Top 3 Tips to Improve Audio in Premiere Pro
Learning how to edit videos is not only a useful skill in terms of processing your videos but also the ability to make good money on the Internet completing orders for other people, working as a freelancer.
We will go over a few basic aspects of editing and how to interact with background music or sounds effects. We will work in a simple, but at the same time effective video editor Adobe Premiere Pro CC, which in most cases will be quite enough for video editing.
How to add background music to a video
Load the prepared files into the project by double-clicking the left button on the empty space in the project.

Then drag and drop the video onto the timeline for further editing.

Now we need to separate the video from the audio. Select the "Selection" tool on the panel to the left of the scale or press the V key and right-click on the video. In the context menu, select "Unlink".
Now select the audio file with the mouse and press “Delete” on the keyboard. It should be done if you want to replace audio.
If the goal is to add a music file as a background to an existing one, then leave the existing audio and simply add your music file by dragging the mouse.

Sound editing: keeping music out of the way in Premiere Pro

Software developers offer a not very elegant solution since they advise using the volume curve and making the music quieter at these moments. It is clear that this method works at all 110%, however, if, for example, you have a 3-hour video and need to edit it quickly, this solution does not work at all. Therefore, we will show you how to do it much easier, in just a few clicks, using the Sidekick plugin.
So, download the demo or buy the full version for Sidekick Extended version 6. Remember the folder where you downloaded the application.
Download Premier with our application.

The program will scan all plugins and connect the detected ones, including the Sidekick Extended.

Now let's see what we have in this project: video and two audio tracks (voice and music)

If you just combine your voice with the music, it will be almost completely masked by the music, so it's time to use Beatrig.
Open the mixer window:

Open the window in full screen:
Click on the Music icon at the bottom and now we can add effects. Open the Beatrig window.
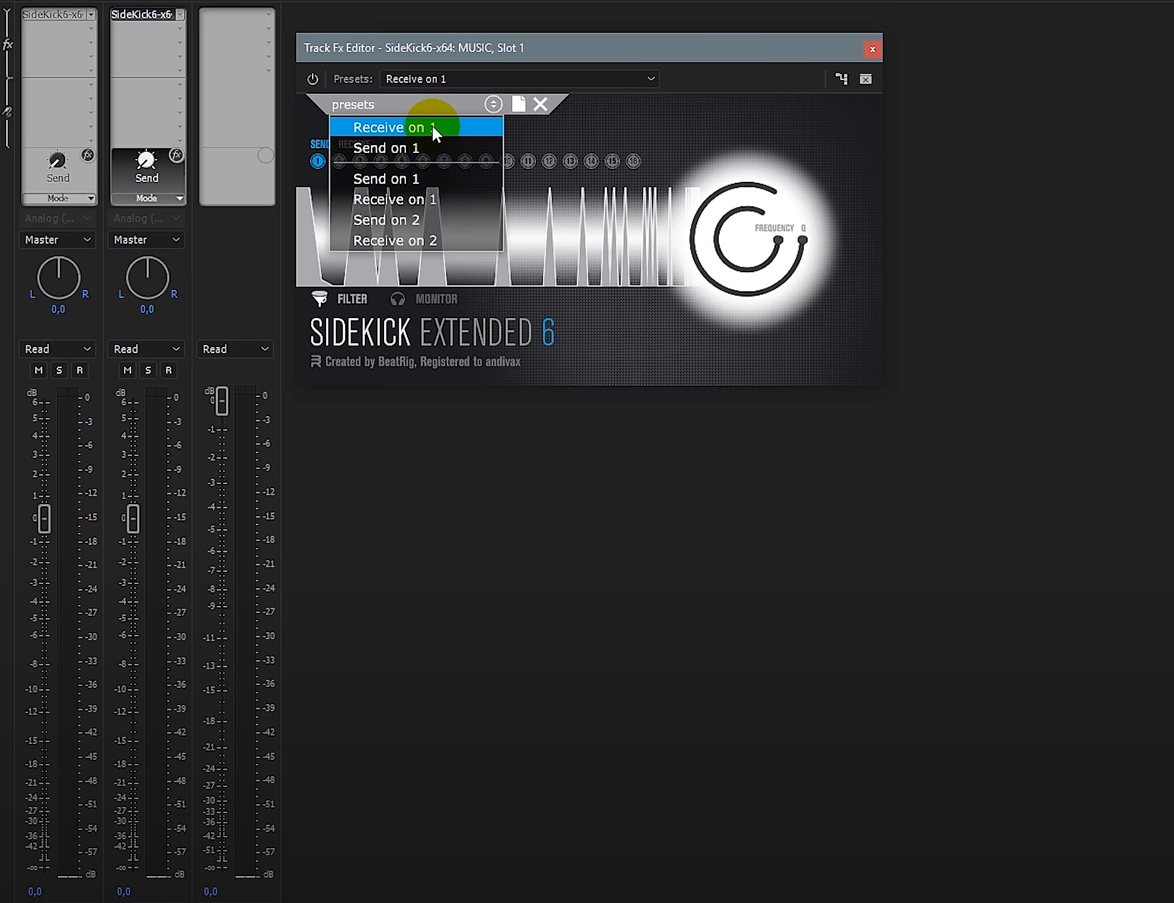
Upload the same plugin to the music channel. We call the menu with presets. We select the very first Receive on 1, which means control of the signal on the first channel.
We adjust the signal control parameter, by how loud the music track will sound as a result.
In our opinion - to summarize - the plugin is convenient and cheap. We hope you can appreciate it.
Sound attenuation and gain setting
And first, add an audio clip to the Timeline panel that needs some work.
Next, in the title of the track on which you have the edited audio clip, click on the Show Keyframes button and select Show Clip Volume.

A graph of the volume level appears on the clip.
As you know, the volume of an audio clip can be changed by simply dragging the volume graph up or down with the Selection tool.

But at this stage, we are interested in the amplification and attenuation of the sound at the ends of the clip. To implement this effect, select the Selection tool. While holding down the Ctrl key, move the cursor over the audio clip volume graph (the plus sign should appear at the cursor), and click. This will set the keyframe.

If the plus sign does not appear when you hover the cursor over the volume graph, it means that your animation is not enabled. To enable it, open the Effect Controls panel, expand the Volume parameter and click on the stopwatch image opposite the Level parameter.

Next, in the Timeline panel, place several keyframes at the beginning and end of the audio clip.

Now using the Selection tool, move the keyframes as in the picture below.

This way, the sound will fade in at the beginning of the clip and fade out at the end.
One could stop at this, but no. I want to show you another way to achieve this effect using the capabilities of Adobe Premier. The method is really very simple and is based on the use of sound transitions.
So, you have an audio clip on the Timeline.

Go to the Effects panel, open the Audio Transitions folder, then open the Crossfade folder and select one of the three transitions (all three transitions are very similar to each other, so you can try each one and choose from Your look is the best).

To apply a transition to a clip, click on it and, without releasing the mouse button, move it to the beginning of the clip, and then to the end of the clip:

Edit the duration of the transitions. To do this, move the Selection tool to the edge of the transition and drag to the side:

Listen to the result. The sound, as in the first case, gradually increases, then plays with a normal volume, and gradually fades out at the end.