With the help of this program, you can perform high-quality processing of sound, vocals, your, or voices by eliminating various noises and other sounds. Adobe Audition provides users with a large set of features and tools to accomplish this task.
How to work with sound, vocals, or voice in Adobe Audition
To start working with any audio recording, you first need to add it to the program. To do this, do the following.
Adding a recording for processing
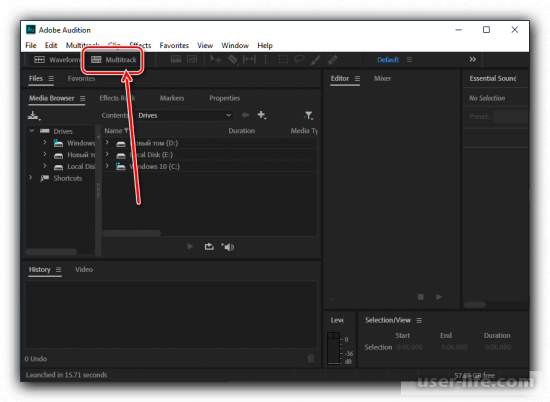
1. Use the Multitrack tab to create a new session.
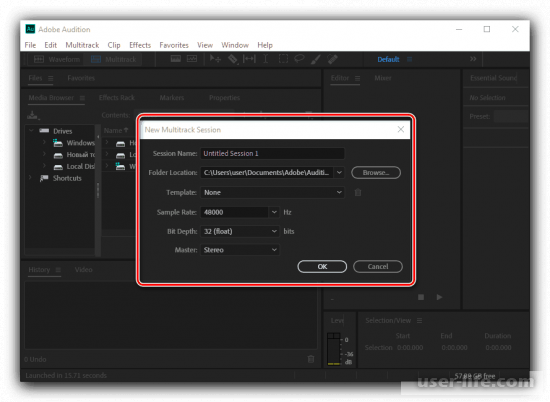
2. In the pop-up window, click "OK" if you don't need any additional settings.
3. Drag and drop the desired song into the program interface by holding down the left mouse button on the shortcut.

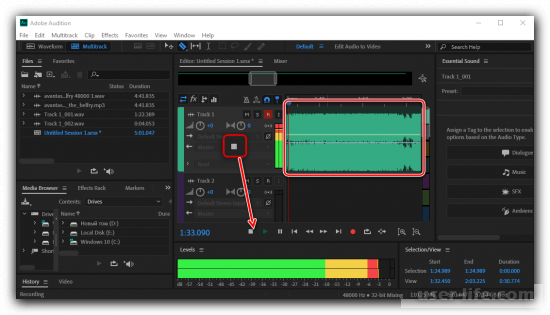
4. Click the red "R" button in the track edit window to create a new track. After that, turn on the recording by left-clicking on the round button. The process of creating a new soundtrack will begin.

5. If necessary, you can move the recording point by first stopping it with the white square button.
Removing extraneous noises
1. Double left-click on the added audio track to open an additional editing window.
Then click the "Effects" item at the top of the window and select "Capture Noise Print" from the "Noise Reduction" drop-down list. This tool is used to remove noise in certain parts of the composition.

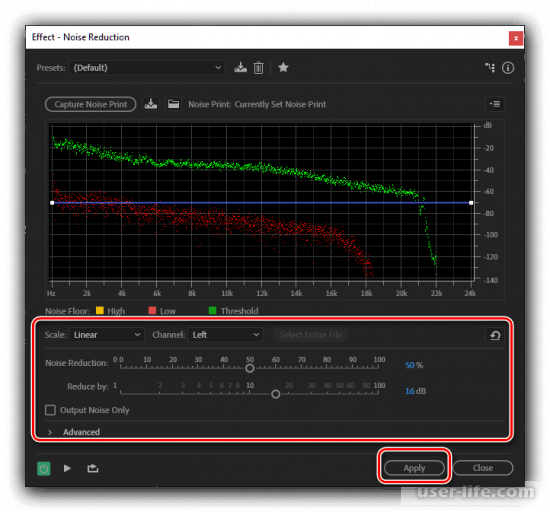
2. To remove noise on the entire track, use the keyboard shortcut Ctrl+A, then go to "Effects" - "Noise Reduction" - "Noise Reduction (process)".
Check our guide on how to improve your Audio in Premiere Pro

3. In the next window that appears there is no need to change the settings, so click "Apply". After that you can check the result and, if necessary, repeat the setting, specifying other parameters.
Smoothing soft and loud tones
Transitions during a sudden change in sound level should be as smooth as possible so as not to spoil the image of the full picture.
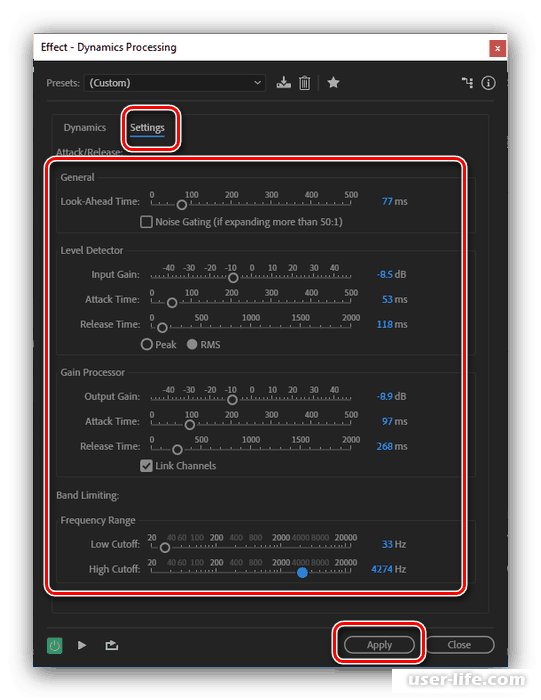
1. Select the entire track with Ctrl+Aperform, then go to "Effects" - "Amplitude and Compression" - "Dynamics Processing".

2. A window with parameters appears.

3. Go to the "Settings" tab, which is responsible for the advanced settings. The screenshot below shows a sample configuration option, but it is not universal for all types of audio recordings.
Processing sharper tones in the voice
A very useful feature is the processing of audio tracks, with which you can highlight certain elements. To perform this, do the following.
1. Select the entire track with the familiar keyboard shortcut, then open "Effects" - "Filter and EQ" - "Graphic Equalizer (30 bands)".
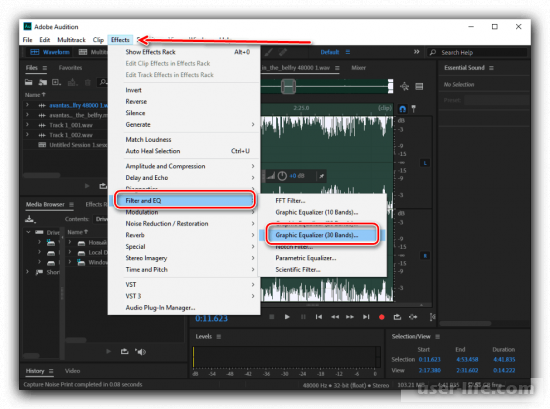
2. Here we get to the equalizer, which allows us to make fine adjustments to the vocals.
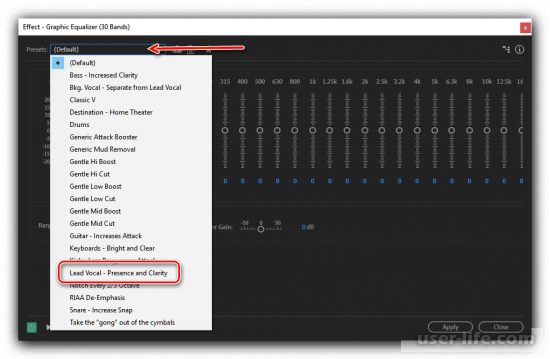
In this case, we are interested in the item "Lead Vocal - Presence and Clarity", which should be selected after opening the list called "Presets".
Increasing recording volume
In any audio editor, you cannot work without the tool for adjusting the recording volume, because in some parts of the track it can come in handy very often.
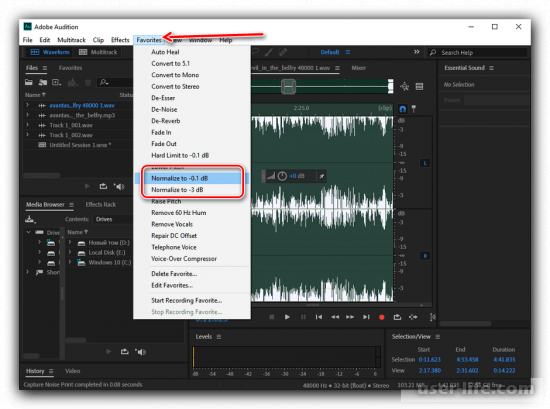
1. To increase the volume to the maximum limit go to "Favorites" - "Normalize to -0,1 dB" or "Normalize to -3 dB".
Available values will vary depending on the characteristics of your track. This is due to the fact that the program itself selects the acceptable volume level for recording without loss of quality.
You can also manually adjust the sound level, disregarding the recommended parameters. This is done with a special button.
Be careful with this instrument, as sound imperfections may occur if used carelessly.

Processing areas with defects
Even after all processing steps, there may still be areas that stand out too much from the rest because the volume level changes unevenly.
In this case, you need to manually find the necessary part and pause the process. After that, select the problematic fragment and correct the sound manually with the special button.

Conclusion
Today we have reviewed the basic steps of sound processing in Adobe Audition. To apply our recommendations, you do not need to download any additional extensions, all the tools are built into the program by default. We hope you found our article helpful.