I may be a visionary if I assume that you are reading this text because you are in search of good quality music. Music, to the rhythm of which the people will involuntarily shake their head or even dance. But music can do much more than making people (and some animals) dance. Music can liven up absolutely static images. Literally — animate. Apple Motion can help with that.
In my previous article, I tried to introduce you to Motion and its capabilities as much as possible (perhaps even too detailed). Now I’ll tell you how to use the behaviors (Apple Motion effects for procedural animation) to change parameters by music and make any image go dance.
The result is such a visualization.
Let's start.
1. Create a project
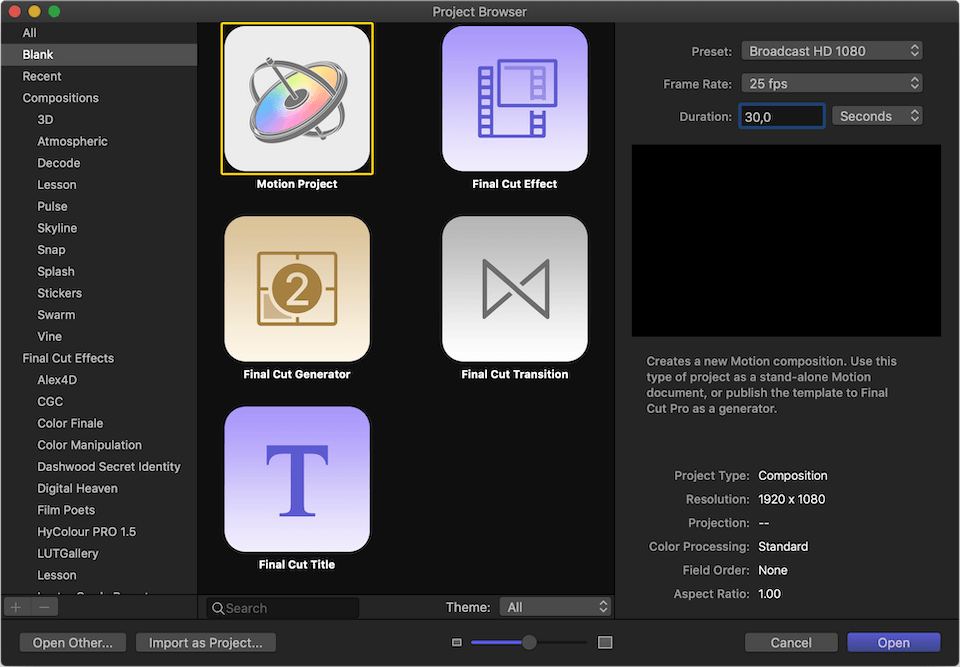
Launch Apple Motion and create a project with the duration of an audio track. If the duration is not accurate, we will fix it after creating the project.
2. Add a Generator layer
Open the Motion Library, select the Generators/Generators category (I understand how ridiculous it sounds), find in the list, and add a generator called <a "nofollow" title="Two Color Ray generator in Motion" href="https://support.apple.com/guide/motion/two-color-ray-generator-motn16404a30/5.4.4/mac/10.14">Two Color ray to the project.
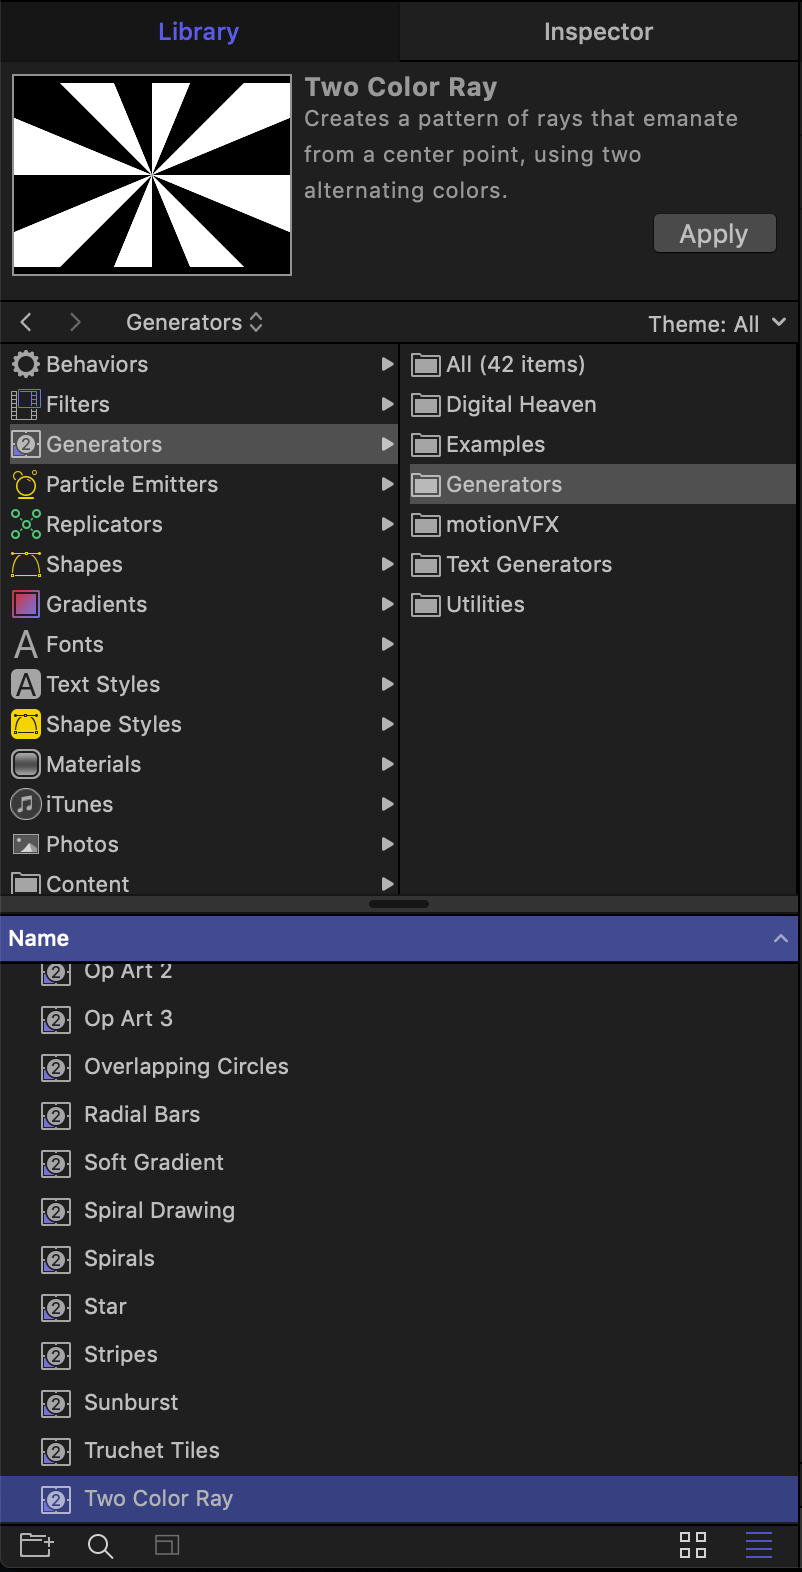
<a "nofollow" href="https://support.apple.com/guide/motion/intro-to-image-generators-motn8ae88750/5.4.4/mac/10.14">Generators are "smart" layers that contain a ton of parameters or are already animated or that can easily be animated with keyframes or parametric behaviors. In this case, we already have sectors of two different colors.
3. Adjust object parameters
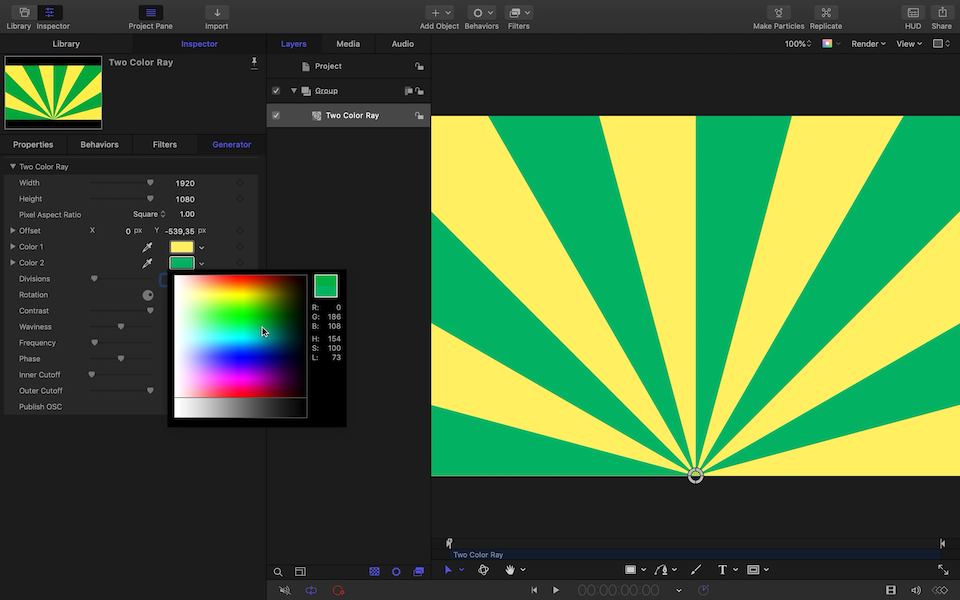
In the Generator object tab find the Y offset and setting so that the rays come from the "horizon", the bottom edge of the project.
You can also do this on the screen by selecting the Adjust item tool.
Choose Colors for the rays, change the number of Divisions, at your discretion.
4. Import vector graphics
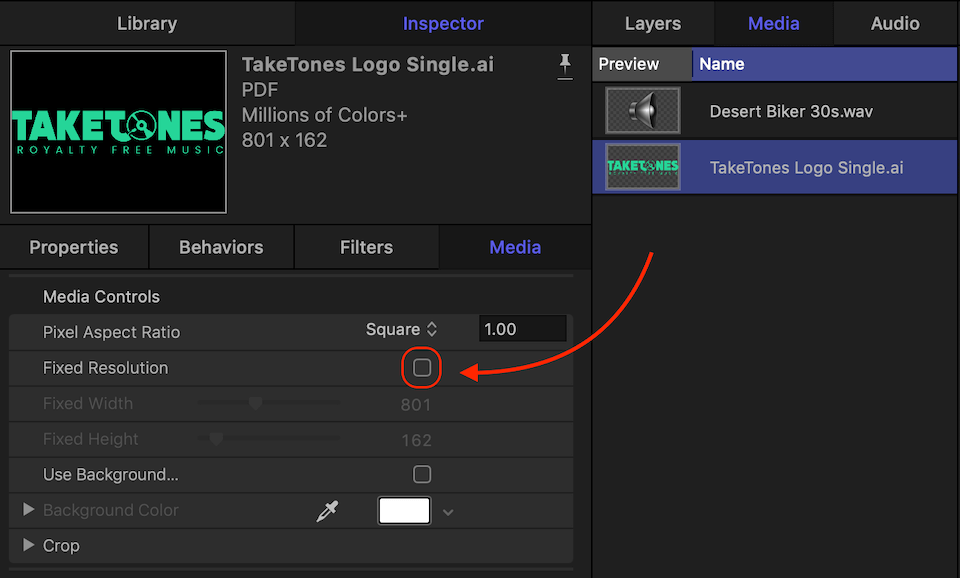
Apple Motion supports importing vector graphics from Adobe Illustrator (*.ai and PDF). An important clarification — so that the vector graphics after import retain their main property (do not lose image quality when scaling up) - do not forget to remove the fixed resolution checkbox in the object tab when you select the imported vector file in the media list.
5. Import Audio
Audio can be imported just like any media. I prefer to do this with the keyboard shortcut ⌘I.
You can follow my example or import as you prefer — from the menu File/import or the Import button on the main toolbar.
Please note that unlike other animation and compositing applications, Motion allows you to play audio immediately after importing, in real-time, without prior rendering or RAM preview.
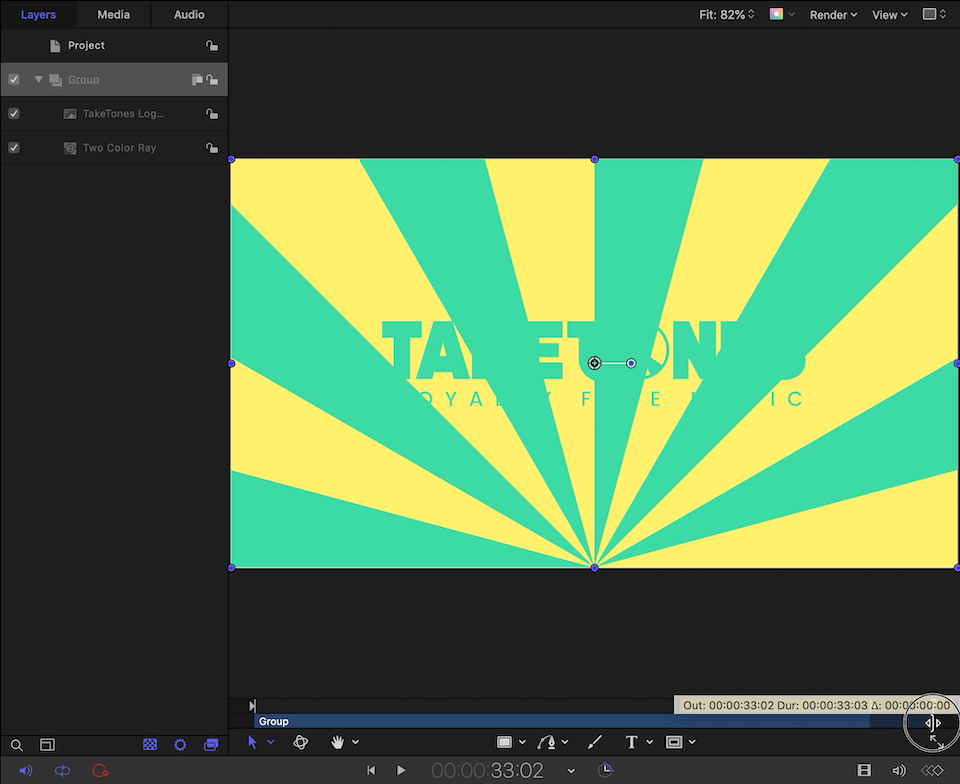
6. Set the correct project duration
Immediately after importing the audio track will be visible on the mini-timeline, but as soon as you select another layer, it will disappear and will not be available in the layers list. For audio tracks in the project tab, there is a separate list, as well as a separate timeline, on which it is convenient to follow the audio waveforms.
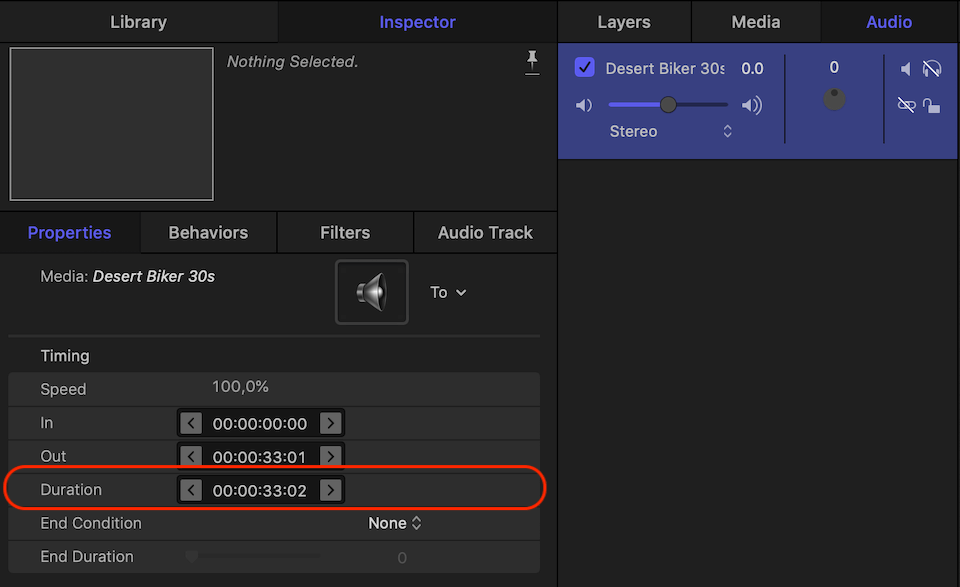
Select the audio track in the audio list or on the audio timeline and in the inspector/timing, find out the exact duration of the audio track.
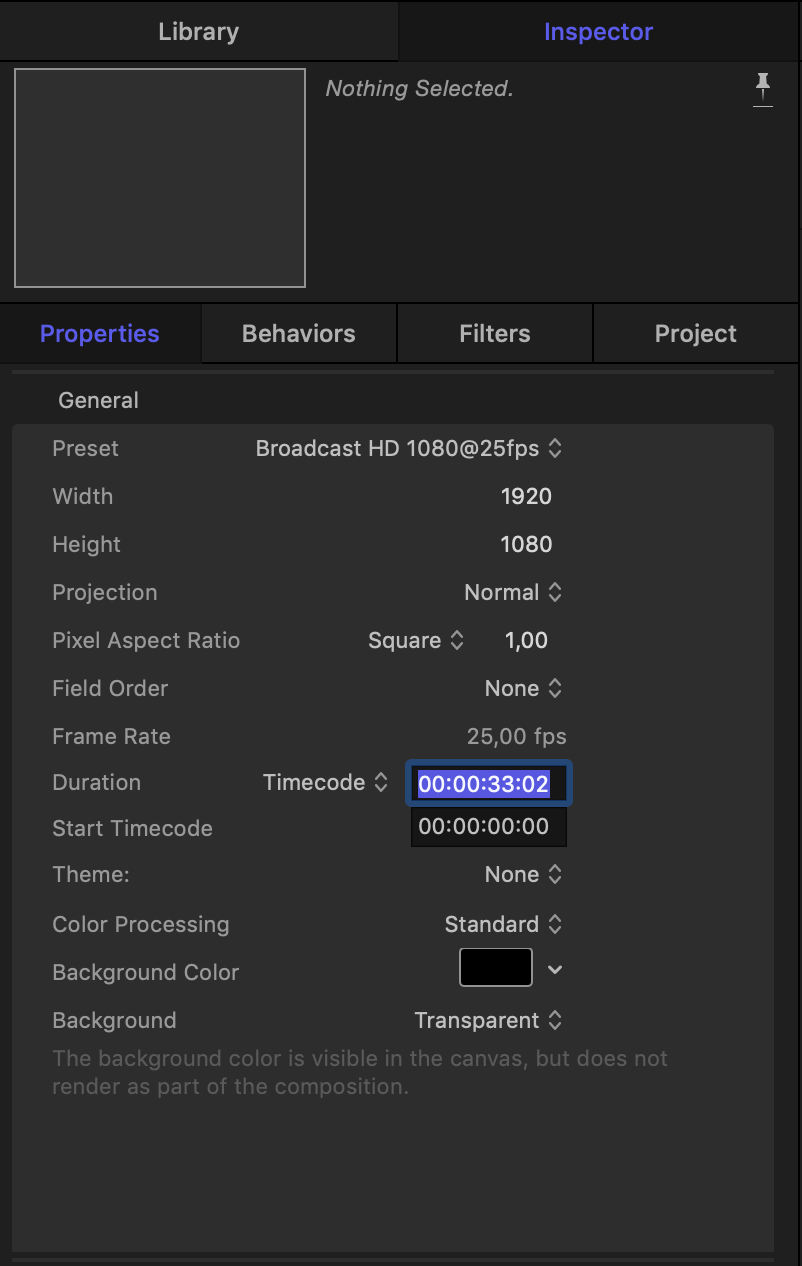
If the duration of the project is different — change the duration of the project so that it is equal to the duration of the track. This can be done either on the timing toolbar or in the inspector, project tab (⌘J).
![]()
7. <a "nofollow" href="https://support.apple.com/guide/motion/trim-objects-in-the-timeline-motn130adedb/mac">Trimming layers
If your project increased the duration after these manipulations — increase the duration of the layers so that they are equal to the duration of the project. Just drag the Out Point or place the playhead on the horses of the project, select the layer and press O.
Also do not forget to reset Play Range — press ⌥X or choose menu Mark/Reset Play Range.
Now everything is ready for the music to show us its magic.
First of all, I want to animate the generator and its parameters Rotation, Waviness, Frequency, and Phase.
8. Add and adjust <a "nofollow" href="https://support.apple.com/guide/motion/audio-parameter-behavior-motn1872e265/5.4.4/mac/10.14">Audio parameter behaviour
Let's start with Waviness. Select the Two Color ray layer and open the object tab.
Then find the Waviness parameter, reveal the Animation menu (or the right click on the parameter), and select Add Parameter Behavior/Audio.
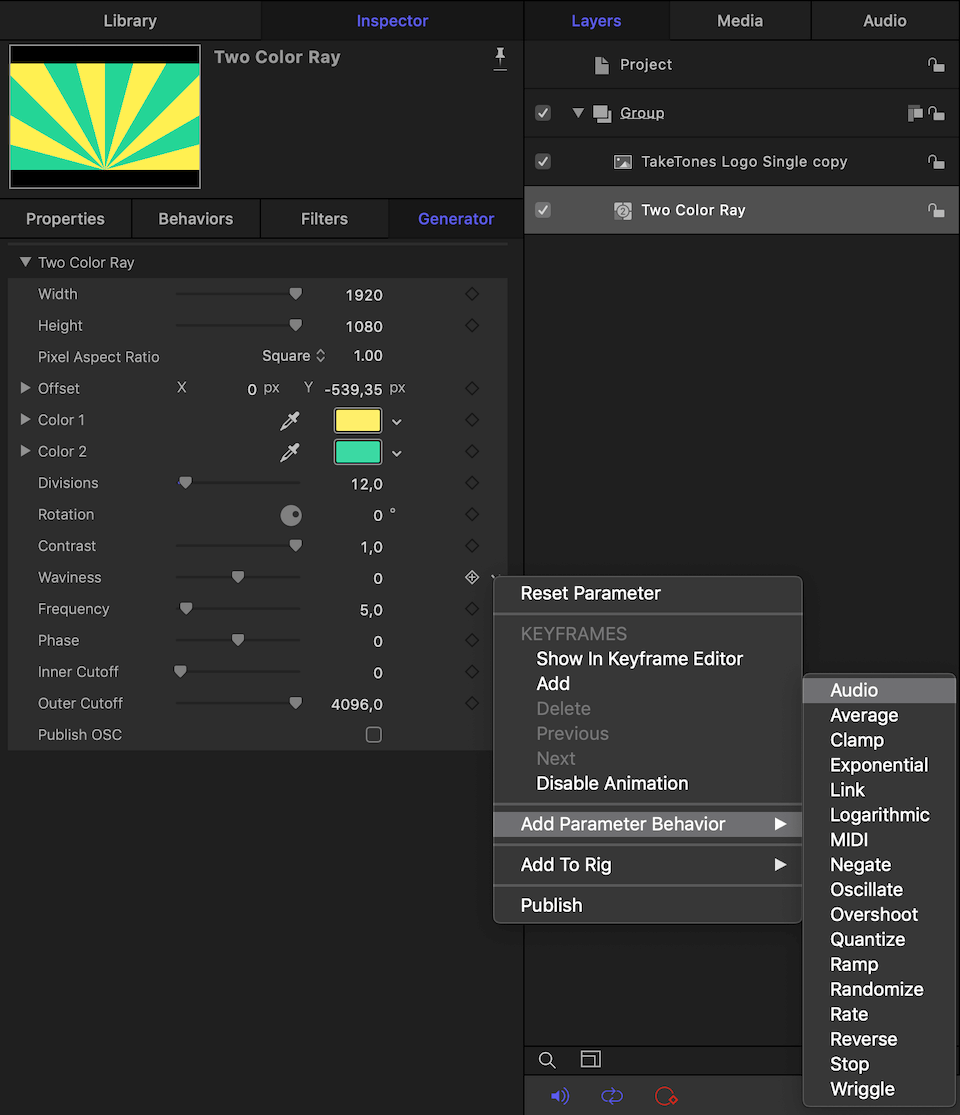
<a "nofollow" href="https://support.apple.com/guide/motion/intro-to-behaviors-motn13748883/mac">Behaviors are one of three Apple Motion effects, along with filters and masks. Using behaviors, you can create animations procedurally, without keyframes.
<a "nofollow" href="https://support.apple.com/guide/motion/intro-to-parameter-behaviors-motn49eb56eb/mac">Parameter behaviors contain a set of functions for changing the parameters of layer properties, an object, and even the effects themselves, including behaviors.
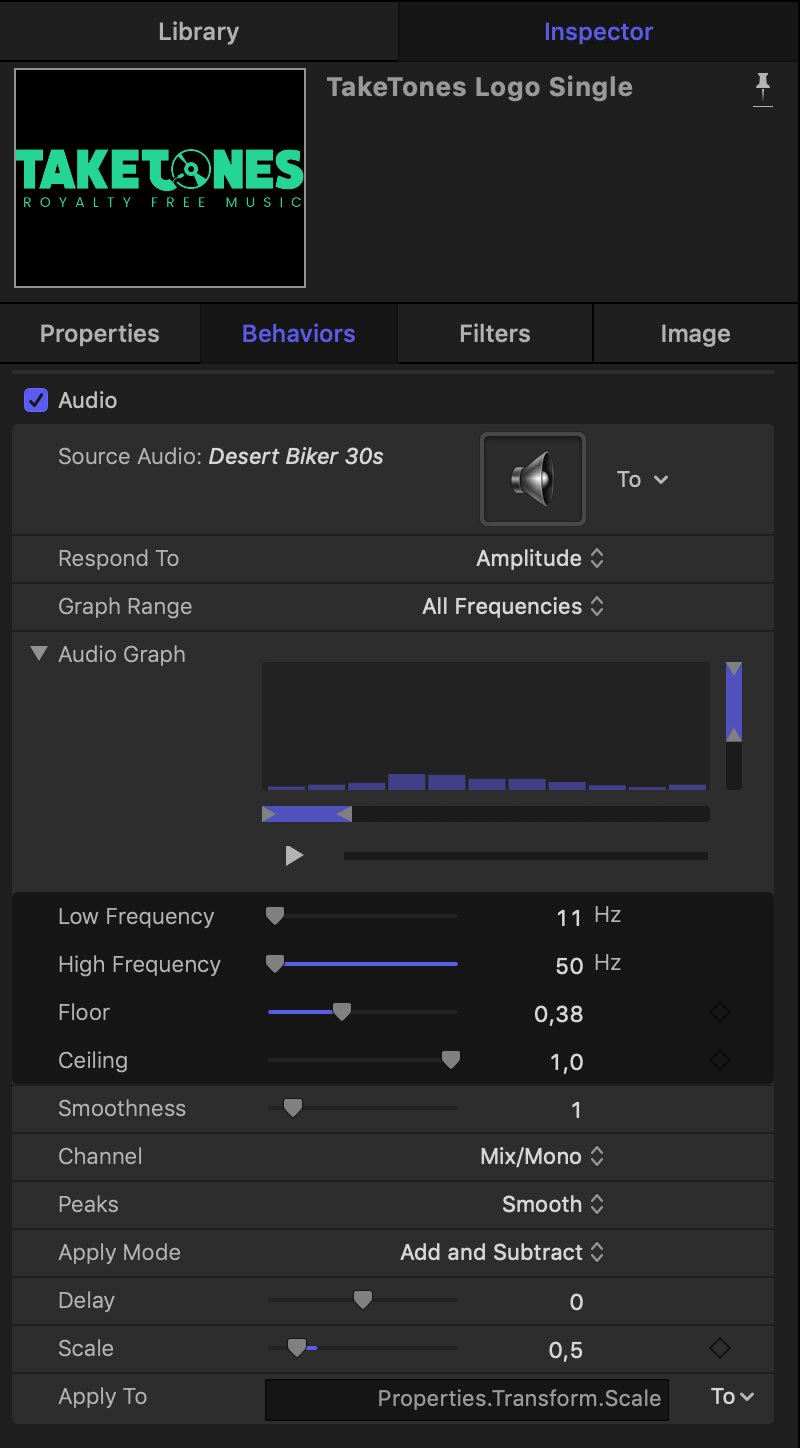
Once you have applied the Audio parameter behavior — go to the Behaviors Inspector tab.
First of all, you need to select a source audio track that will control the parameter. Here you can play the track and view the visualization of the audio data in the Audio Graph.
I will choose animation based on Amplitude, not peak values (Transients), on the Graph range I will select Treble. And increase the Scale parameter to 2.
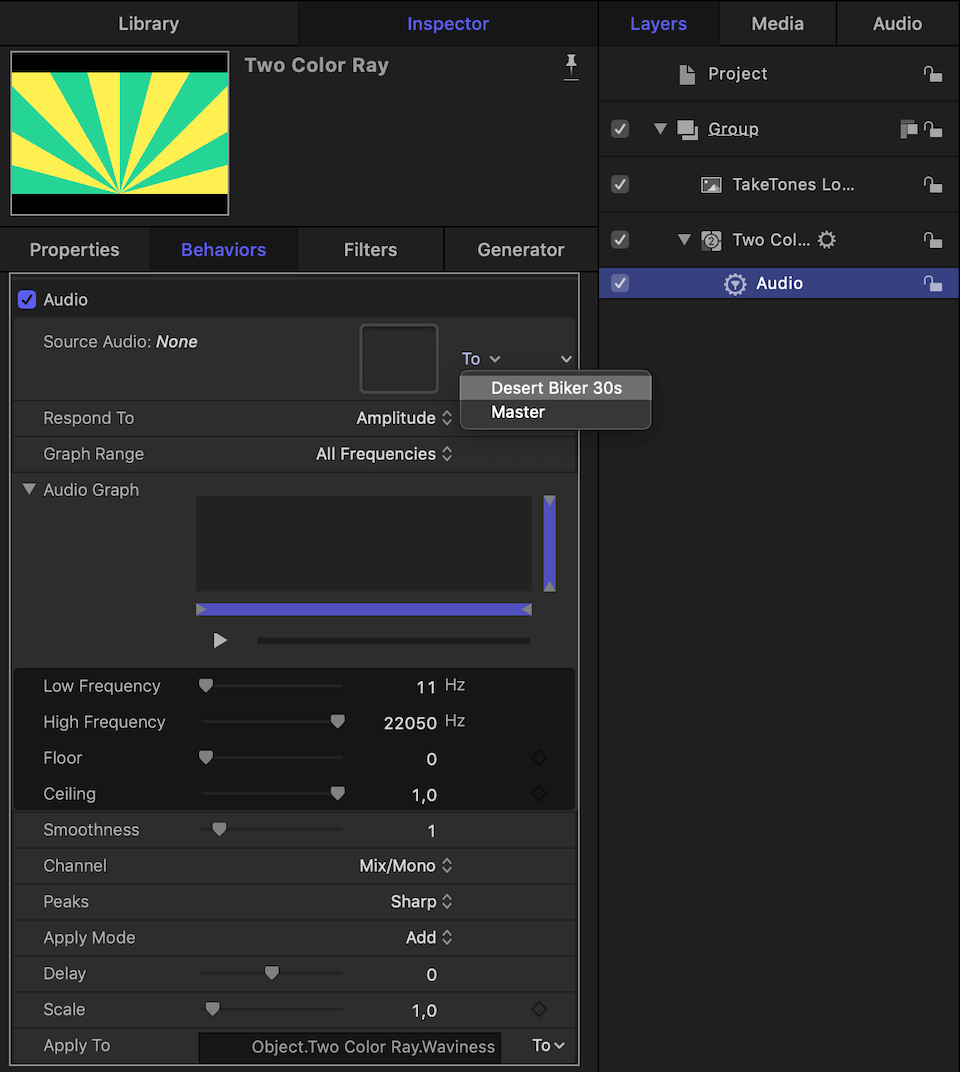
Rename behavior layer to Audio Waviness — select the layer, press Return, type new name, and press Return again.
Duplicate Audio Waviness behavior three times — right click and choose Duplicate from the menu or select Audio Waviness behavior and press ⌘D.
Rename new behavior layers to Audio Frequency, Audio Phase, Audio Rotation.
In each new behavior, layers redirect Apply to parameter to Object.Color Ray.Frequency, Object.Color Ray.Phase, Object.Color Ray.Rotation respectively.
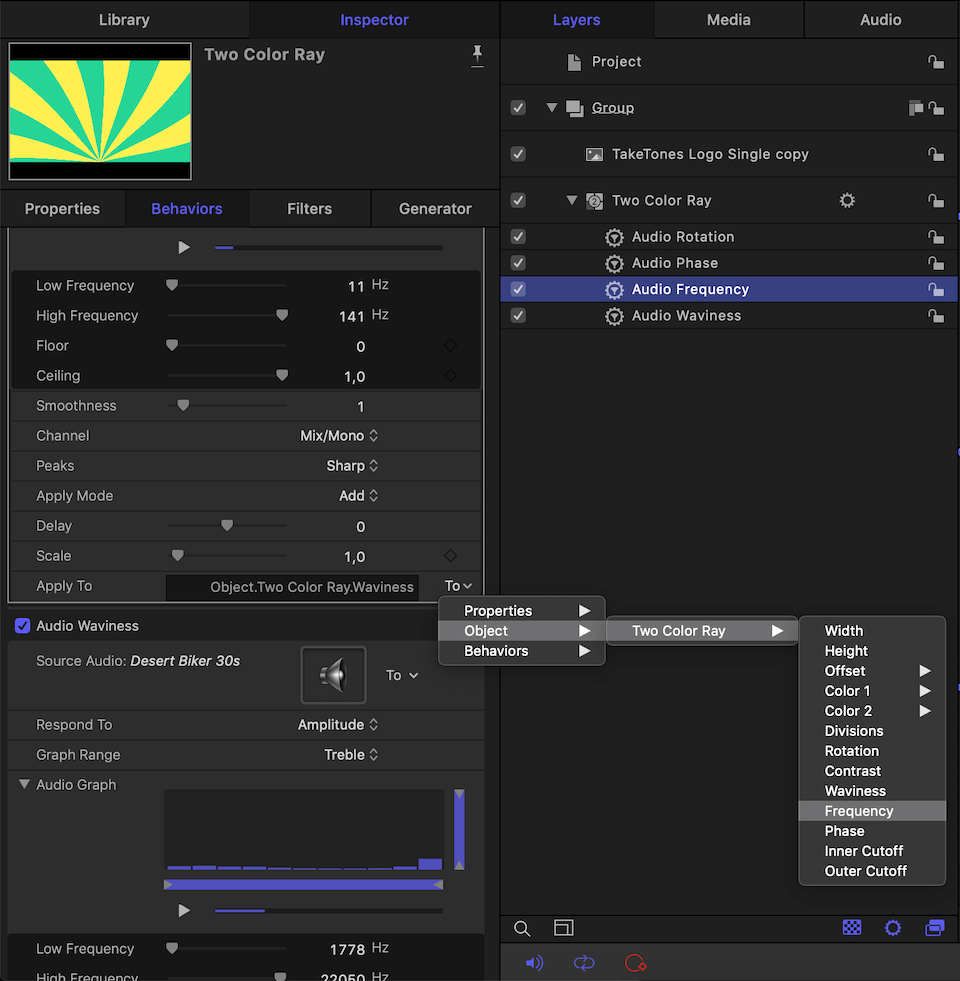
You can experiment with behavior’s properties, follow your sense of rhythm. If you are satisfied with my result, use the settings similar to<a "nofollow" href="https://www.dropbox.com/s/zl45yl64lrgit7i/Taketones%20music%20visualization.zip?dl=0"> mine.
For the logo vector layer, I animate the Scale parameter in the Inspector Properties tab, using the following Audio Behavior settings.
Enjoy the Motion realtime playback, change parameters on the fly, and get the result right away.
9. Enhance your project.
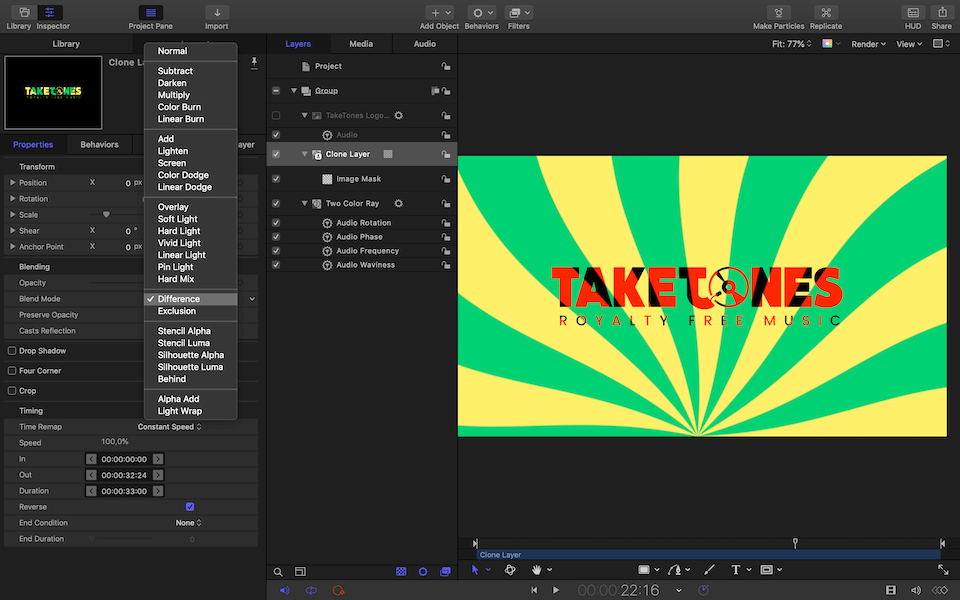
"Best is the enemy of the good" and I will bring the finishing touch. Motion allows you to <a "nofollow" href="https://support.apple.com/guide/motion/add-and-remove-layers-and-groups-motn98bbd596/mac">Clone objects while maintaining animation.
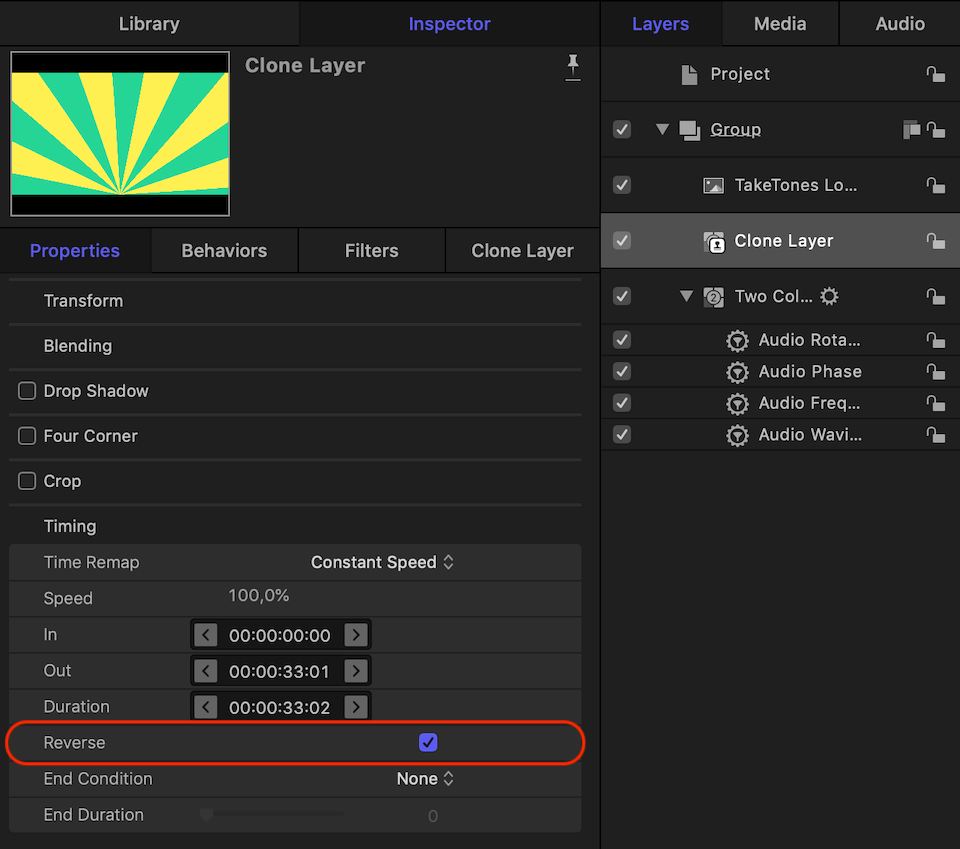
To make clone, select Two Color Ray generator layer and press K or choose Menu Object/Make Clone layer.
At the same time, timing parameters, such as reverse, become available to the Clone.
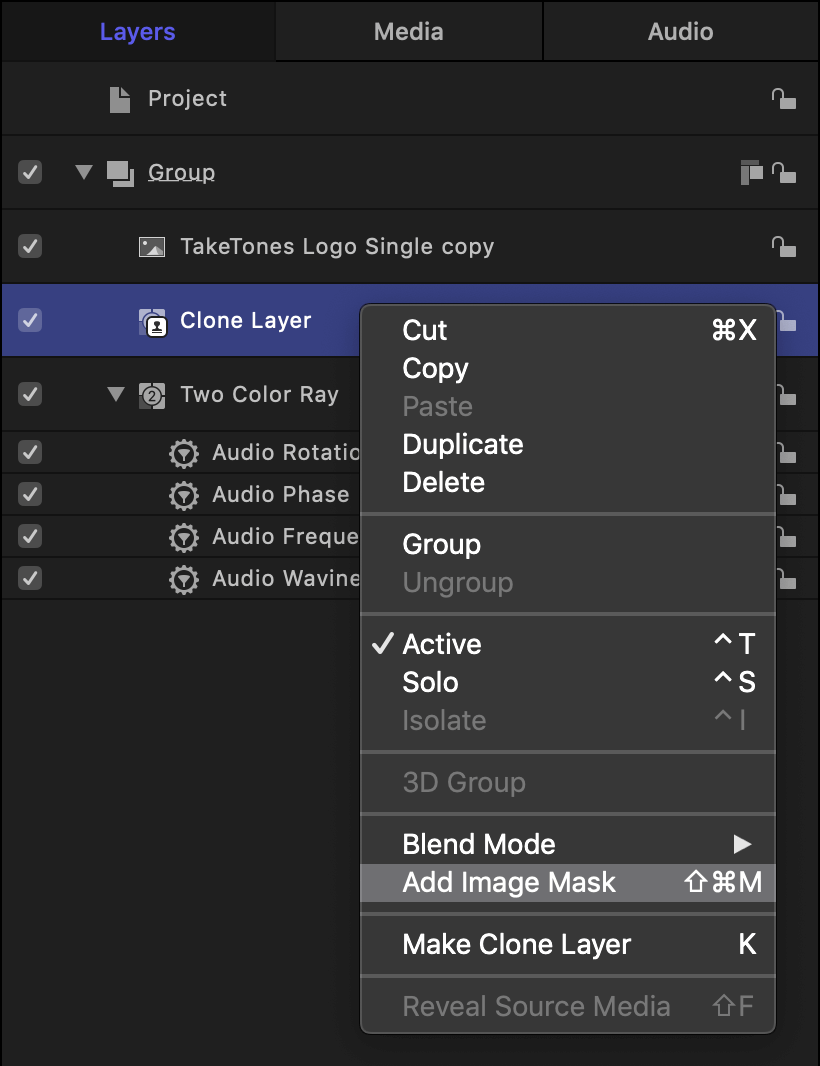
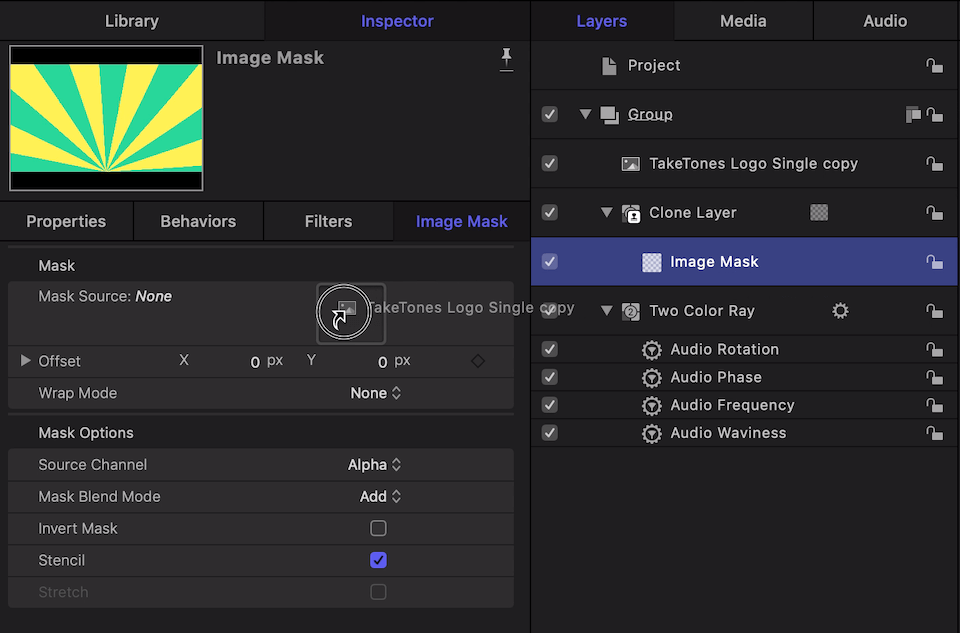
If I apply an <a "nofollow" href="https://support.apple.com/guide/motion/apply-an-image-mask-to-a-layer-motn173b8594/mac">Image mask to the clone of the generators, assign the vector logo layer as the source of the mask image (just drag and drop the logo layer on the source window), and finally apply the Difference blend mode to the clone - this is exactly what I need for the final touch.
10. <a "nofollow" href="https://support.apple.com/ru-ru/guide/motion/motn189cfcd6/mac">Share your project
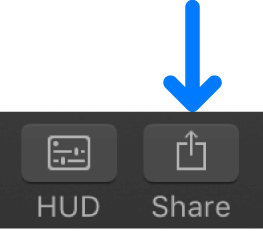
Choose menu File/Share/Export movie or click on Share button on the main toolbar and select Export movie in the pop-up menu.

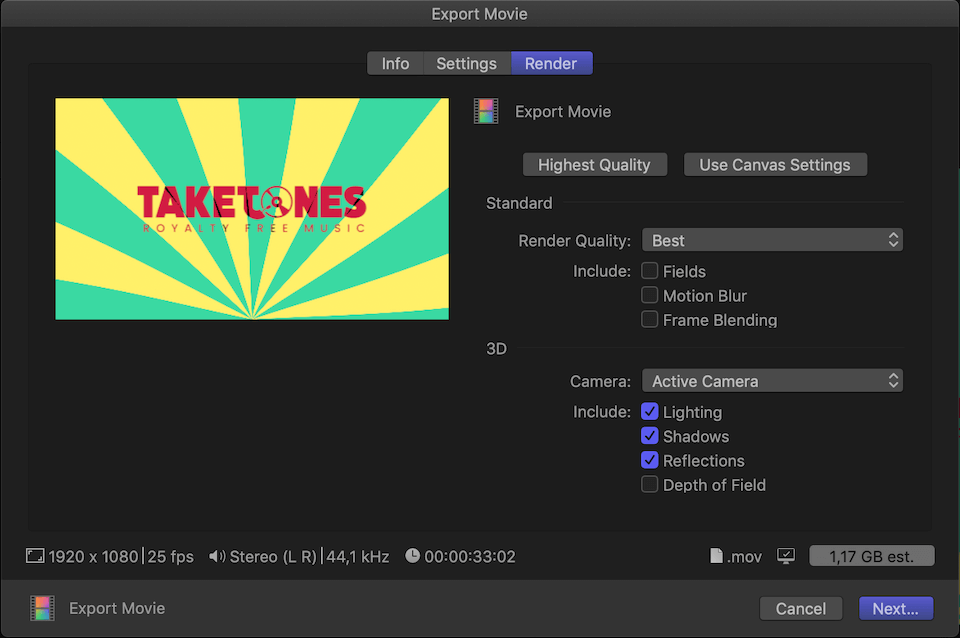
In the Settings and Render panel of the Export Movie window, choose your preferred settings or use mine.
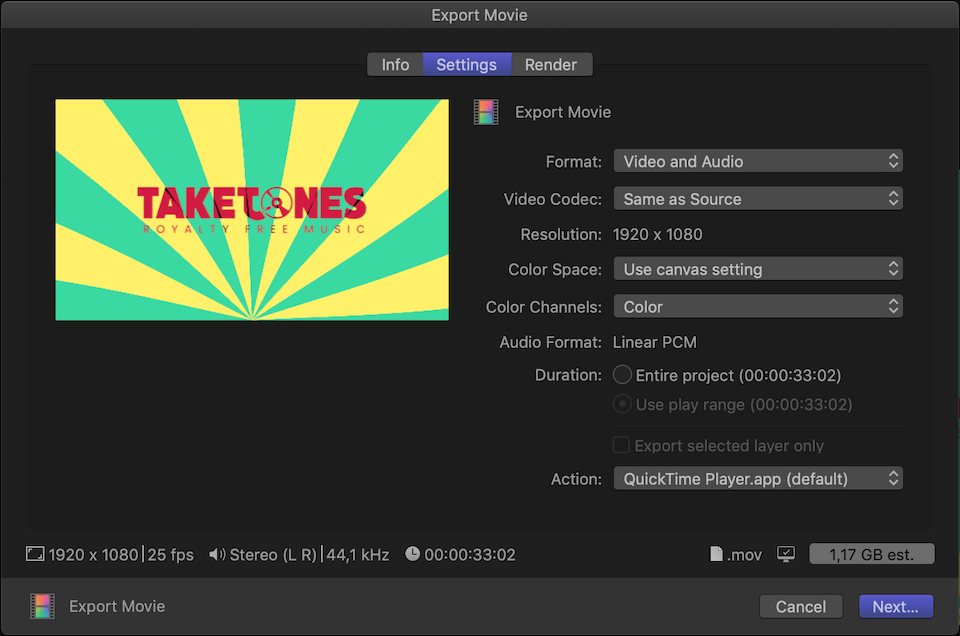
Press Next, choose location and name for sharing your Quick Time movie and Save it.
Now you know that music makes everything move (if it can be imported into Apple Motion).
<a "nofollow" href="https://www.dropbox.com/s/zl45yl64lrgit7i/Taketones%20music%20visualization.zip?dl=0">Download the complete project file (6,6MB)