We have been living a long time in a "Brave new world" where visual storytelling skills are as necessary as written storytelling skills. If we read something, often there will be animated titles from social networks video. Modern standards of communication require us to create and enhance a video.
Many people learn After Effects, use it in their daily tasks. For those of you who want something more, in real-time and not requiring such serious hardware resources or monthly payments — there is a great software solution from Apple called Motion 5, the $50 cost App for Professional Animation and Compositing.
Apple's Motion 5 is available on the AppStore, integrates perfectly with other Apple products (FCPX, Compressor), confidently copes with tasks even on more than modest hardware, allows you to quickly and conveniently create animations of any complexity (including procedural animation), in real-time, it contains a lot of useful additional content.
The first what you will see when starting Motion from Doc or Launchpad is Project Browser, which is structurally very similar to the Finder window.
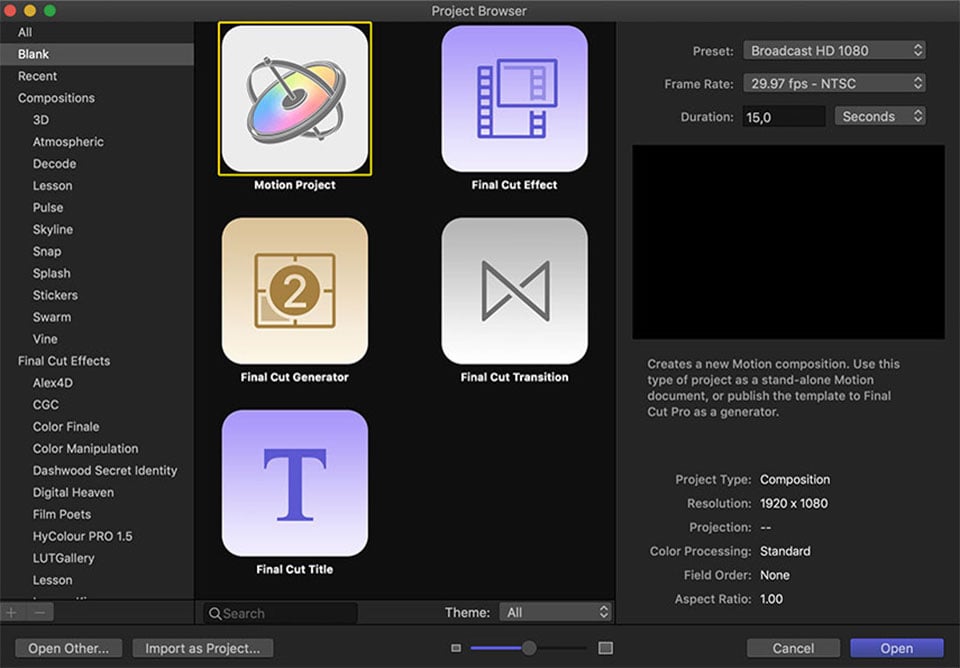
Apple Motion Project Browser
The left column lists the categories of projects, in the middle is revealed the content of the selected category, the right column contains all the necessary information, including preview.
Since I plan to enhance an existing clip, iI has already created based on the clip's properties Motion project (size, duration and frame rate) by clicking on the Import as Project button, selecting the video in the pop-up window and clicking on Import as Project again.
I will not immerse you in the detailed description of the interface (you can do it yourself in the online Motion User Guide). Everything will become clear in the process. I notice only that Window Layout is the default (Classic) and you can choose another one that is convenient for yourself in Window menu (Window>Window Layout).
After we have created our first layer, it will be prudent to save our project. Motion projects, unlike FCPX projects, must be regularly manually saved. The close window button will tell us about it.
![]()
Choose File > Save (or press ⌘S), choose a project name and save location.
I will immediately hide the timeline, that won't be needed in this project. We will use the mini-timeline, which is located under the Canvas — the area where we can view our project.
![]()
Immediately play the clip, make sure that you have real-time audio, without RAM preview or "rendering". If music distracts you, you can turn off the sound on the Timeline toolbar.
Adjust the scale of the look of your project to your convenience — press ⇧Z if you need to fit view into the Canvas or ⌥Z if you wanna see your project on a 100% scale. Or use the Zoom Level pop-up menu in the top right of the Canvas area.
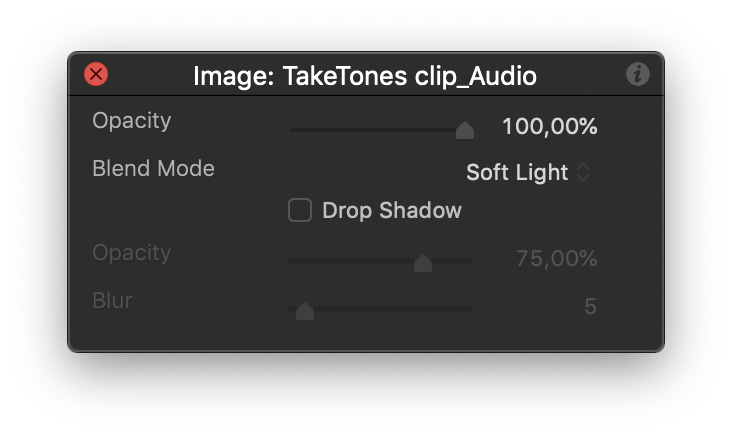
First of all, I want the clip to be more rock-n-roll style. To do this, I clone the clip layer, place the clone under the clip, apply the blend mode to the clip.
To make it more convenient and faster to configure layers and effects, I will do this with the HUD. If for some reason you do not have a HUD window open — this can be done using the toolbar.
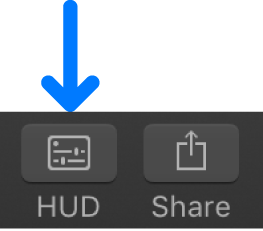
Or by the Window menu (Window>Show HUD), or simply pressing F7 (Make sure that in the keyboard system settings you set the checkbox "Use F1, F2, etc. as a standard function key").
Let's apply to the clip layer a Color filter — Gradient Colorize. To do this, we need the Library tab — a huge and very useful set of build-in content that allows you to quickly find and browse the necessary.
Make sure the filter is selected — go to the Inspector/Filters tab (F3) and adjust the filter gradient to your discretion, by adding color tags, changing their color and adjusting tags position on the gradient bar.
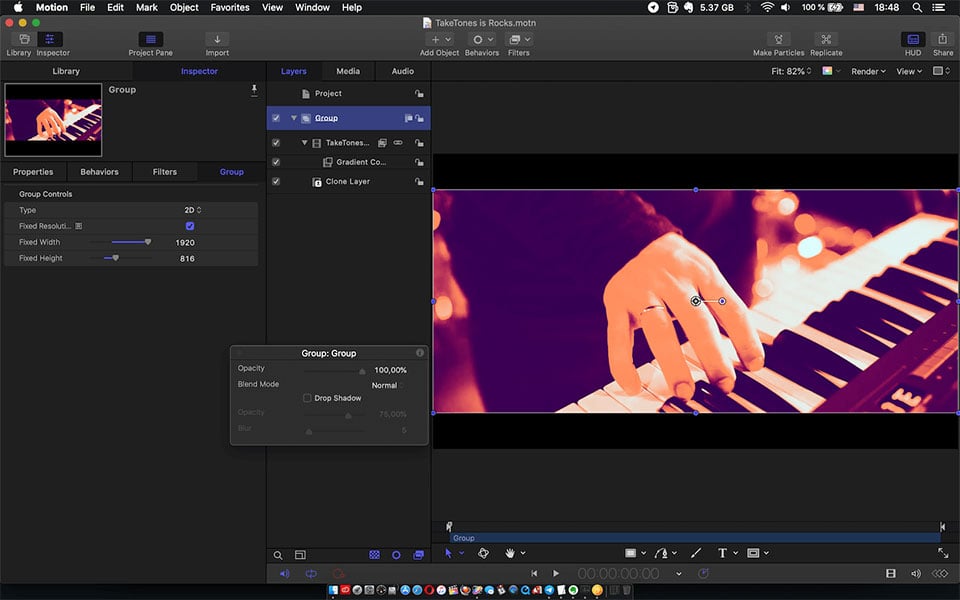
Since the original video has a letterbox, let's return it to black. Select the group, go to the Inspector/Object tab (Group, F4), set the Fixed Resolution checkbox “On" and set the size to 1920x816.
Nothing prevents us from applying another filter to the clip. Since I know exactly the name and category of the filter (Stylize/Bad Film), I have applied right from the toolbar. Since the filter already contains an animation of its parameters, it will be prudent to configure it by enabling the playback of the project. Motion is a real-time animation application.
Modesty is the shortest way to obscurity. And this is not my way. Therefore, I will add the logo and site name.
Apple Motion lets you import Adobe Illustrator files. Make sure your logo is in RGB color space first. Stop Playback, place the playhead at the beginning of the project and through using the import button on the toolbar and add the logo to the project.
By default, the new imported layer will be exactly in the center of the canvas. Just drag it to the right place. Activate snapping for convenience — press N or View>Snap. For more visual integration, I will apply the blending mode for the logo. Let it be a Difference.
Now we only need to add the name of the site, enhance the text and animate it.
On the canvas toolbar, select the Text tool or press T. You can notice that your cursor now looks like in a text editor app. Choose the place on the canvas where you want to add the text, click and type the text. In my case, it will be "taketones.com". When you finish typing, press Esc to exit text-editing mode. On the HUD or in the Inspector/Text tab, you can adjust the format and appearance of your text. You can also move it to another place if you change your mind about the design of your project.
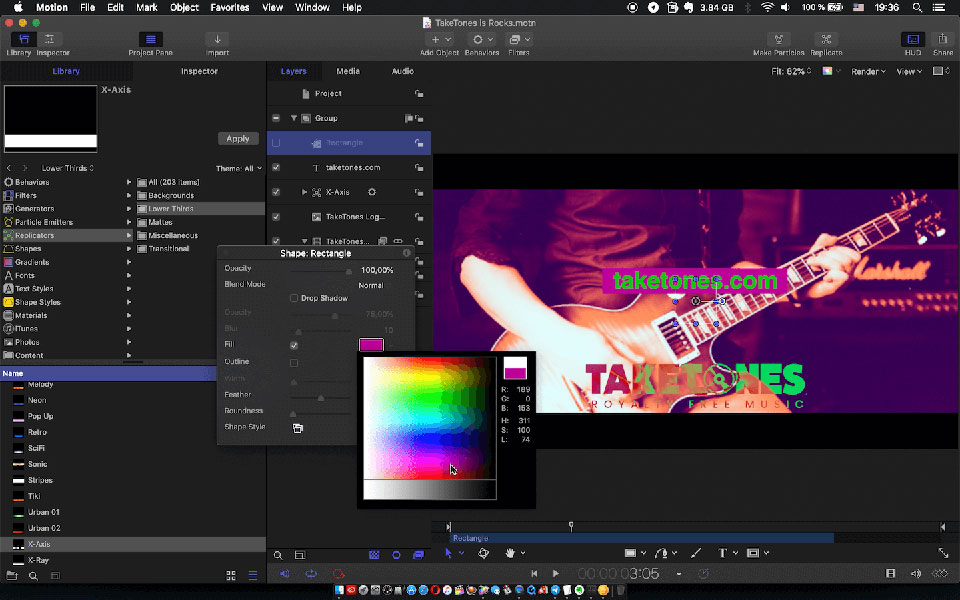
In my opinion, the text is not highlighted enough and is lost on the video background. To fix it I will go back to the Library/Replicators/Lower third, choose X-Axis and add this to the project layers.
Apple Motion contains a huge amount of already animated content. Just choose what suits your idea and add it to the project.
If the replicator layer is above the text - just reposition it. If the replicator layer is shorter than the project duration, simply stretch it to the end of the project on the mini-timeline or select the replicator layer and place the playhead at the end of the project and press O (or Mark>Mark Out).
I don’t like the color of the lower third, so I will select the source of the replicator (Rectangle layer) and change the fill color with the HUD.
Let's animate the text and maybe animate the logo.
Apple Motion allows you to perform animations procedurally using Behaviors. Behavior is the same effect as Filters. In total, Motion has three types of effects — Behaviors, Filters, and Masks. For text animation, there are special already configured procedures in Library/Behaviours/Text Sequence. I will choose Text-Continuos because I want to animate text throughout the entire project. I’ll probably use Quiver. Just drag and drop it on the Text layer.
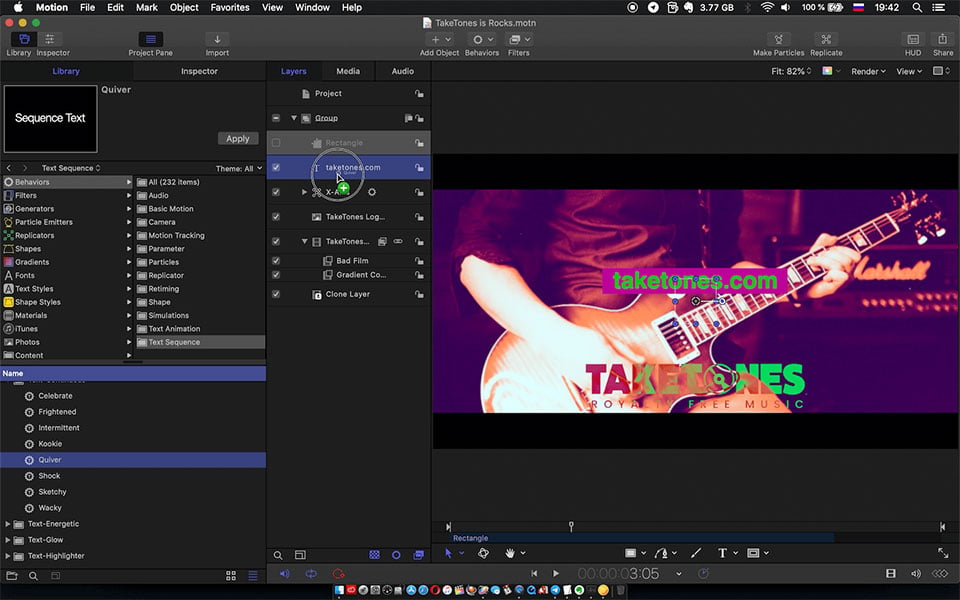
Apply animation to the Text layer
When playing the project, it is noticeable that the X-Axis is animated only at the beginning. Let's add out animation.
Duplicate the Sequence Replicator behavior, move the playhead to Project End, then move the duplicated behavior to Out Point. In the HUD, change Sequencing From by To.
To animate the logo I use the behavior from the Basic Motion category — Fade in/Fade Out with default settings.
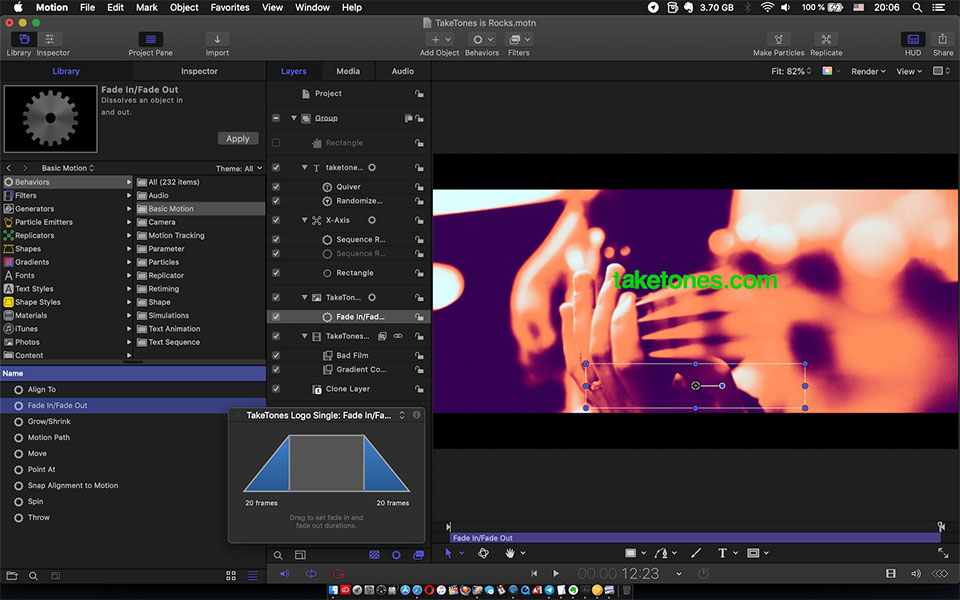
Behaviors > Basic Motion > Fade In/Fade Out
There are a couple of details left. It will be much more interesting if the lower third reveals the text. To do this, I will apply the Image Mask to the text. The easiest way to do this by selecting the context menu. But this is also possible by Object menu (Object>Add Image Mask) or using the keyboard shortcut ⇧⌘M.
An image mask requires a source. Just drag the lower third replicator layer onto the mask in the Layers list. By default, the source of the mask image will be deactivated — we will return the checkbox on the replicator layer.
Now it looks much better.
Perhaps in a couple of clicks, I will make the video more creepy — just reverse the position of the color tags by clicking on the revers Gradient button and reposition color tags.
Wow — now it looks in rock-n-roll style.
I hope all this time you did not forget to save changes in your project.
Because now is the time to do it again and export the project to a video file. We can do this with a button on the toolbar, a command from the menu File>Share>Export Movie, or by shortcut ⌘E.
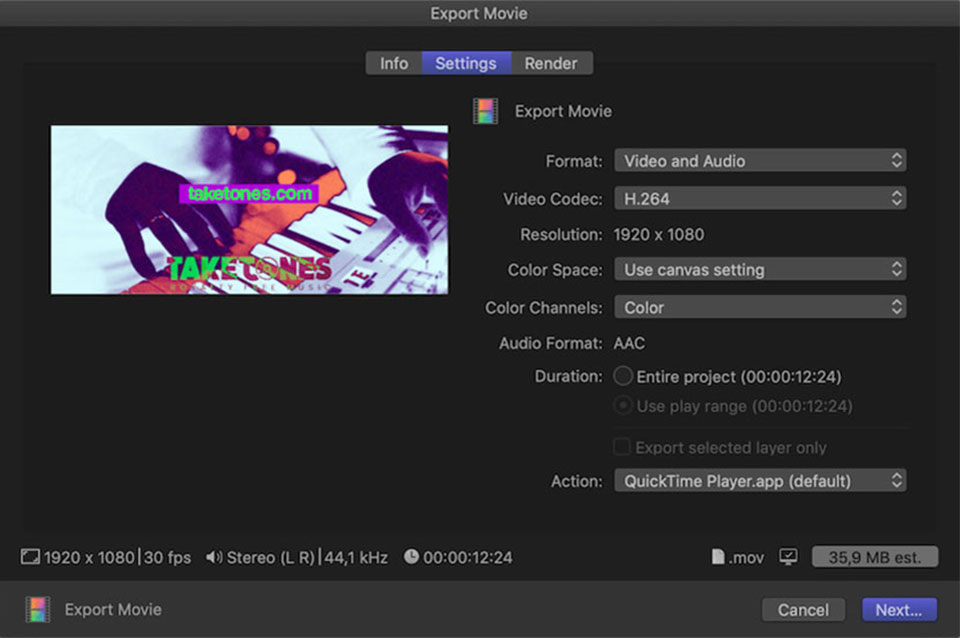
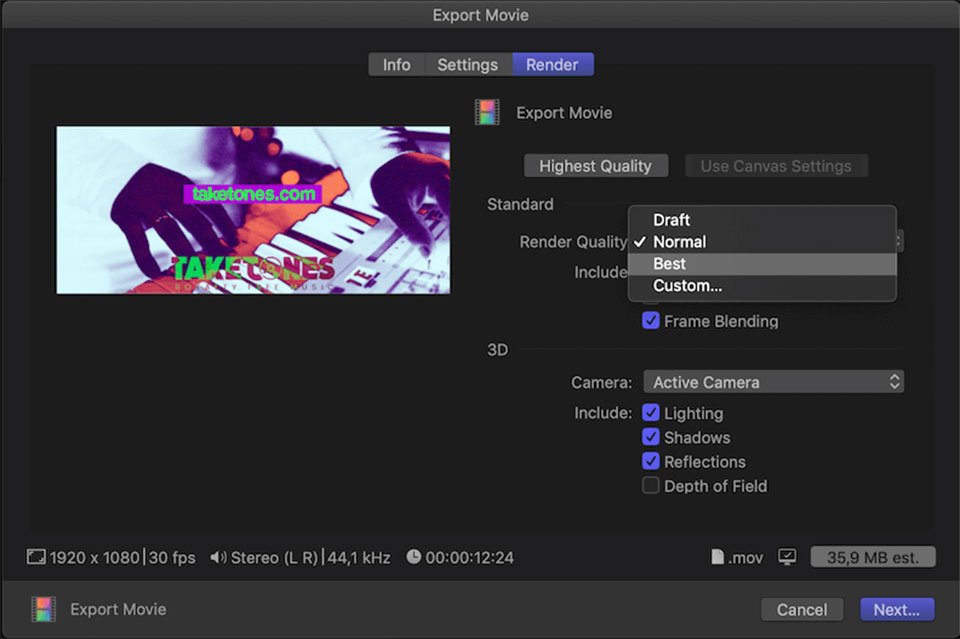
Since I plan to upload this on YouTube, I will choose the h.264 codec and using the text in the project obliges me to choose Best in Render Quality settings.
In conclusion, I want to say that — I just present the algorithm of Apple Motion pipeline and outlined its main features. If you decide to do something like that, you won't have to repeat exactly, especially filter settings, text color, font, etc. Feel like an artist and create your unique design with Apple Motion.
Download the complete project file (223MB)