
Sometimes you need to export a batch of sequences in Premiere Pro as separate videos. The good news is that it’s not necessary to export them one by one. This is actually a very simple process, and what you need for it is Adobe Media Encoder. So check if this program is installed on your computer.
You can also check our Youtube video.
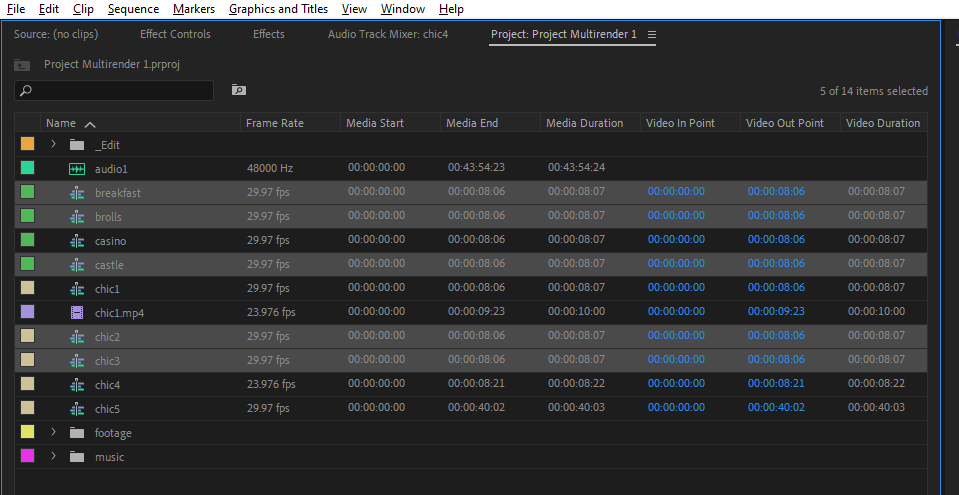
Find the sequences you want to encode in your Project panel. Select all of them with Ctrl.
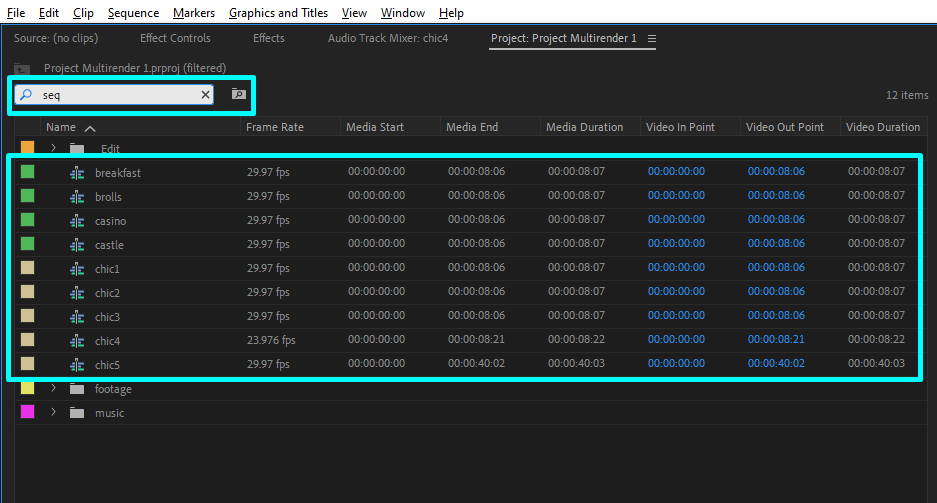
To view all the sequences in your project use the Search Field and type “seq”, then choose those that need to be encoded.
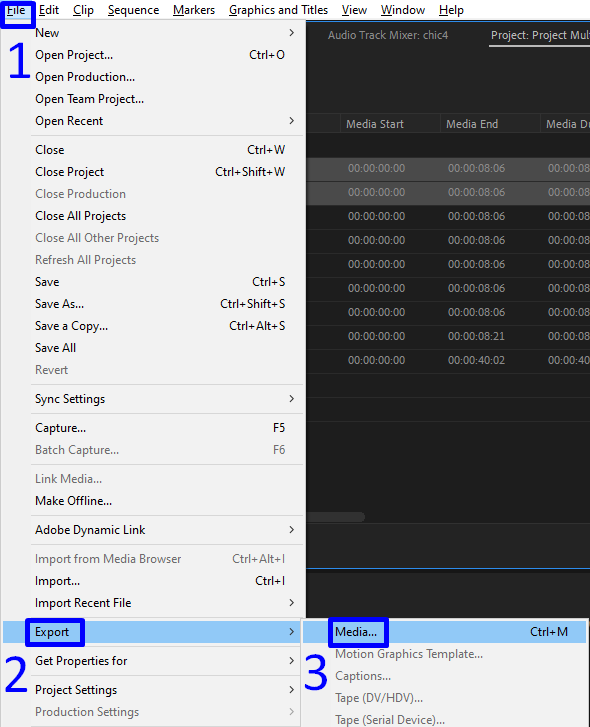
Hit Ctrl+M on Windows (Cmd+M on macOS) or go to File → Export → Media and then proceed with choosing Queue.
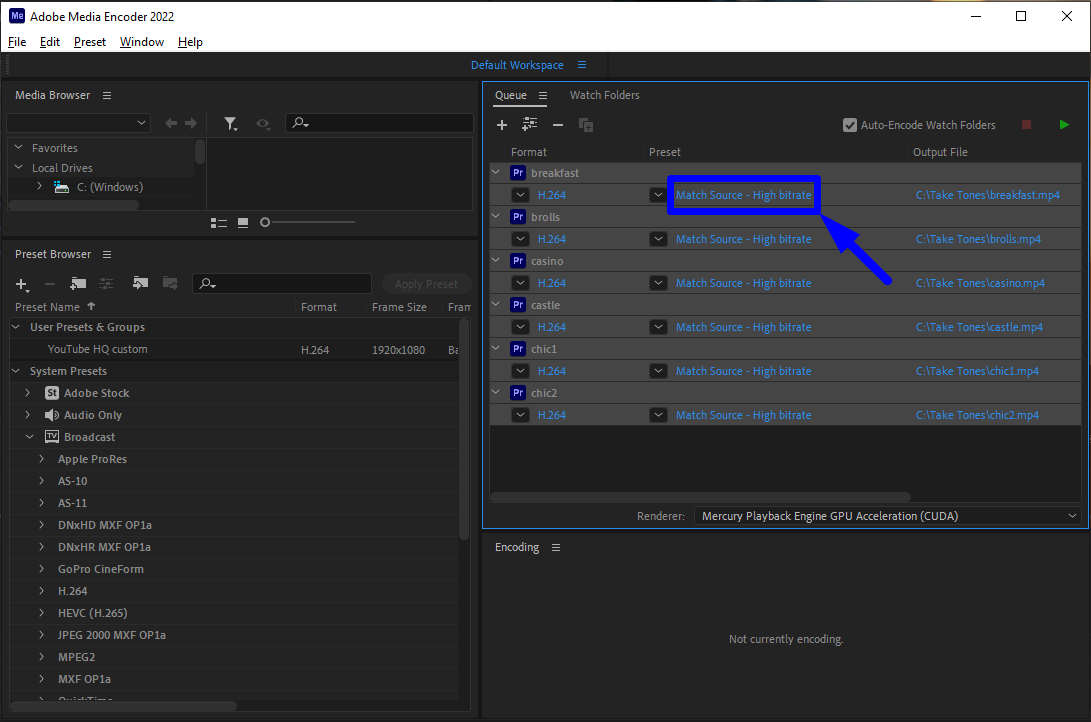
It will open Media Encoder — a program made specially for rendering Premiere Pro and After Effects projects. We see all our sequences listed here, and if you want all of them to be rendered with the same settings, just select all (Ctrl+A) and click here on the text.
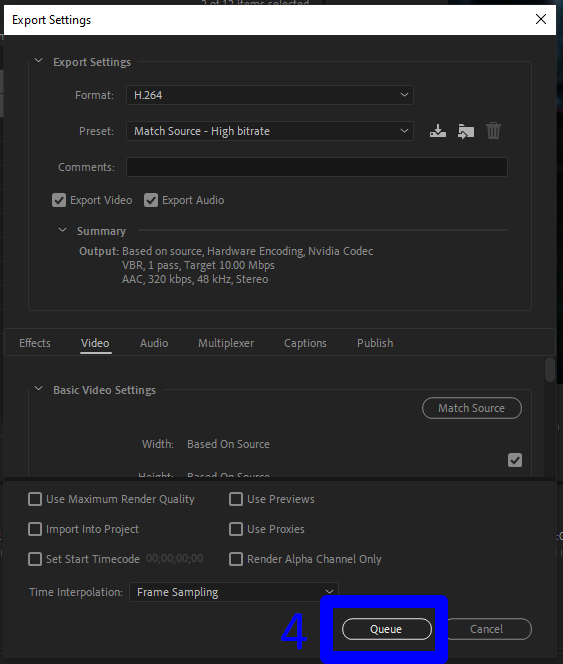
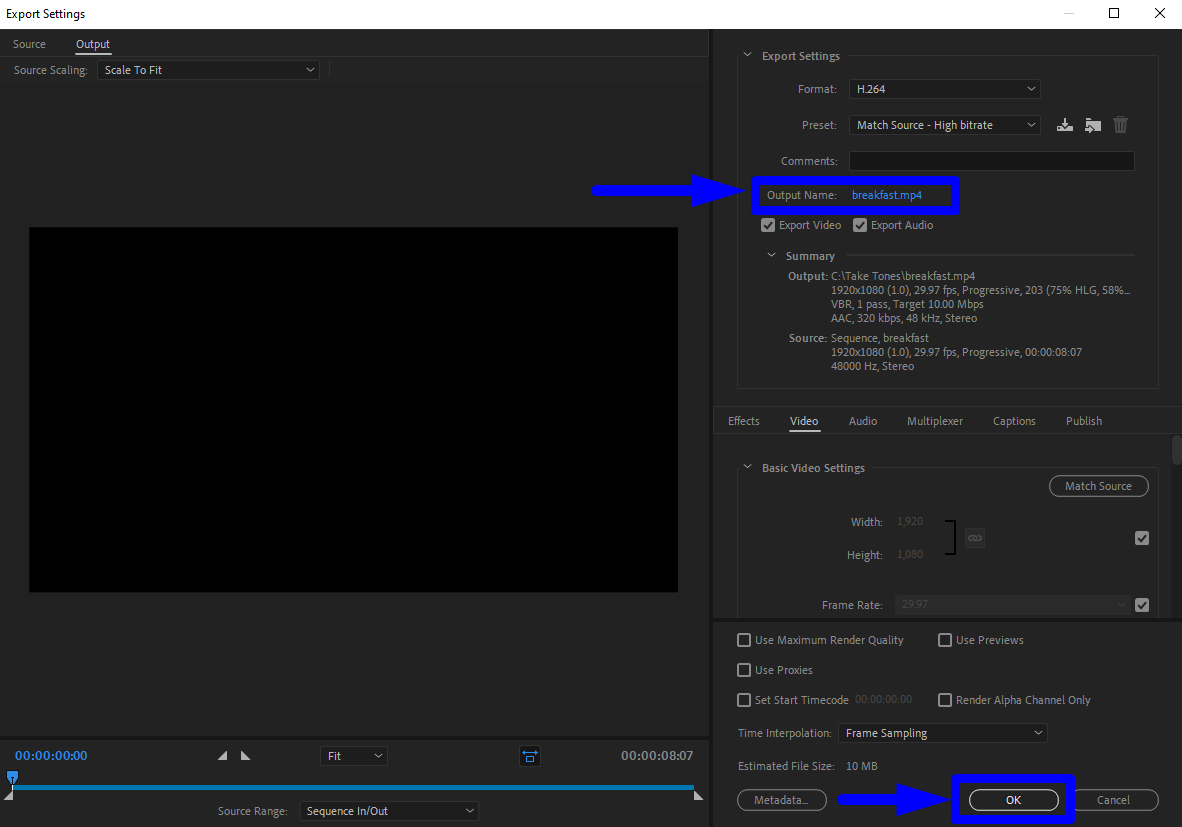
You’ll open the same window with Export Settings you saw in Premiere Pro. Choose the folder for your files in Output Name. Adjust the settings or choose an existing preset and click OK.
Now, hit Play and Media Encoder will render your files one by one.
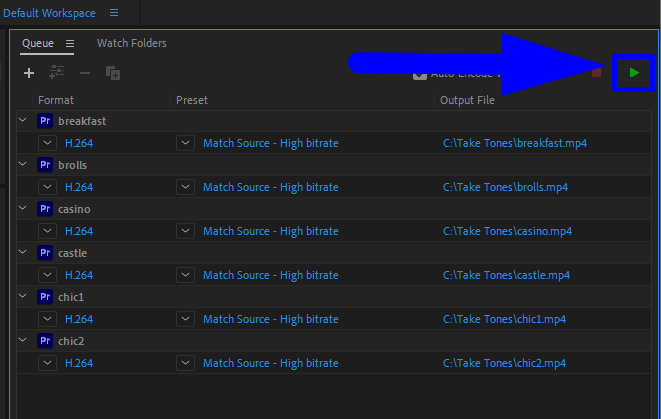
And while it’s processing, you can easily go back to Premiere Pro and continue working there.
If you want to set different settings on different sequences, you can do it by changing the settings for each video. Or you can drag ready-made presets from the Preset Browser and that will save you some time.