What is VHS style
Trends from the 90s are now becoming more and more popular. This applies not only to fashion, photography, and music but also to music videos. You can design a video in the style of old movies, post it on Instagram or YouTube to attract an audience.
Apply the VHS video effect to create the desired atmosphere. It utilizes the picture in vintage style by adding graining, stripes, shooting dates, royalty free music, and other elements typical of videotape clips. You can also use period cinematography features in your work when creating an authentic video clip.
VHS in Adobe Premiere
If you have Adobe Premiere Pro, you can make this cool VHS effect without additional plugins.
This rewind effect contains a host of applications, some of which you may have wondered about. Want to take a retrospective shot over a voiceover? - Rewind.
Did your character find something interesting in a home movie? - Rewind.
This is one of those effects that is very versatile and allows you to use your creativity to come up with new ways to use it effectively.
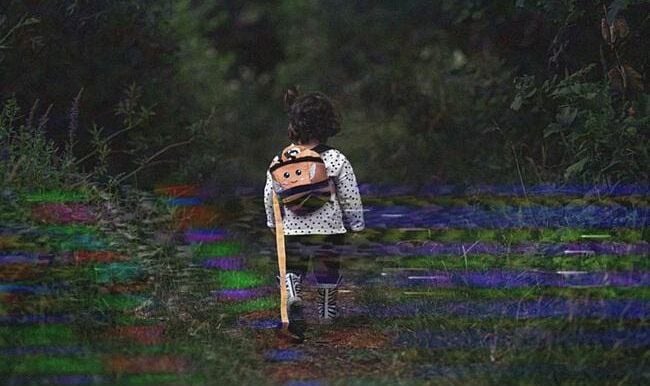
The glow of two colors on the outline of objects is called chromatic aberration. Originally an unintentional distortion of the image, it has become the effect many people try to achieve.
How to make:
-
1. Create 2 layers on top of the original video with its copies.
-
2. On each layer, add the Color Balance RGB effect. In the top layer, leave the value 100 only on the red color. In the second layer - only on the green, in the third one - on blue. In each of the layers, set the Opacity to the blending mode Screen.
-
3. Slightly increase the scale of the upper layer, a few units will be enough. The desired shift appears on the image.
The combing effect

Interference in the form of running horizontal stripes can be simulated by using the Wave Warp effect.
-
1. Create an adjustment layer, overlay it on top of the video layer, add an effect.
-
2. In the effect settings, select the Square wave type.
-
3. Adjusting the direction 180°
-
4. Set the height to about 53 and the width to about 1000.
-
5. Slow down the initial wave velocity by selecting a value of 0.1 or 0.2.
Color correction
The RGB Curves or Shadow Tint and Highlight Tint in the Lumetri Color setting can help bring the colors closer to the retro look. Adjust the shadow tint to green or blue, and set the backlight tint closer to red or pink. You can also increase the values of the faded film.
Noise
The best way to add noise in Adobe Premiere is to use the Noise HLS (Noise HLS Auto) effect. With it, you can adjust the hue, lightness, and saturation of noise, as well as its speed.
Format

On the adjustment layer, add the Crop effect and set a value of 13 on the Left and Right lines. That cuts the video from both sides. If all frames in the video have the same format, another option is also possible. Create a new Episode (Sequence) and change the frame size in the settings to 1440 and 1080, obtaining an aspect ratio of 4:3. Copy the contents of the first episode into the new one and work only in that format.
Once you know the basic techniques for making VHS-style videos, you can experiment and customize them to your liking. Make your family movie journey look more interesting. The above effects are occasionally supplemented with scratches, highlights, or film frames.
You can find footage with them on Youtube. Some bloggers share their work and leave links to download ready-made plug-ins in the public domain. Nevertheless, it is better to create them yourself in Photoshop or After Effects, so you do not depend on copyrights.
One more variant
Step 1. Creating copies of the original video track
So, imagine that you have a video in the timeline of your project in Adobe Premiere Pro where you want to achieve a VHS effect. Then first you need to - take the "Selection Tool" and press the left mouse button and the "Alt" button on the keyboard and, while holding them, move the selected video to the track above.
As you can see, the original video stream remains in place, while its copy is on the track above. Now you need to repeat the operation, creating another video stream. As a result, you should have 3 video streams filled.
Alternative approach: you can select the original video stream, press Ctrl + C, this way you will copy the selected video to the clipboard. Then you select tracks 2 and 3 (by default, the selection is set on the first video track) and press Ctrl + V to paste the copied file into the second and third video tracks, respectively. I want to note that the slider should remain in one place, because it is better not to allow the video streams to shift.
Of course, you can create and distribute copies of the original track in any other convenient way, but I have described two methods for you that are quite convenient and will allow people who are just starting to learn a video editor to implement the VHS effect for Adobe Premiere. Beginner-level pros.
Now that you've made copies of the original track, we can move on to the second step.
Step #2. Create color channel likeness in Adobe Premiere Pro for VHS effect
To create a semblance of color channels in Adobe Photoshop, using which we will realize the color shifting, we need to resort to using one of the effects in the tab "Effects", section "Video Effects", subsection "Image Control", the effect is called "Color Balance (RGB)".
But if you want to quickly access this effect, you can use the "Search" field by simply typing its name there - Color Balance (RGB).
Once it is selected, drag it by pressing and holding the left mouse button to each of the 3 video streams.
Now select one of these files and find the tab "Effect Control", find among the options previously applied effect Color Balance (RGB), and consistently on each track display only one color as a priority. For example, I will make the uppermost track to be completely red. To do this, I'll make the Green and Blue values equal to zero, and the Red will be equal to 100.
In addition, it is necessary for the section "Opacity" in the item "Blending Mode" to select the option "Linear Lightning (Addition)". And now the same manipulation should be done with the other tracks, making the Blue value on one and the Green value on the other equal to 100 and changing, in the same way, the "Blending Mode".
The result of this simple fiddling will be that each video stream in our sequence becomes a color channel. Now let's move on to the next step.
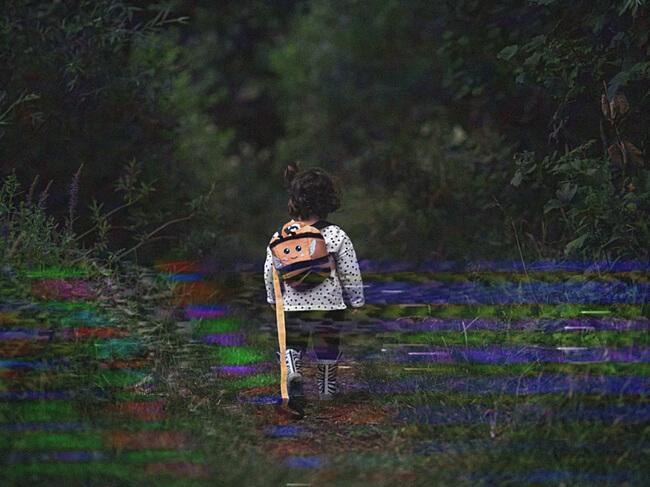
Step #3. Let's make a color shift, achieving chromatic aberrations (color shifts).
Now that our color channels are ready, we can move on to one of the most important, but very simple operations: creating chromatic aberrations, in other words creating a color shift that helps us make a VHS effect in the video.
To do this, we need to do three small manipulations. To begin with, we shift the upper video stream, which is responsible for the red channel, shift it by 3 pixels, for this, in the Effect Controls tab in the Motion section in the Position item, change the X value from 960 to 963.
Then we shift the middle video stream, which is responsible (at least in my case) for the Green color channel, by 3 pixels. To do this, in the "Effect Control" tab, under "Motion" in the "Position" item change the X reading from 960 to 957.
In the end, we will shift the last lower video stream, which is responsible for the Blue color channel, by 7 pixels. To do this in the "Effect Control" tab, in the "Motion" section in the "Position" item change the value of the X reading from 960 to 953.
Color shifting, or in professional parlance chromatic aberration, we have achieved the necessary minimum, which, by the way, can be enough for most people, so they can simply quit reading this step, but I still advise you to familiarize yourself with other steps, because they can be useful to you.
Step #4. Additional touches to enhance the VHS effect of the video.
Now that we have created the most important effect, which I think a lot of people are looking for, we can start creating additional elements that will make our video more like VHS.
To do it, we will need to create an additional element in the project, namely the "Adjustment Layer", on which we will add all further video effects that will be reflected in the video streams responsible for the color channels and will allow us to make the illusion of VHS video.
To add the "Adjustment Layer" element to the project we can go to the "File" program main menu item, go to the "New" section and select the "Adjustment Layer" element we need.
Or there are a couple of other ways to add this element to your project, a little more simple.
The second way - in an empty area of the list of all elements included in the project hover the cursor and press the right mouse button, thereby calling a context menu, select the section "New element" in it, and the appearing list selects the desired "Adjustment Layer".
The third way is to click on the icon which is in the bottom right corner of your project window, a list of items that you can add to your project will appear and in this list select "Adjustment Layer".
Now that you know how to add the "Adjustment Layer" to your project, you can move on to the next steps. To do this we need to move the "Adjustment Layer" to the video streams that are responsible for displaying the color channels and place it over all the video streams, so all the manipulations performed on it will be reflected on all the video streams that are under it [Adjustment Layer].
First, let's make the staircase effect that was characteristic of VHS video, due to technical limitations. We need to find the "Wave Warp" video effect, which can be found on the "Effects" tab, in the "Video Effects" folder, "Distor" section, and drag it to the "Adjustment Layer". Then go to the "Effect Control" tab and find the settings for this effect. They are located under the corresponding heading
To begin with, change the value of the field "Wave Type" to "Square", then change the value of the fields "Wave Width" and "Wave Height" to 2. The value of the field "Direction" is set to zero (0).
Next, we need to add some noise to the video, because in the era of old VHS tapes you could only dream about the serious quality today's technology provides, especially if you didn't get the first copy or even the second one. To do this, we need to add the following effect to the "Adjustment Layer" - Noise, which is located in the "Effects" tab, in the "Video Effects" folder, in the "Noise & Grain" section.
Then, in the "Effect Control" tab of the adjustment layer, find the settings of this effect. And replace the value of the "Amount of Noise" field from zero (0) to 20%. You will notice the appearance of changes in the video.
The next step is to add a line running through the video from time to time. For this purpose, we will again resort to the "Wave Warp" effect. But let's apply slightly different settings of this effect, namely:
-
● Wave Type - Square;
-
● Wave Width - 700;
-
● Wave Height - 10;
-
● Direction - 0;
-
● Wave Speed - 0.1;
-
● Pinning - All Edges.
Now we will have a constantly moving bar throughout the video.
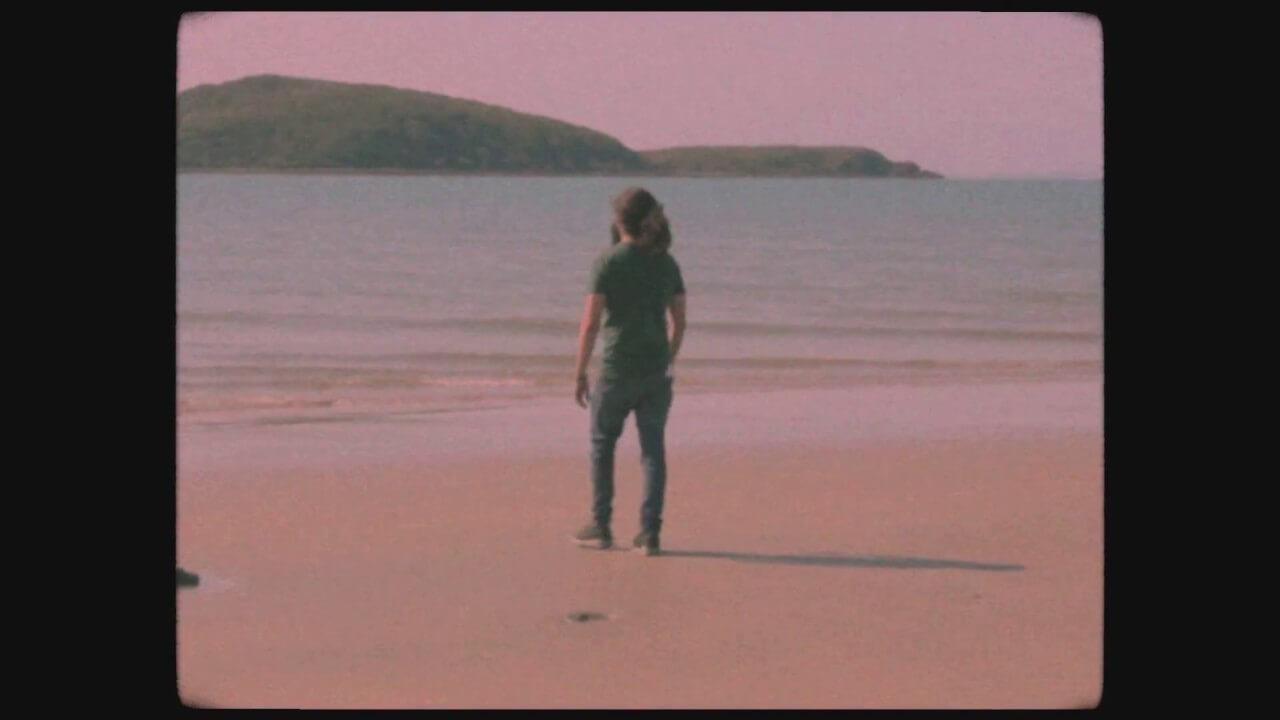
And the final touch - reducing the saturation of the picture. I will use the "Lumetri Color" video effect, located in the "Effects" tab of the "Video Effects" folder, "Color Correction" section, but you can, of course, apply other video effects that can reduce the color saturation of your video. Let's apply it again Adjustment Layer and go to the tab "Effect Control" related to our adjusting layer.
If you find the effect you want, go to "Basic Correction" and set the Saturation value to 60%. And here is the result in front of you.
Step #5. A small optional touch to enhance the VHS effect.
I don't think this step is necessary, but it can also play to your video's advantage.
Adding a SCANLINE, like on old TV monitors, will also help you complement our effect, giving it that vintage effect we've been trying to achieve. To do this you can use the site - freeject.net, or add to the project already lying with the project in a folder with the name. And then drag this file to the timeline laying it on the track lying above the adjustment layer. And also in the tab "Effect Control" go-to "Opacity" in the item "Blending Mode" select the option "Overlay". And now you can look at your work.