Do you want to widen your YouTube audience and attract more viewers? Of course, you do. Then think of adding subtitles to your videos.
First, this option lets watching the video on mute. Secondly, you attract the viewers with hearing problems. Thirdly, the subtitles are a necessity for foreign viewers. And finally, they can save your video if the sound quality is poor, there’s a background noise, or the speaker has a thick accent.
Let’s figure out how to add subtitles to the video.
1. Uploading a transcript
If you have a pre-made transcript file, you’re halfway there.
Make sure your file is formatted properly. It should be a plain .txt file without any special symbols. To designate a background sound, use the square brackets: [applause] or [footsteps], or [squeak]. To specify who’s speaking, add >>.
The final document may look like this:
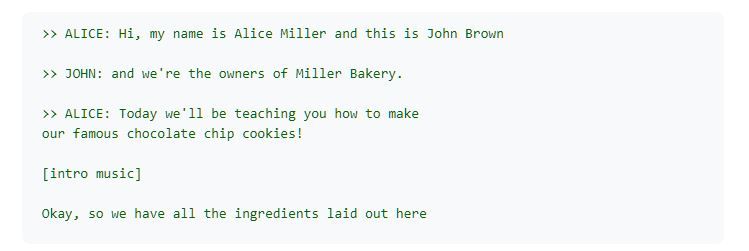
That’s it, just a text without time codes. YouTube uses an intellectual technology that recognizes the speech and matches the subtitles with the video at the right time frames.
Note that this method will work only if the audio is of high quality and the voice is clear. Of course, the transcript must be written in the same language as the video. Otherwise, YouTube won’t match the voice and the text.
To start, log into your YouTube account, click the channel icon in the upper right corner.
1. Go to Creator Studio > Video Manager and select the video.
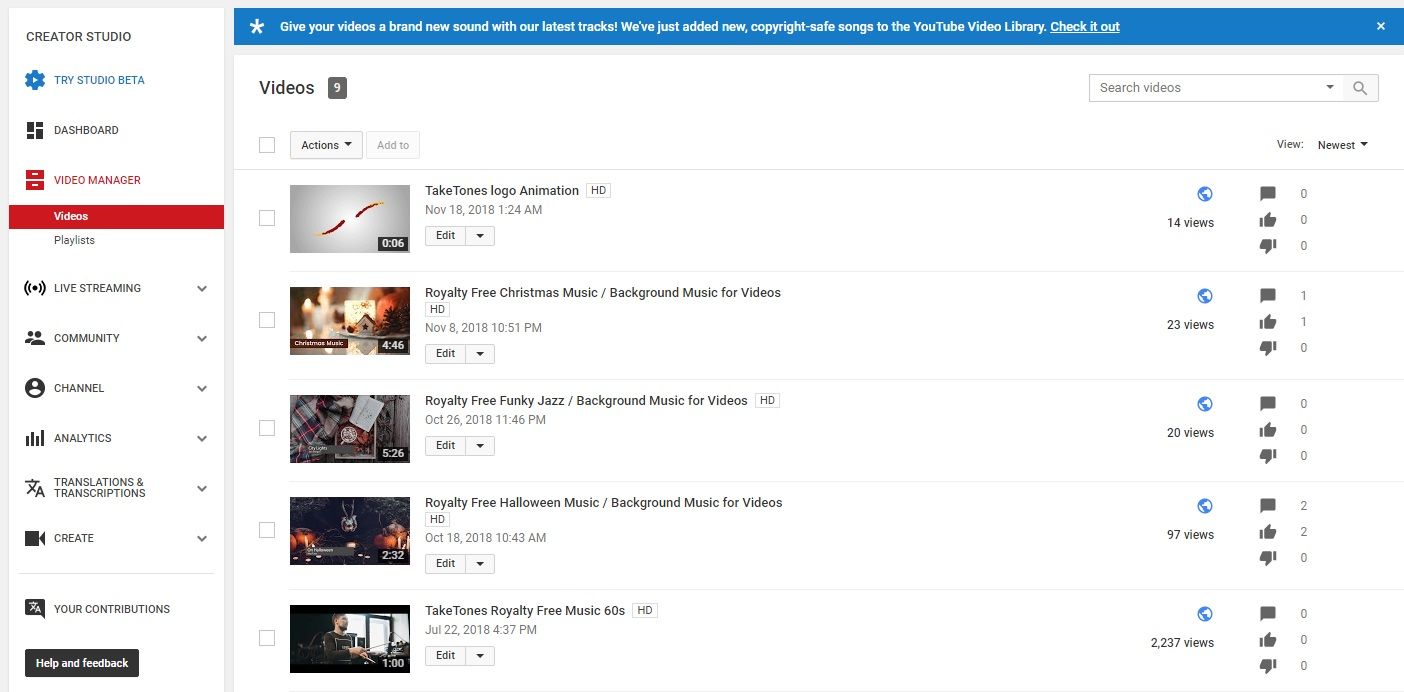
2. Click on Edit and choose Subtitles/CC.

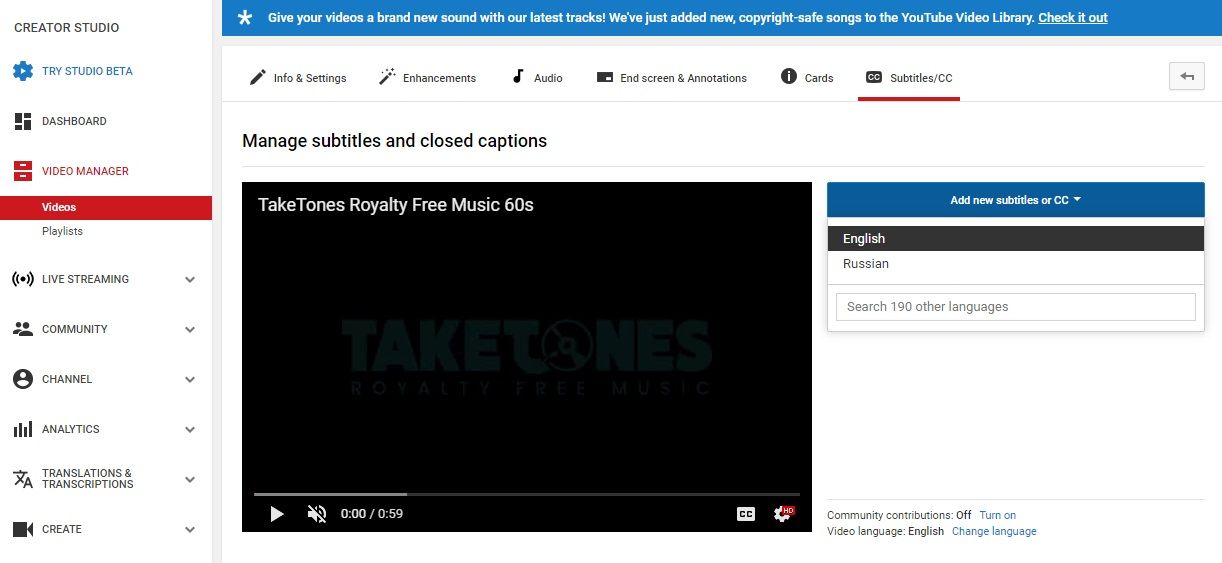
3. Next, choose the Language of your subtitles.
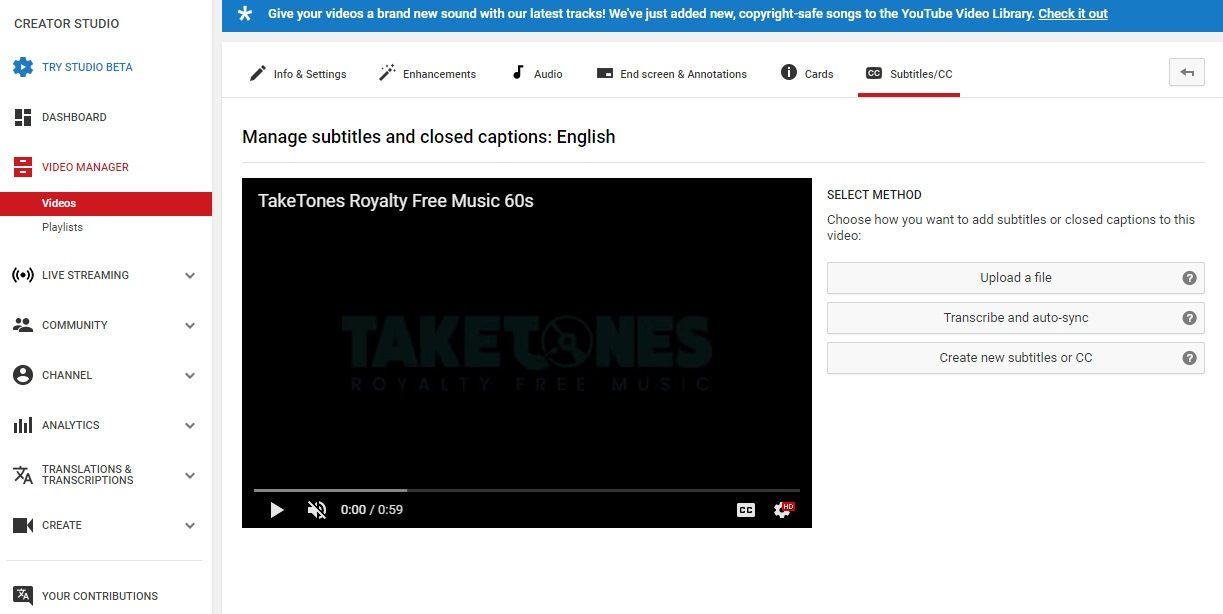
4. And choose Upload a file when selecting a method of adding subtitles.
5. Select Transcript in File type and click Upload.
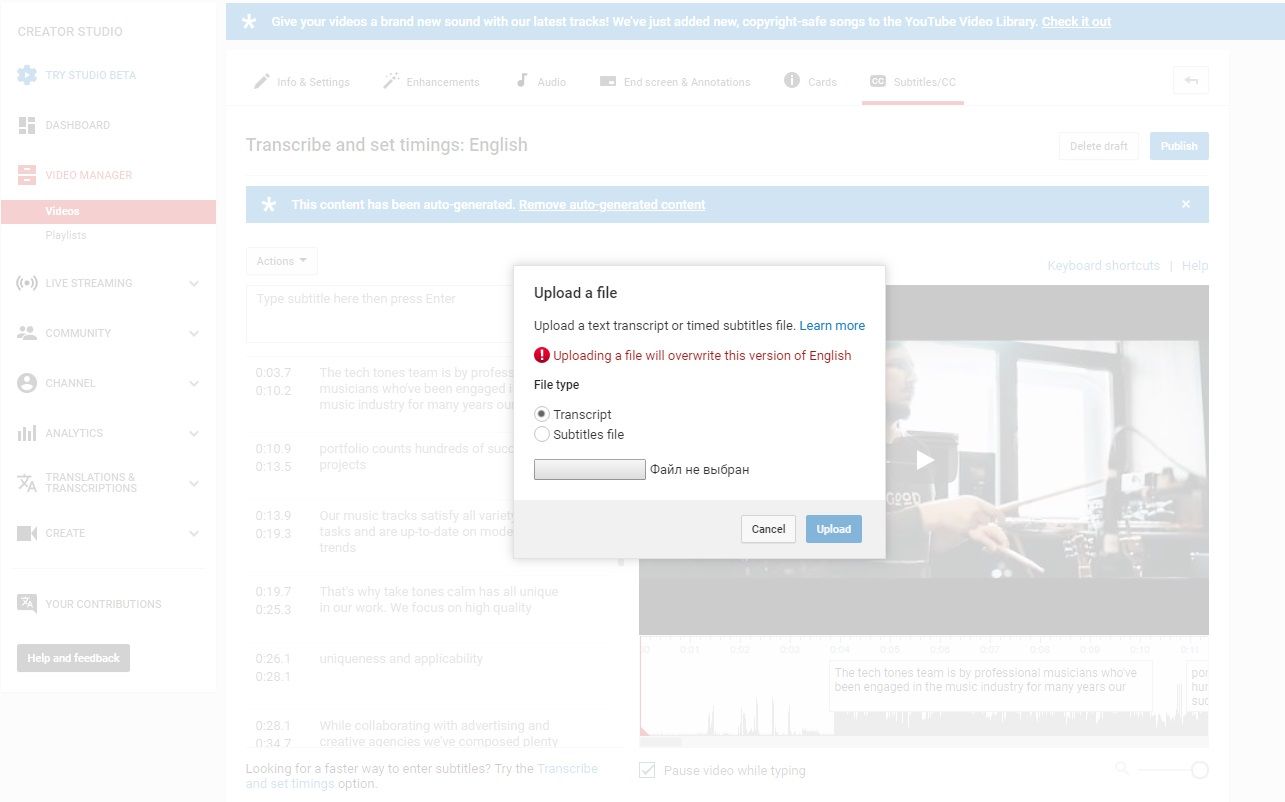
6. Once you’ve uploaded your file, click Set Timings and YouTube will automatically sync the subtitles with the voice in the video. It may take a few minutes.
2. Creating new subtitles
If you don’t have a transcript, you can create new subtitles directly in Video Manager. This method makes sense when the audio is not clear.
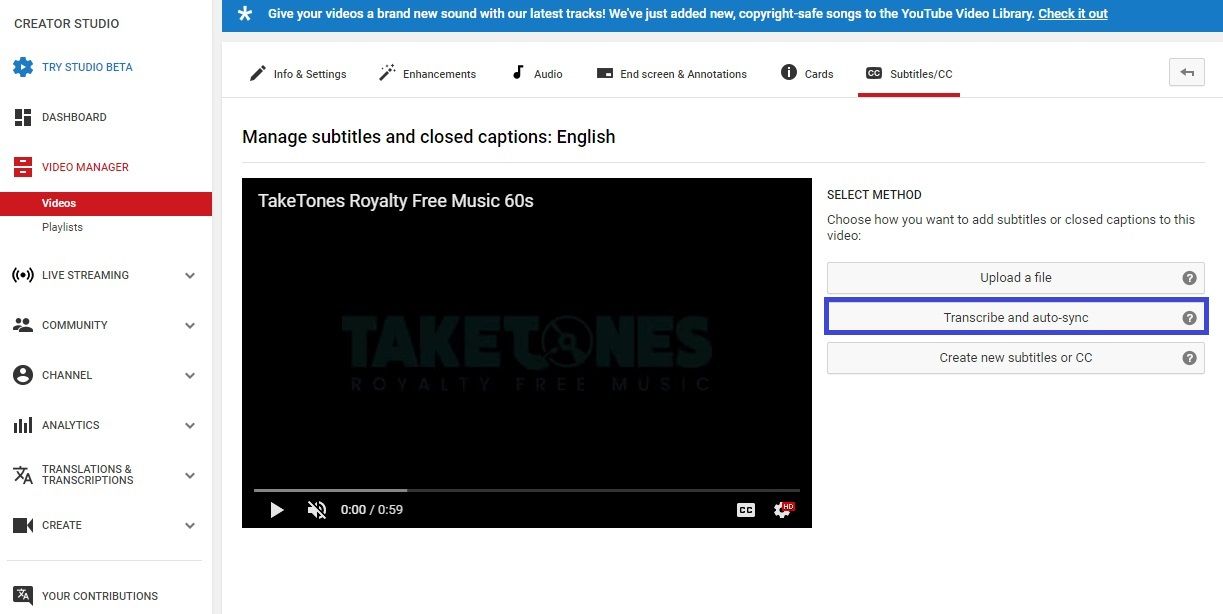
Follow steps 1-3 above and when given the option how to add subtitles choose Transcribe and auto-sync.
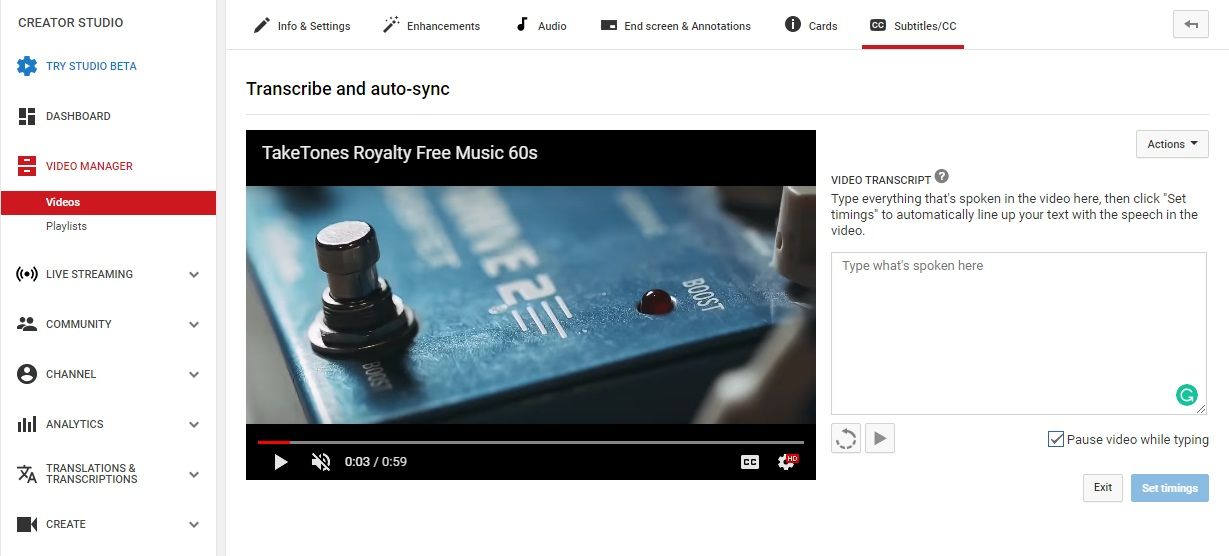
Just type the text manually in the blank box while listening to the video.
When it’s done, click Set timings. You can adjust timing yourself by dragging the frames on the timeline.
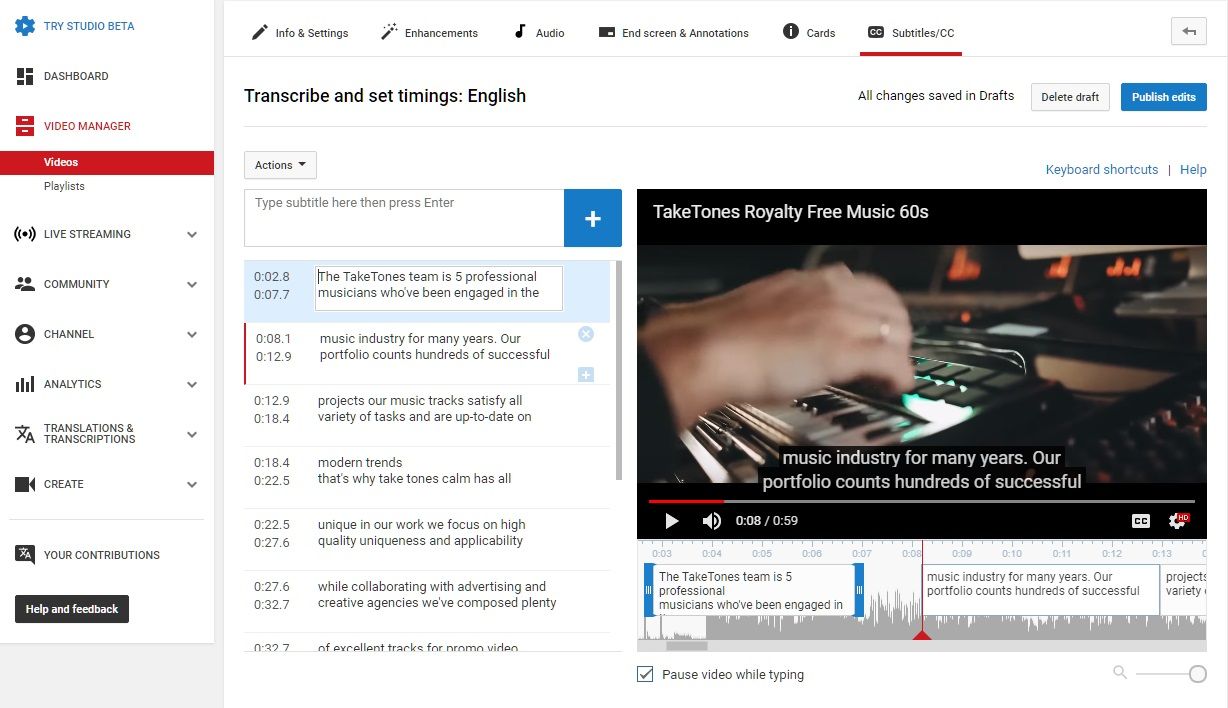
This way you can add subtitles to the entire video. Once it’s finished, click the button Publish. The video with subtitles will be published.
If you can’t create subtitles for the whole video at once, don’t worry. Your progress will be saved in Drafts so you can continue later.
3. Adding automatic subtitles
YouTube has a convenient speech recognition system, thanks to which it can automatically create subtitles if the audio quality is good enough and the language is clearly spoken.
If automatic captions are available, they'll automatically be published on the video. For now, this option is available for English, French, German, Dutch, Italian, Spanish, Portuguese, Russian, Japanese and Korean.
The technology is constantly improving, but there may be errors in the machine transcript. The poorer the sound quality, the more errors you’ll have. So you’ll need to check and edit the automatic subtitles yourself.
Anyway, it’s better than typing the captions from scratch and can save you pretty much time.
To find and review auto-generated captions, go to the Subtitles tab in Video Manager. If they are available, you’ll see them marked (Automatic) in Published to the right of the video.
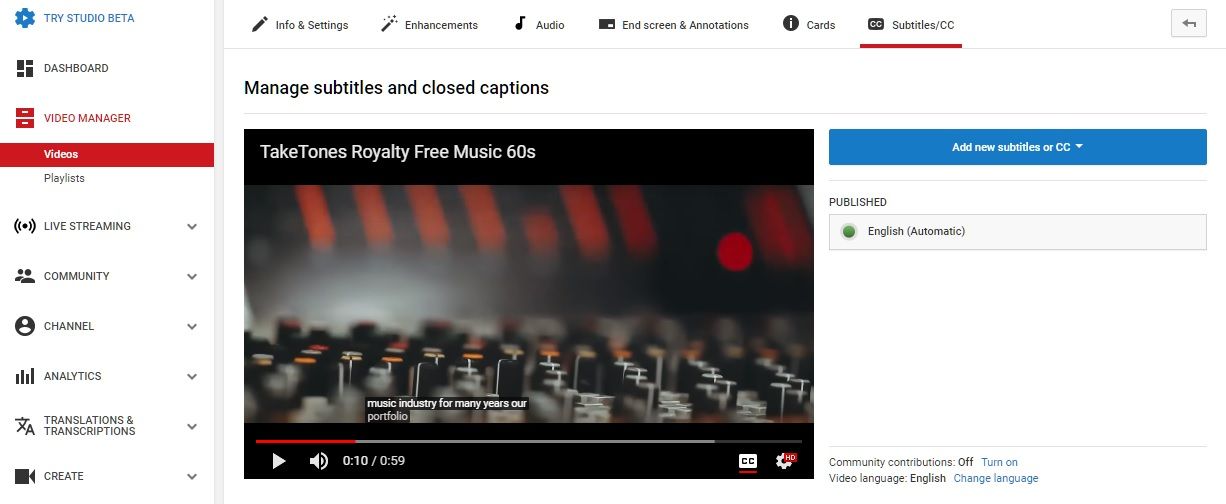
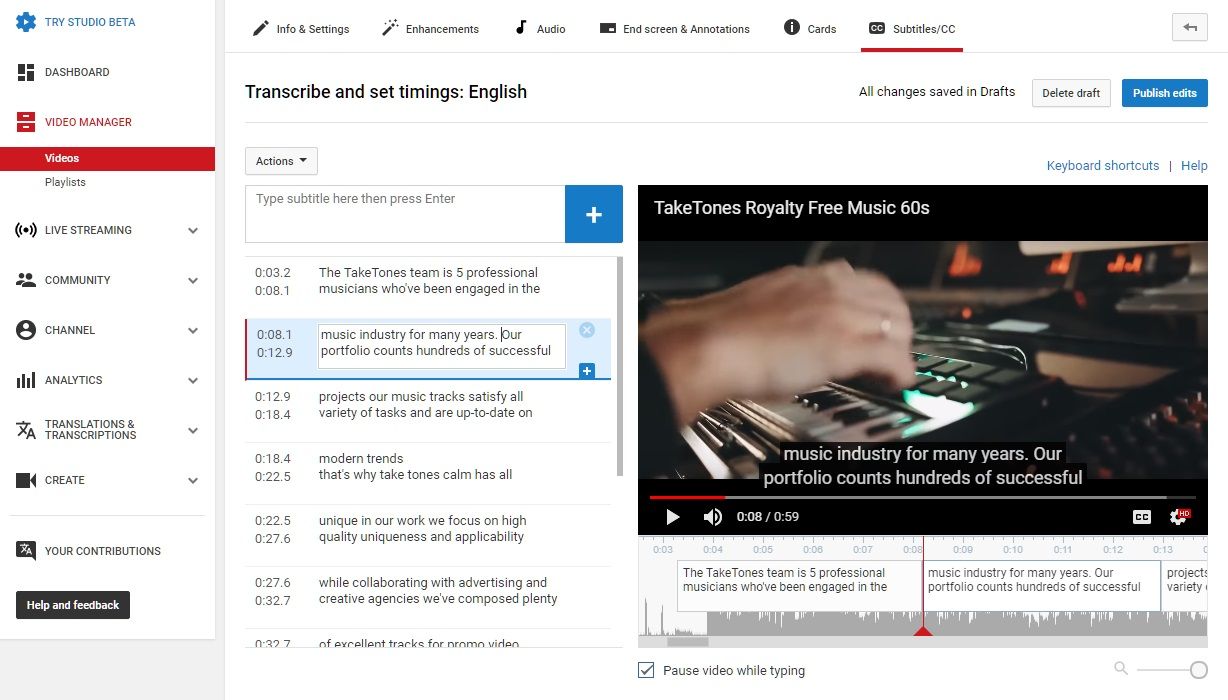
Click on the box and get to the Editor. Here you can change the text and timing if necessary. When you’re done, hit Publish edits.
If you don’t see automatic captions on your video, there are a few probable reasons:
• The captions haven’t been generated yet because of the complex audio in the video.
• The video is too long.
• The language in the video is not supported.
• The sound quality is poor or YouTube doesn't recognize the speech.
• There is a long silent part at the beginning of the video.
• There are multiple speakers, and their voices overlap.
To make the captions visible by default in a particular video, simply add “yt:cc=on” as a tag to that video.
Now you see that subtitles are quite useful and can help you increase the reach and get more views. Make your YouTube videos easier to watch for much more viewers globally.


