Here's how to use a free plugin to turn your video into a spectacular cartoon.

There are all kinds of design challenges. Sometimes you need something unusual, so that the video doesn't look filmed, but, for example, drawn by hand with pencil or chalk, in watercolor or gouache. But how do you get that effect? By hand-drawing each frame? That's long and complicated, especially if you don't have the skill. Come to the aid of a fairly simple plugin for After Effects. It takes one or more keyframes in a given style and processes the rest of the video, then imports them into After Effects and assembles them as an animation.
Thus you can quickly and effortlessly create spectacular animated cartoon-style clips in almost any of the techniques.
What's coming up in this lesson
We're going to show you how to use the EbSynth plugin for After Effects and a simple photo styling application to turn an ordinary video into a painted one.
The main stages of the work:
-
● select the desired video,
-
● do the sequencing,
-
● choose the style of the future cartoon,
-
● apply the effect to the video.
Download and install the plugin
Go to the official ebsynth.com and click the Download button. In the window that appears, click on the barely noticeable line No thanks, just start the download and save the archive. After unpacking it, run this file:

Image: TakeTones
Preparing the workspace in After Effects
Creating a project and a new composition

Image: TakeTones
Open After Effects and create a new project: File → New → New Project. In the new project, create a composition: Choose New Composition.
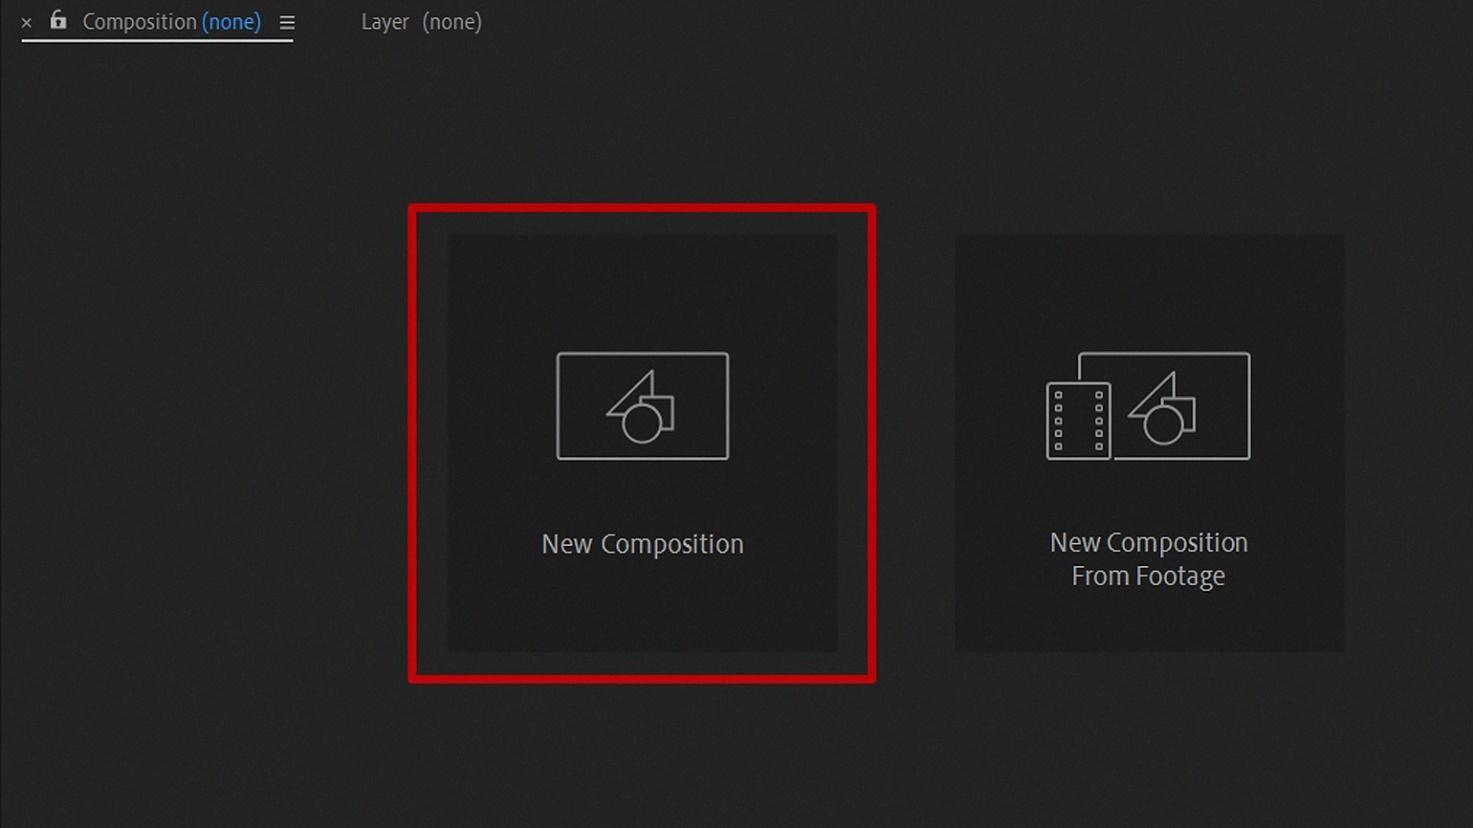
Image: TakeTones
In the composition settings window, specify the settings as shown below. Set the frame rate to 30. Name the composition park.

Image: TakeTones
Source code
First, you need to select the source video for the project. You need one short video.
We used the free online service Pexels to find the necessary source. The plugin works most effectively with clips with static backgrounds, so our choice was a video with a man walking through a park - it was shot from a tripod. We used this fragment:

Image: Twicce Switzerland / Pexels
Importing the original video
Simply drag the desired video from the explorer window to the Layers panel.

Image: TakeTones
Trim the Timeline panel
If you want to keep the overall timing, you can do nothing. But nothing happens at the end of the video, and the camera starts shaking, so it is better to make the video shorter. At the same time, let's shorten the beginning as well.

Image: TakeTones
Move the slider to the seventh second, for example, and select Trim Comp to Work Area, as shown below. The composition is now seven seconds long.

Image: TakeTones
Sequence video
Next, you need to make a video sequencing - save it as pictures. Select Composition → Add to Render Queue.
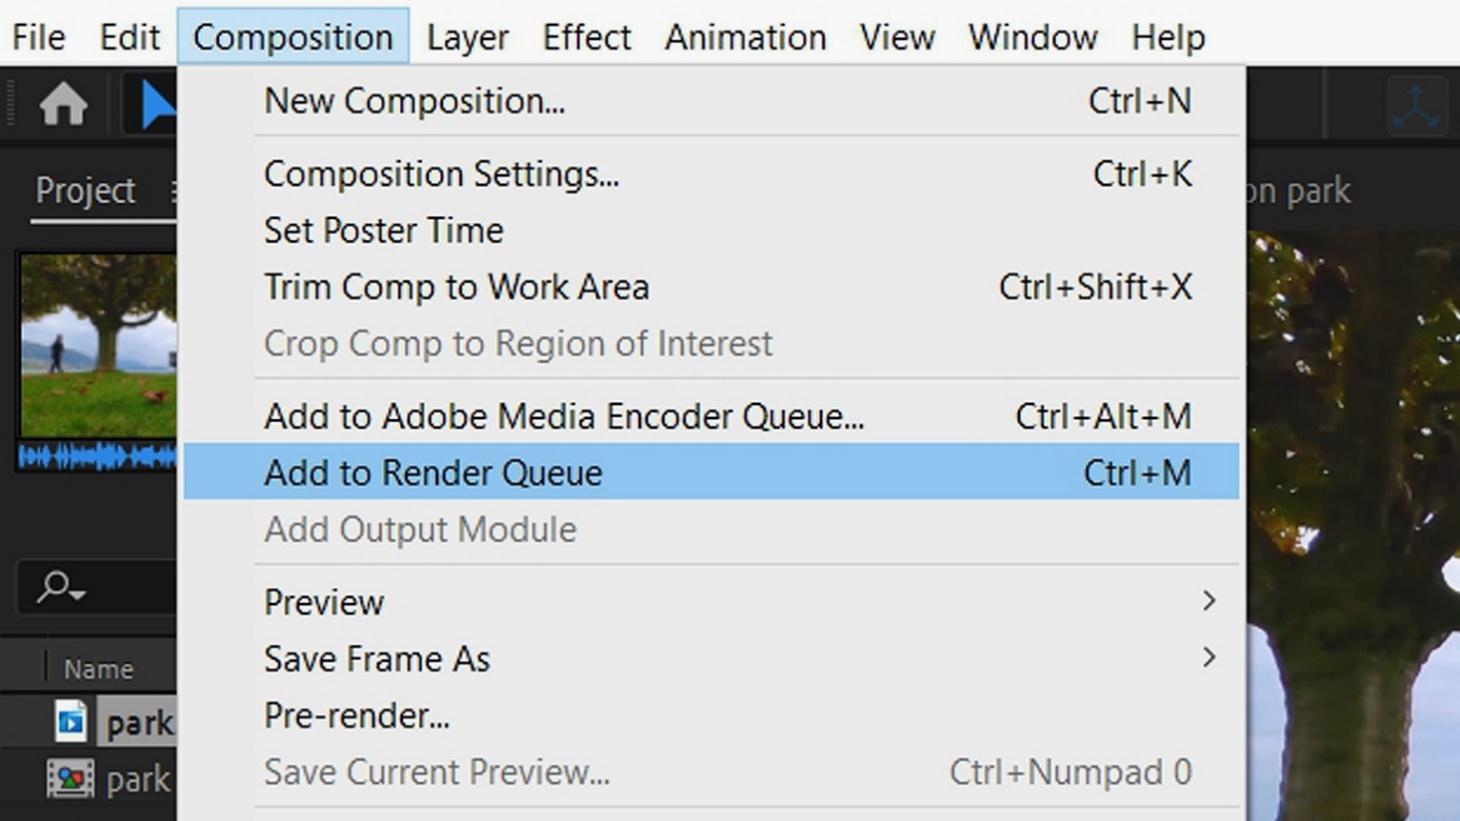
Image: TakeTones
Tap Lossless and select JPEG Sequence.
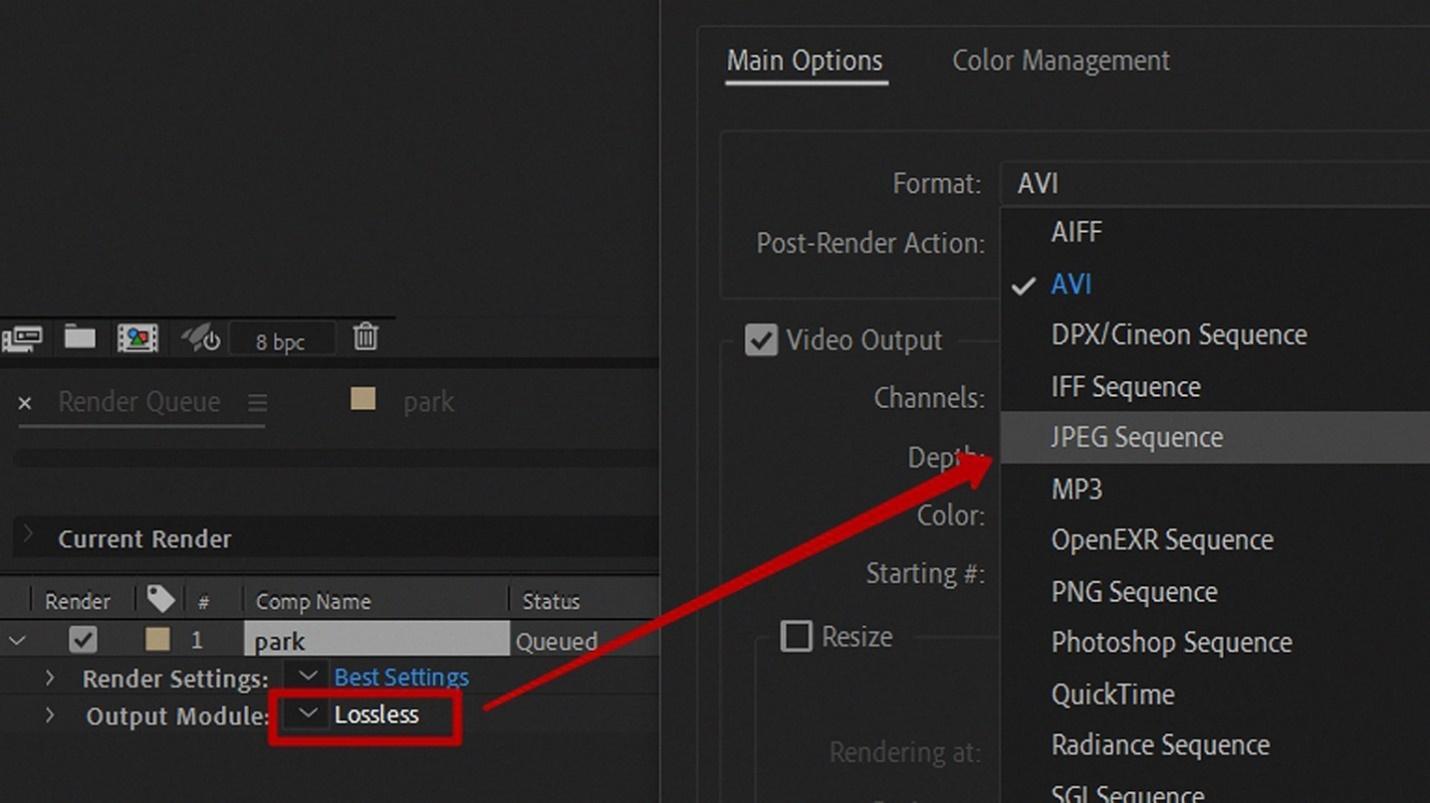
Image: TakeTones
Select the folder to save the files by clicking on the file name next to Output To, and name its video.
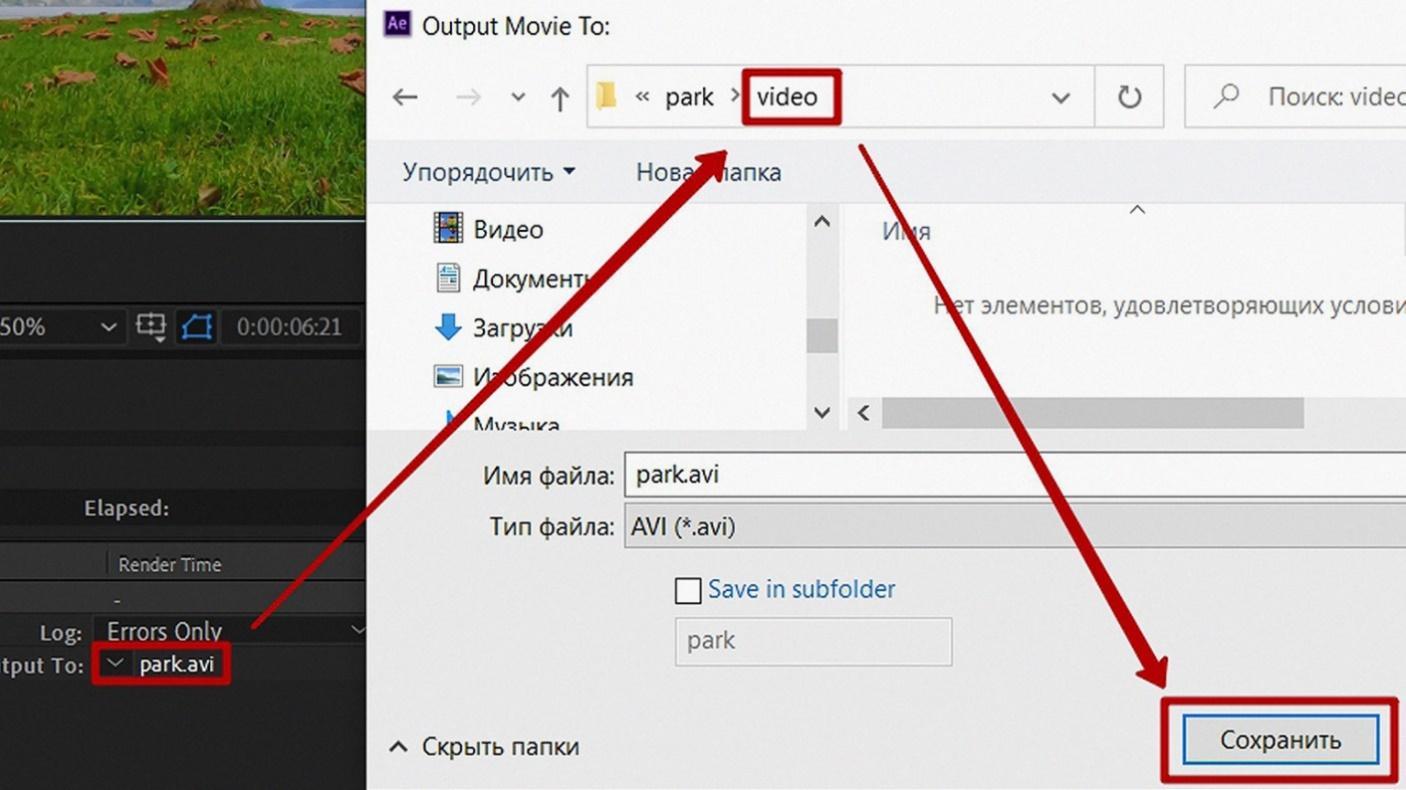
Image: TakeTones
To avoid confusion, when working with the plugin, stick to this folder structure in the project:

Image: TakeTones
Click the Render button to start the process of saving files to the selected folder.

Image: TakeTones
After the process is complete, make sure that the files are saved and each of them is assigned a number. The file numbers correspond to the frame order of the video.

Image: TakeTones
Create an effect for the keyframe
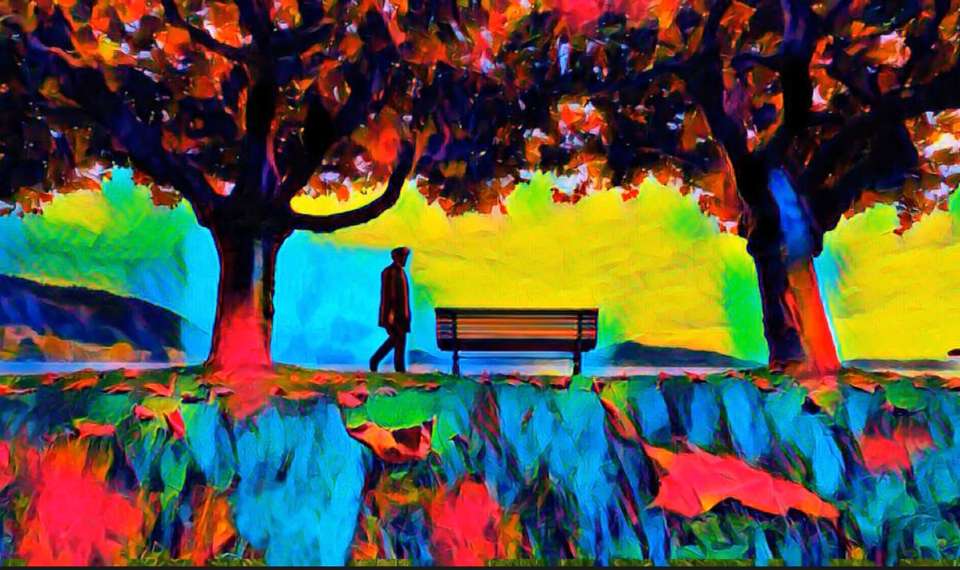
Perfect - for our clip we have 211 pictures (your number may be different, but it will also be about two hundred). Now we need to choose one image, which has all the elements from the clip - trees, grass, leaves, mountains, sea, bench and man. The person in the frame is necessary, because otherwise the plugin will not be able to get graphic information about him and will assemble something average "to his taste".
Now apply some interesting drawing effects to the selected picture. Since the popular Prisma Labs editor works only through a mobile app, we used its counterpart - the online service Loonapix.
We liked this stylization option:

Image: TakeTones
But there really are a lot of choices:

Image: TakeTones

Image: TakeTones

Image: TakeTones

Image: TakeTones
Switching to EbSynth
Save your favorite image in the keys folder and open the EbSynth plugin:

Image: TakeTones
Select an image from the keys folder by clicking Select next to the Keyframes field, and for the Video field, select the first file in the video folder. The [####] element in the filename is a variable, which means that the frame sequence will be used.

Image: TakeTones
At the bottom, specify the output folder of the processed files.

Image: TakeTones
Click the Synth button and wait for the image processing to finish. This will take time - the plugin needs to render each frame of the original from the video folder according to the keyframe from the keys folder and save it to the output folder. The longer the video, the more images, the longer the processing.
When the processing is complete, click the Export to AE button.

Image: TakeTones
A window will appear in which you can specify the number of frames, - do not change anything, just click Export, and you will be automatically thrown into After Effects.
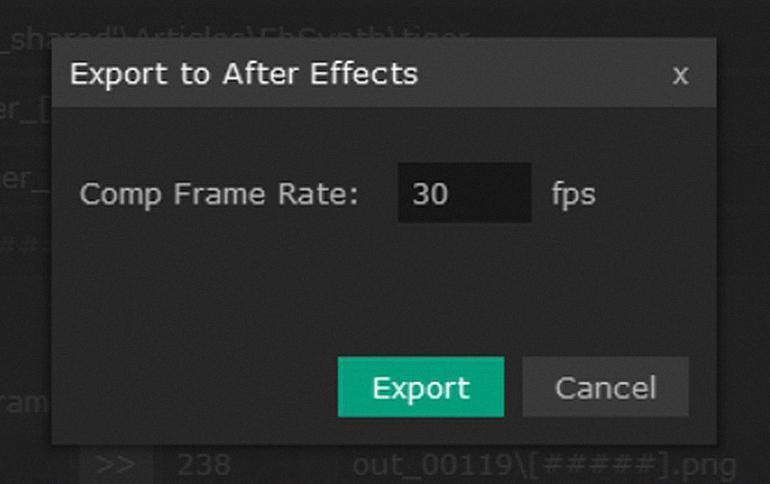
Image: TakeTones
Output is the layer that has merged all the images processed by the plugin.

Image: TakeTones