
In this article, I want to tell you about 5 simple, but nevertheless very useful expressions. I use these expressions in almost every other project and they make my life much easier.
1) So, the first one is loopOut(). A simple expression for looping the animation. Suppose we have a butterfly assembled from three parts: left wing, right wing, and body.

And we need to make the wings rotate around the Y-axis without stopping, thereby creating the effect of realistic flapping of the wings. But can you imagine how many keyframes we need to put to animate the wing during a small five-second composition. According to my calculations, about 60! And, in order not to bother with this huge number of keyframes, the program developers have come up with one simple expression - loopOut.
Therefore, we find the Rotation Y parameter and click on the stopwatch icon to the left of it. After that, a keyframe will appear at the beginning of the composition, changing the value of the parameter for this key to -80. After that we go 4 frames forward and change the Rotation Y parameter to 80. Then go forward 4 more frames and change this parameter back to -80. Thus we got 3 key frames.

After that we hold down the Alt key and click the stopwatch icon again

A text area for the expression will appear. In it, we write loopOut().
That's it, now our animation continues all the way to the end of the composition without any keyframes.
2) Ok, we animated the right wing. Now let's deal with the left wing. Let's not repeat, and animate the left wing in a slightly different way. You all probably remember from school the wonderful mathematical function sine. So let's use it here too. Alt+click on the stopwatch icon to the left of the left wing Rotation Y parameter. In the window that appears, write Math.sin(time).

The wing moves, but quite imperceptibly. Let's try to increase the rotational speed, for this, we multiply in parentheses time by 15.
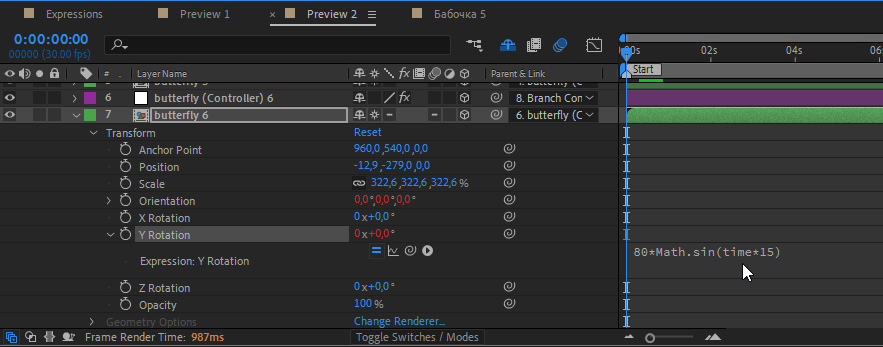
Great, we increased the frequency, but as you remember, the sine values are in the range from -1 to 1. That is why the amplitude of the wing rotation is so small. To increase it we multiply all this expression by 80.
As a result, we get: 80*Math. sin(time*15). You can, of course, increase the frequency a little, but it is up to you.
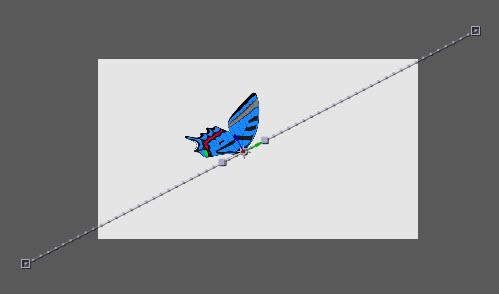
3) Wiggle. Probably the most used expression in After Effects, and yet not everyone knows what it's for. Wiggle is responsible for chaotic movements. In general, the wiggle function has as many as five arguments, but only two are commonly used. The first is frequency, and the second is the amplitude of oscillations. Let's look at an example. I animated the position of the butterfly, and now it moves from the bottom left to the top right corner.
The movement looks linear and implausible as expected. If we want to keep the direction of the movement, but add a few organics to it, we can't do without wiggle. So, Alt+click on the stopwatch icon to the left of the Position parameter and type wiggle(3,400) into the text area. We look and see that the flight of the butterfly has become more realistic. What does wiggle(3,400) mean? And it means that three times per second with an amplitude of 400 pixels in any direction there will be random oscillations. The most interesting thing is that wiggle can be applied to almost any parameter in AE.
4) This point is not so much an expression as it is a very interesting trick when working with a wiggle expression. Many people ask me how you can change the settings of a wiggle function over time, or, in other words, how to animate one of the arguments of a wiggle function. Very easy! - I'll tell you. We should create a zero object. Then go to Effect => Expression Controls => Slider Control. Let us change the amplitude. Now let's go to the expression we created in the previous point.

Let's select the amplitude, take the pickup and pull it to the Slider zero-object parameter.

This is the expression we end up with:

Now you can easily animate the Slider parameter value and in the same way, the amplitude will change.
5) The last thing I wanted to tell you about today is the simplest expression with the manipulated variable time. You have probably come across such expressions more than once. For example, we have some solid layer, we apply Fractal Noise effect to it, and we need to animate the Evolution parameter to make this effect not static.

Yes, you can put 2 keyframes at the beginning and the end of the composition, but there is another way. Alt+click on the stopwatch icon to the left of the Evolution parameter and write time. Now, if we move the current-time indicator to the position of one second, the value of the Evolution parameter will equal one degree. 1 second = 1 degree. It is so simple!

If we need to speed up the animation, let's say five times, we write time*5.

I think that's the end of the article. I hope you found this article useful because now you know that you can use expressions instead of keyframes to save time.