Last time, we settled on designing an FCPX title, animating it, and making sure that real-time procedural animation with behaviors in Apple Motion is great. But our title, even though it's already available in FCPX, can be added to the storyline, allows for text editing — still not ready.
Template Markers
When we add a title to the FCPX storyline and change title duration, we can see that our adjusted animation also changes in timing. When the duration of a title is increased by more than 5 seconds (5 seconds is the duration of a template project in Apple Motion), the animation becomes slower. When the duration of the title is shortened, the animation becomes like on steroids. Perhaps for some tasks, this is quite acceptable and meets the current requirements, but in my case, it is very important that the animation timing does not change in any way when changing the title duration in FCPX. The template markers that we need to add to Apple Motion will help us fix the timing of the animation.
First of all, we need to set project markers, which we will then convert to template markers.
We are very fortunate to be using procedural behavior animations in our title template. All we need to set the boundaries for the end of the intro animation and the beginning of the outro one is to set the playhead to the last frame of the Overshoot behavior layer and the first frame of the Custom behavior layer. As we remember from the last part, the Rectangle layer is the engine of our animation.
Select the Overshoot behavior, press ⇧O, or choose a Menu>Mark>Go To>Selection Out Point. To be on the safe side, I will move the playhead one more frame forward (press left arrow). Now, by observing the list of layers in the Project pane, we can make sure that there are no behaviors under the playhead - they are all dim. Whereas the layer under the playhead is highlighted.
To add a project marker, we need to deselect the objects (in this case, this is the Overshoot behavior) by clicking in an empty part of the Project pane and press the ` (grave) or M key. You can also add a marker from Menu>Mark>Markers>Add Marker. Or, without deselecting the object, press ⇧M. A green color project marker will appear on the timeline.
We need one more marker before starting the final animation. Select the Custom behavior, move the playhead to the first frame of the behavior layer, go back one more frame, and add a project marker (⇧M).
Now, holding down the ⌘ and ⌥ keys, you can navigate through the markers by pressing the right or left arrow key. Let's go back to the first marker. Open the Edit Marker window — Menu>Mark>Markers>Edit Marker or press ⌥⌘M. In the Type pop-up menu change the first marker type from Standard to Build in Optional.
In the marker editing window, click on the left arrow button to go to editing the last marker. Change the marker type to Build Out Optional. When finished editing markers, click OK and notice how the appearance of markers on the timeline ruler has changed. Now, these are not green copies of the playhead. The markers look like two pennants pointing towards each other. There is an orange dotted line between the markers. The range marked by the orange dotted line is now "rubber". It can be stretched or shrink when trimming in FCPX. Anything outside this range before and after the markers will not change in any way in timing when trimming in FCPX.
Switch to FCPX, if your title is already in the project storyline, the changes we just applied in Motion will not apply to it. You can either delete the title and add it again, select the title, and double-click on a new one, or, as Szymon Masiak advised, in his awesome video — cut the title to the clipboard (⌘X) and paste it back on the storyline (⌘V). When adding a title from the clipboard, the template will contain everything that changes.
By changing the duration of the title in the FCPX project, we can see that the timing of our animation is now well protected. Moreover, if you go to the Title inspector, you can see the Build in and Build Out checkboxes that allow you to turn off the Intro and Outro animation. If you do not want to use such an option, instead of the Optional marker, select the Mandatory type in the Edit Marker windows in Apple Motion.
Our title has become noticeably more usable in FCPX, but still unfinished. Only two checkboxes in the title inspector are not enough to comfortably adjust the template for the necessary tasks.
We cannot fully edit the title text without switching to Motion every time. Despite the fact that Apple Motion has all the template editing capabilities we need, let's prepare our title for independent living in FCPX and full editing content, without constantly resorting to Motion. To do this, we need to meet with the possibilities of rigging and publishing in Apple Motion.
Publishing
When I start rigging and publishing, I always follow the same principle as when creating a graphic design - Less is More. Apple Motion allows you to publish any available parameter, but by overloading the template inspector with settings, we only complicate the work for ourselves and for those potential users who are going to use our product. Studying at art college instilled in me a useful skill - it is very important to stop on time.
If at some point in working with the template I realize that I am missing something, the template can always be opened in Motion, add a new parameter to the existing ones, or create a new version of the template.
First of all, a serious problem is an impossibility of increasing the number of words in the title so that they are fully visible on our eye candy background. If you remember - we applied an image mask to the text layer, the source is the image mask shape. The same shape source is the image of the mask for the placeholder clone.
On reflection, I came to the conclusion that I need the following options to fully customize the title in FCPX:
1) width of the shape, the source of image mask;
2) coordinates of the X position of the Title group;
3) degree of influence of the Blur filter on the placeholder clone;
4) access to the clone's clone blend modes...
5) and perhaps even the ability to round off the corners of the shape — Steve Jobs was very fond of rounded shape and windows.
If I missed something, the test results in FCPX will tell you what else needs to be added to the template so that working with it in FCPX is the most comfortable.
Apple Motion allows you to publish any available parameter for further customization in FCPX. All we need is to call the Animation menu or the context menu (right-click) of the object parameter.
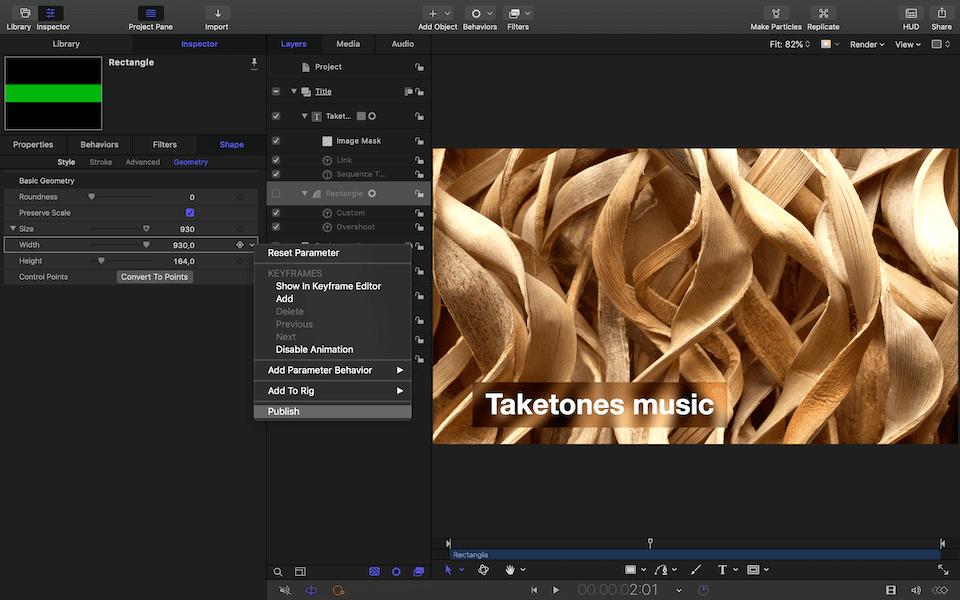
After choosing the Publish command, going to the Inspector, Project's Object tab (f4), in the Publishing section, we will make sure that the published parameter is now available for FCPX.
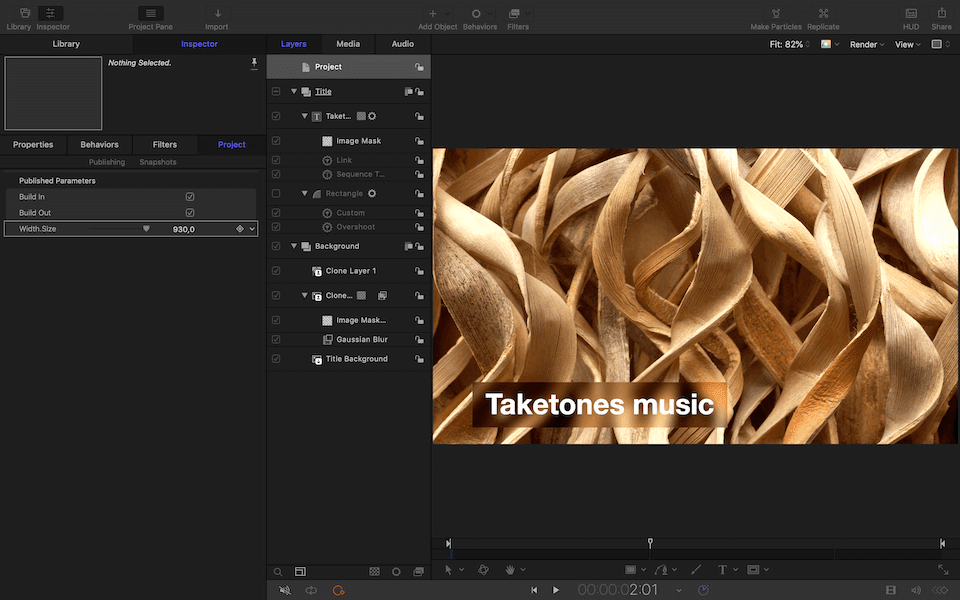
If you do not agree with the name of the parameter that Apple Motion assigned by default, you can change the existing name to any other, even using Emoji.
If the hierarchy of published parameters is inconvenient for you or does not meet your needs, you can easily move the published parameters in the Publishing tab by dragging and dropping.
When publishing is done, don't forget to save your changes and go to FCPX to test the results of our efforts.
It's no exaggeration to say that everything works perfectly. Perhaps it would be nice to publish the possibility of animation not only by characters but also by words. It would also be convenient to adjust the Spread parameter from the Sequence Text, since the nature of the animation changes depending on the number of elements, but there is no limit to perfection. If the already published parameters are not enough for you, you can always add more, at your discretion. This is the perfection of Motion Templates.
You can download the result here. We're done with publishing, but what about title rigging? I will talk about this in the next part. "Stay tuned"©
Title template for FCPX in Apple Motion Part 1
Title template for FCPX in Apple Motion Part 3