Custom visual effects can help bring your project to life and present it favorably. Learn about Liquid Effects.
In this tutorial step by step you will create a very interesting and easy to perform Liquid Effect, which with the proper imagination can be used in promotional sites and presentations.
The procedure looks like this:
-
We will make a new project and prepare the scene for animation.
-
Animate the text, as well as the main elements of the environment.
-
Let's create the first website screen for the movie "Alien" as an example.
-
Apply the Roughen Edges effect as a final step.
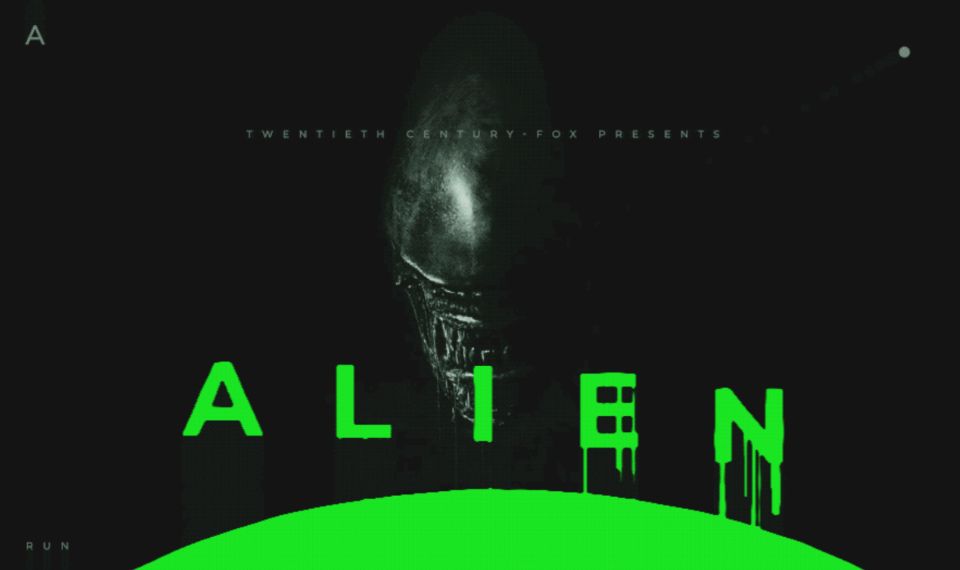
And this is what we end up with:

This is the kind of dripping text you learn to make.
Creating a new project
Make a new project and composition: File - New - New Project.

Creating a new project.
Then select New Composition.

Creating a new Liquid composition.
Set the parameters in the settings window that appears (you will be able to change them in the process):
Frame Rate - the number of frames per second, 30.
Duration - animation duration, 5 s.
Call the composition Liquid.
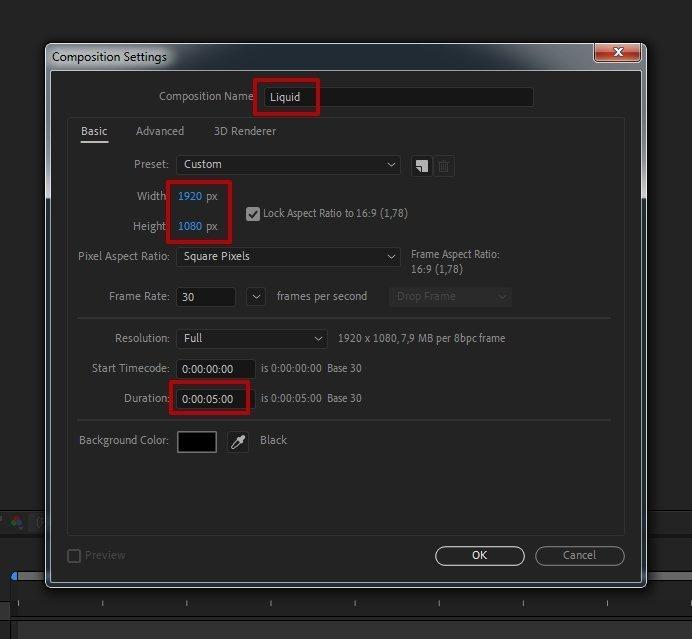
Settings for the Liquid composition
After creating a Liquid composition, make another one: right-click on the project panel and choose New composition.

Create a second Alien composition, slightly smaller than Liquid.
The size of the composition will be slightly smaller than the main one.
Don't forget to uncheck Lock Aspect Ratio, so you can change the proportions of the composition arbitrarily, the length will not change in proportion to the change in width (and vice versa).

Settings for the song Alien.
Call this composition Alien, and you'll need it to work with the text animation and create the base effect. Your project panel should look like this:

This is what the project panel should look like.
The next step is to place the text in the Alien composition and prepare the basis for the effect.
Preparing the text
Go to the Alien composition, select the Ellipse Tools toolbar and draw an oval as shown in the image below. Center the oval horizontally with the alignment tools. Its main part should be outside the visible part of the composition.
We are going to do the effect in the visual style of "Alien", so you can choose a caustic green, such as #1AEA23.

Draw an oval and hide most of it.
The base from which the letters will come out is ready. Now create a text. Select the Horizontal Type Tool from the toolbar.
Write the word Alien - so that each letter is on its own layer. In the future, this will allow you to customize the consistent appearance of the letters and slime.
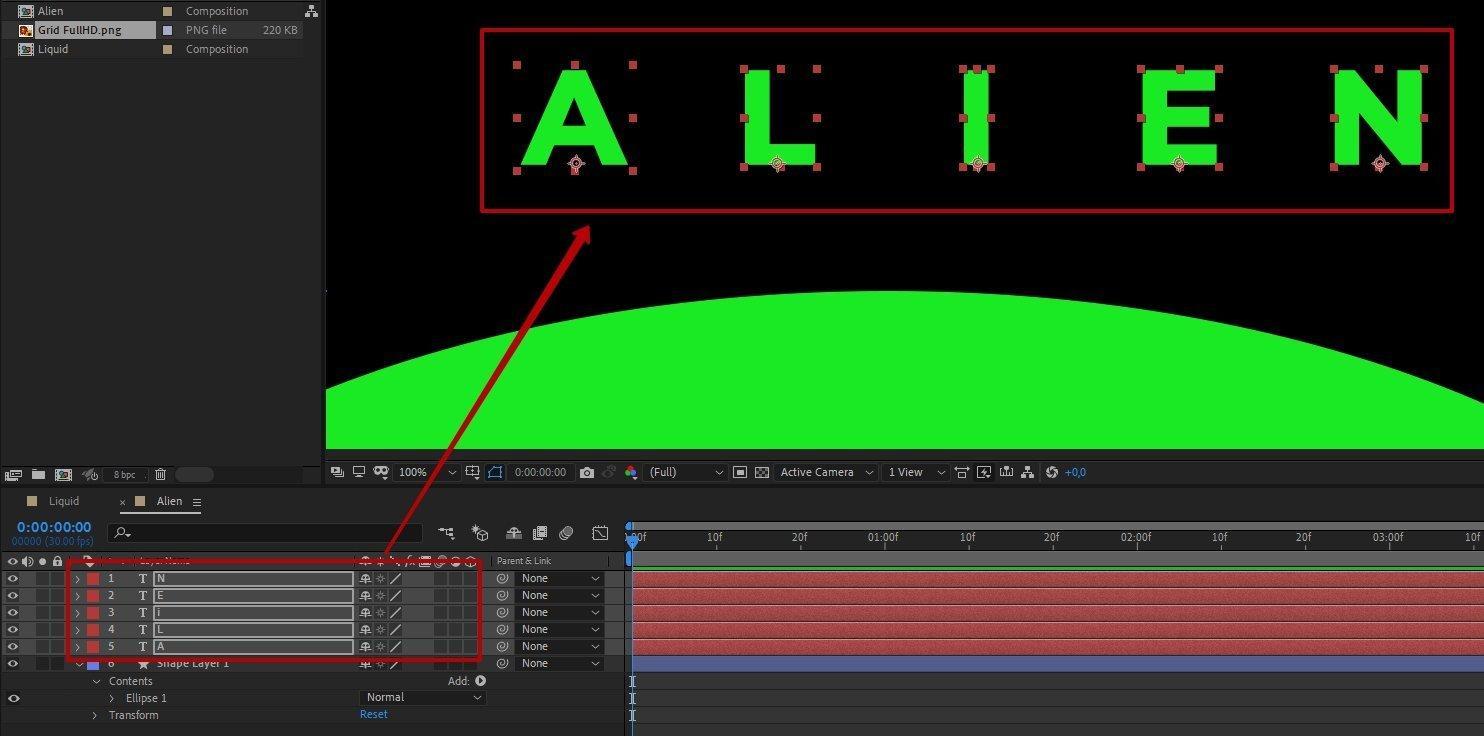
Each letter is on its own layer
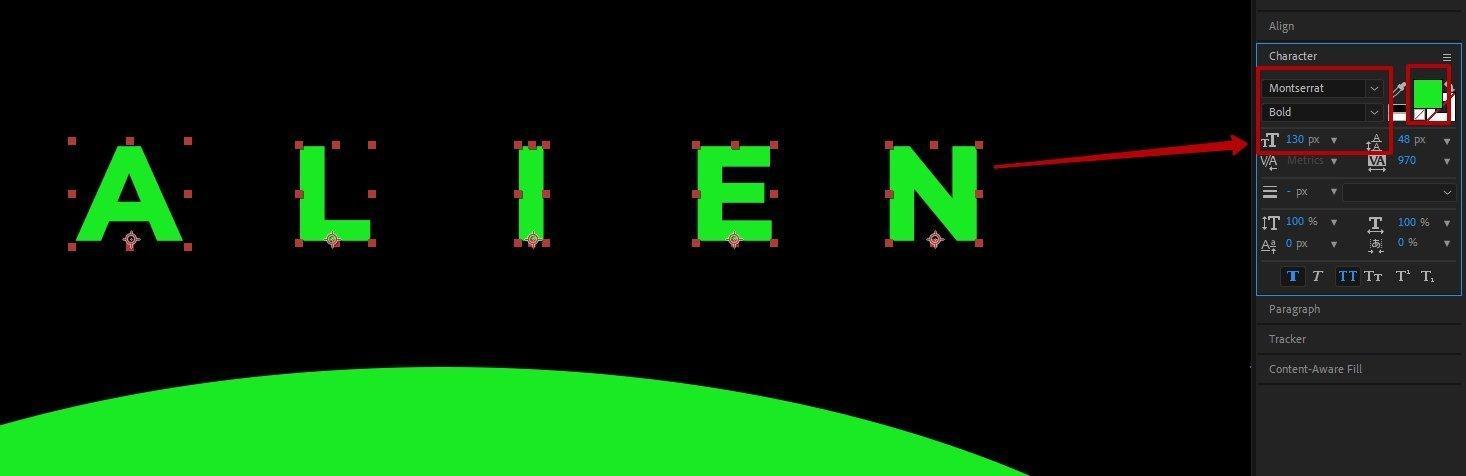
Font settings in the example: Montserrat, Bold, 130 point, color #1AEA23
To get equal letter spacing, select the text layers and use the alignment tool.

Align letter spacing
The next task is to center the resulting text in the composition. Grouping won't work in this case, so choose the Parent & Link column, which is designed to join one layer to another.
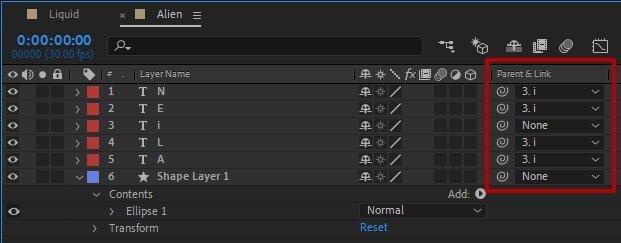
Binding layers for text alignment to the center of the composition.
Select layer 1 as the parent layer and bind the other four (child) layers A, L, E, N to it. Any changes in the properties of the parent layer will be reflected in the child layers, but not vice versa.

Make layer 1 the parent, and bind the rest as children.
Now select the parent layer and align it to the center of the composition. The child layers will be aligned as well.

Center the text
The next step is to translate the text into curves, as we will work with the form in the future.
Select text layer A, right-click on it and choose Create - Create Shapes From Text.
An interesting point - After Effects does not remove the text layer, but simply hides it, creating an additional vector layer based on the text layer, which is incredibly convenient when making changes.
Repeat the procedure for the remaining text layers. It should look like this:
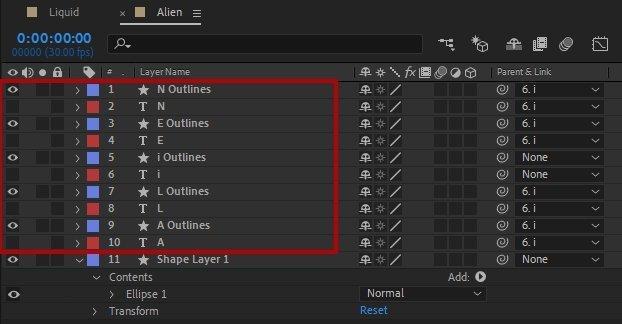
Translate all letters into curves
To keep text layers out of the way and take up space in the Layers panel, select all text layers and click the icon in the Shy - Hides layer in the Timeline column. Like this:

Hide unnecessary text layers.
Now remove the binding from the parent element, it is no longer needed.

Remove links between objects.
Done. Now you can start creating the base of the effect.
Creating the Liquid Effect Base
Select the Rectangle Tool from the toolbar and draw a rectangle for the letter A. In the future, it will become that viscose stretchy liquid.

This rectangle will later become a drop.
All layer properties are applied relative to the Anchor Point - the object's anchor point. Select the layer with the rectangle, then choose the Anchor Point Tool from the toolbar.

The Anchor Point Tool is located below the main horizontal menu by default.
And move the Anchor Point to the top border of the rectangle.
Put Anchor Point at the top of the rectangle
Now, when you apply scale or rotation, the object will be transformed relative to the center of the top rectangle border.
Duplicate the layer with the rectangle by pressing Ctrl+D. Double-click the rectangle itself and drag the side center marker to change its width. Similarly, you can change the height through the top center marker.

Copy the rectangles - the future drops.
Now duplicate the layer a few more times and arrange them as in the screenshot.

The image becomes more recognizable
Now select all the resulting rectangles and, using the Parent column, link them to layer A.

Bind the future drops to layer A
If you move the letter layer, the rectangles will move with it.

That's why you had to tie the rectangles to A.
Now you need to make the dripping slime gradually disappear when the letter appears. This can be done with the help of keyframes and the Scale layer property.
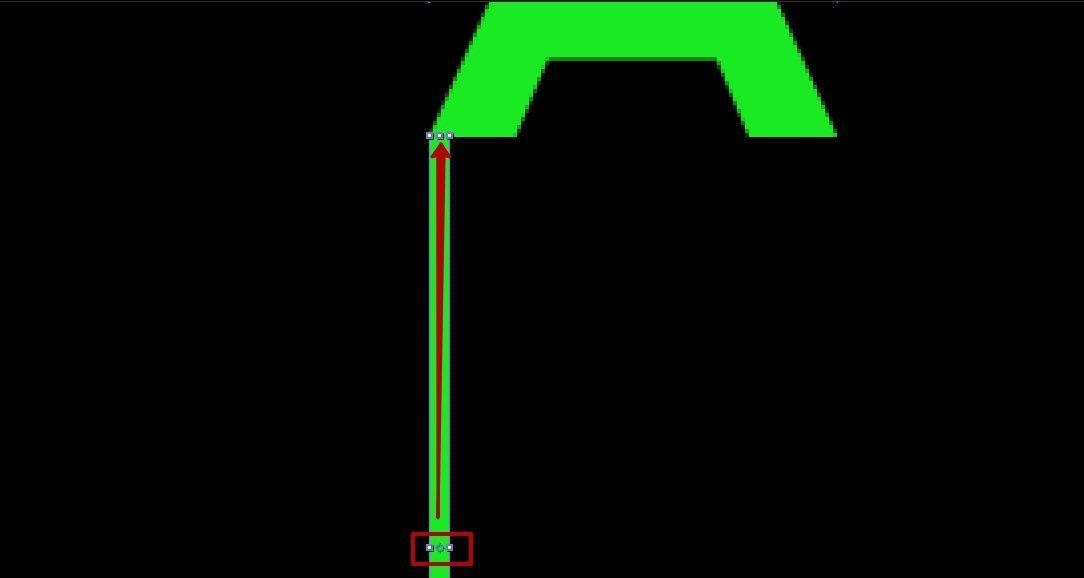
But first, let's animate the letter A. Select the layer with the letter and press P on your keyboard to open the Position property. Go to the third second of the timeline and put the keyframe there: click on the stopwatch icon next to the Position property. Then go back to the first frame and move the letter down outside the green area.

Motion animation of the letter A.
Highlight both frames in the Timeline panel and press F9 Easy Ease. Go to the Graph Editor and adjust the antialiasing as shown below.
Adjusting animation smoothing.
Press the spacebar and see what happens.
Now A moves smoothly out of the bottom of the image.
Let's go directly to the animation of the liquid.
Fluid animation
Select all the layers with rectangles and press the S key: the Scale property appears. Go to the third second in the Timeline panel and click the stopwatch icon next to the Scale property to put a keyframe.
Next, remove the proportion restriction from the Scale property, so that you can change only one value. Set the value to 0% and 100%.
Adjusting the scale.
Move in the Timeline panel to the place where the letter A begins to break away from the green base, and place another keyframe there.
Set the second keyframe. Further animation is adjusted so that the transition from this boundary is predictable and smooth enough.
And set the Scale values to 100% and 0%, on the contrary.
Look at what we've got here. We are getting closer to the final result, but so far everything looks unnatural: the lines appear and disappear synchronously, while the letter itself retains its clear outline.
The letter A is already leaking liquid, but the animation is not quite natural yet.
We need to distribute keyframes at the layers with rectangles for the Scale property so as to give some randomness to the lines and create a smooth transition from letter to drop.
The keyframes now look like this:

Mark keyframes for each rectangle.
The result is also noticeable - everything looks a little more natural: thin lines, as they should, disappear earlier, thick ones later and run down longer.

The letter A is already leaking fluid, but it's a little angular so far.
Now you need to copy the rectangles to the remaining letters, link to them and animate.
Select all existing rectangles and press Ctrl+D to copy them. Move the layers under the layer with the letter L: you should always keep the layer hierarchy, so you won't get confused which letter the lines belong to.

Duplicate rectangle layers for the letter L.
Now place the rectangles on the workspace so that they do not go beyond the letter and are scattered in random order, like this:

Place the rectangles in the boundaries of the bottom of the letter L.
Bind the lines to the letter using the Parent column.

Bind the rectangles to the letter, so that in the future they will come out of the bottom of the screen together.
Now you need to animate the letter. The second letter should appear a little later than the first letter, so the keyframes need to be placed a little further back on the Timeline.
Move to the third second of the tenth frame and mark the keyframe there. Go back to the first second of the tenth frame and move the letter L down beyond the green base. Don't forget to adjust the keyframes of the copied layers a bit: move them a bit further down the timeline. This will give randomness to the appearance of the liquid and all the drops won't drip at the same time.

Determine on the timeline the drop time of the letter L
Result:

Now A and L appear alternately
Do the same for the remaining letters - I, E, N.
Brief scheme of work:
-
Copy the layers.
-
Place layers with rectangles under the specific letter layer you are going to work with.
-
Correct the rectangles in the workspace, adjust the width of the letters.
-
Use the Parent column to link all the copied rectangles to the letter layer.
-
Animate the letter by placing the keyframes a little farther back than the previous letter.
-
Remember about F9 for keyframes of letter animation, adjust Easy Ease graph if necessary.
This is what you should get:

The letter animation is ready.
We are left with a few important details. But first, let's add the entourage.
Creating the first screen
Go to the Liquid composition and transfer the Alien composition to the Layers panel.

Aligning an Alien composition to the center.
Using the Align panel, position the composition along the bottom edge.

Aligning an Alien composition to the bottom edge.
Find a suitable background and create accompanying elements, like here:

The environment is ready. Now for the fun part.
Roughen Edges Effect
The Roughen Edges Effect will help create the illusion of flowing liquid, work the letters and make the rectangles softer, more fluid.
Go to the Effects & Presets panel, type Roughen Edges in the search box, and transfer the effect to the Alien composition in the Workspace or Layers panel.

Roughen Edges will make the edges more rounded.
On the left side, in place of the project panel, you will see the Effect Controls tab, where you can adjust the effect. In its settings, pay attention to the two parameters - Border and Scale.

In the Effect Controls tab we will adjust two parameters: boundaries and scale.
The values are chosen purely by experience - assess the effect in terms of its naturalness.

Adjust the Border and Scale by eye.
In the example Border is 4.9 and Scale is 300.
The whole scene now looks like this:
Ready letter animation with liquid effect!
It turned out quite atmospheric, you can still play with the settings effect, animation and color, and impose music.
Conclusion
After Effects gives you endless possibilities for creativity. Today the program is in high demand on the web: skills in After Effects help you to create an impressive portfolio or present your work to a client. And understanding the general principles and techniques of animation will help you to master another promising profession - motion design.