Here are a couple of tips on how to quickly adjust all the panels in Premiere Pro so you can work fast and efficiently. The principle is easy — we’re going to get rid of everything we don’t need (as a beginner user of Premiere Pro) in order to concentrate on things that really matter.
Premiere Pro default interface was made to satisfy different requests of a wide audience — beginners as well as professionals — and it kind of misses the target. Here is the way to rearrange it a little bit and customize it to make the work easy.
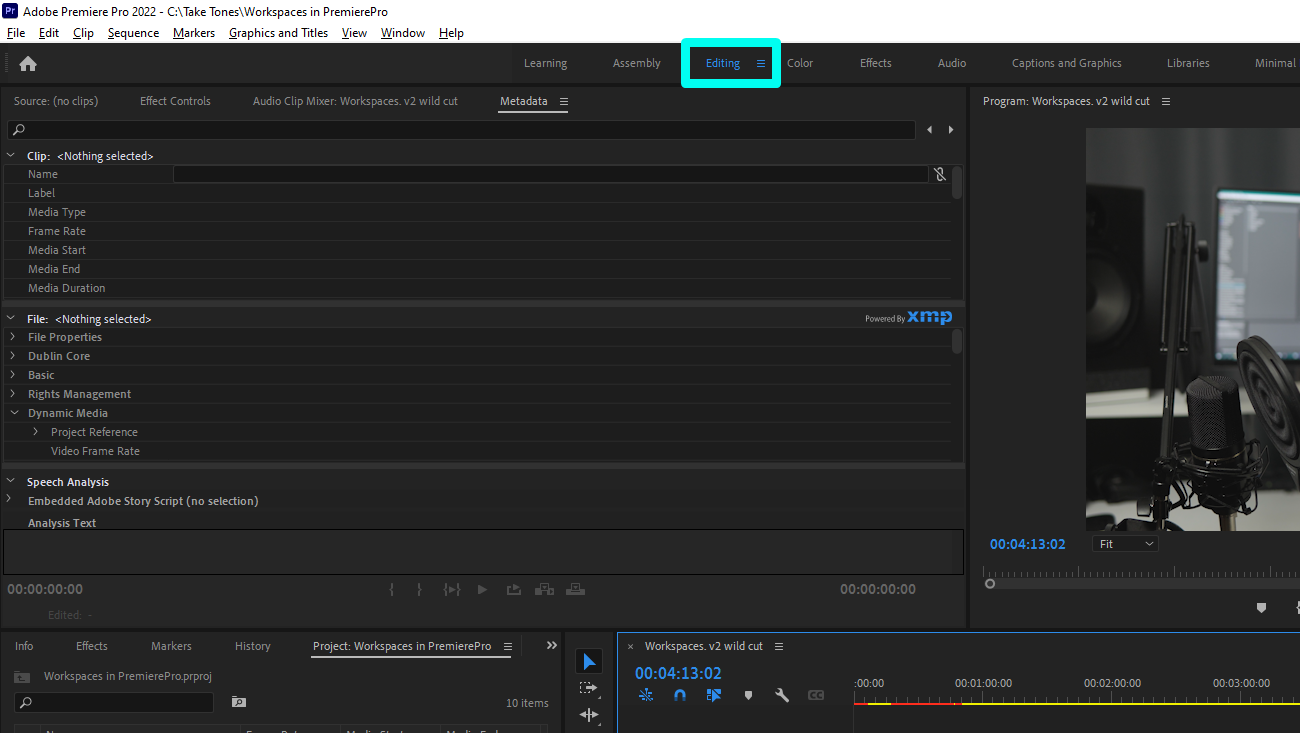
First, go to the Editing workspace.
We’ll just throw away everything we don’t need now in order to focus on important things and keep the most useful features handy and easy to access. Before you start, go to Window → Workspaces → Save as New Workspace.
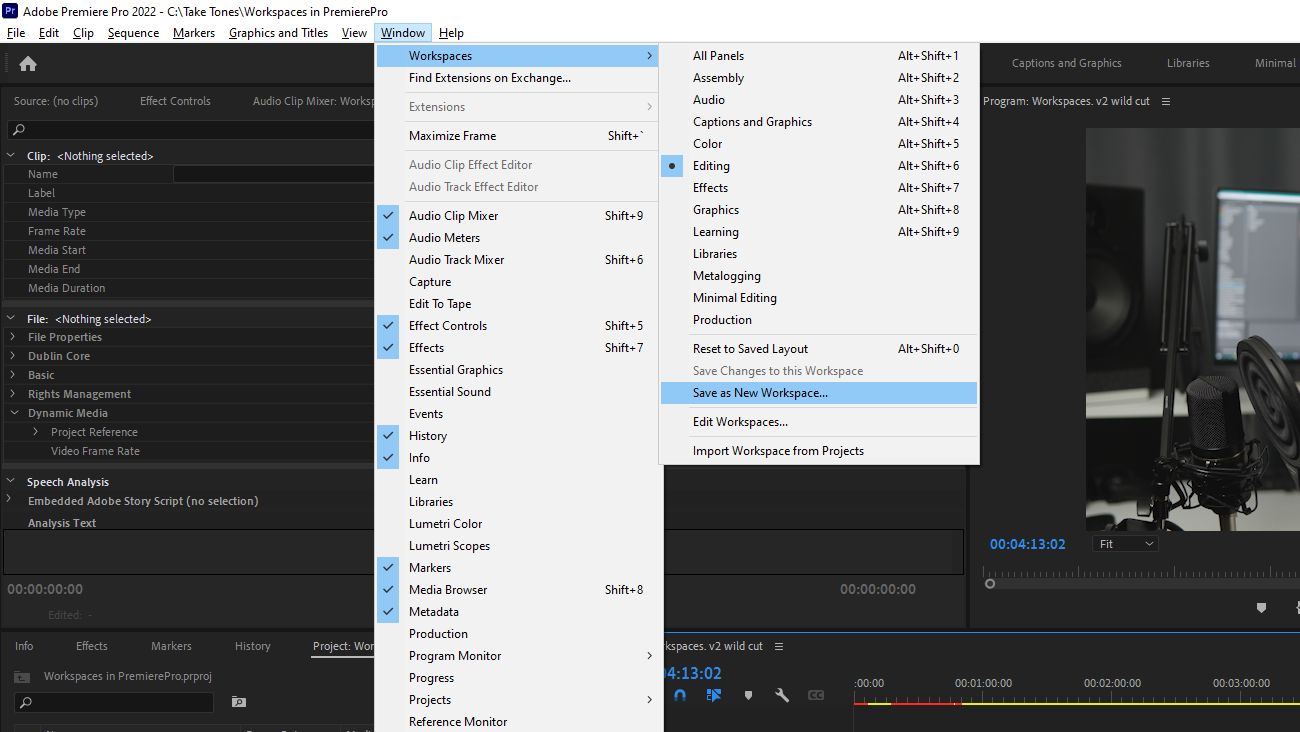
Now you’ve created your own Workspace. And when you’re done, don’t forget to go to Window → Workspaces again and choose “Save changes to this workspace.”
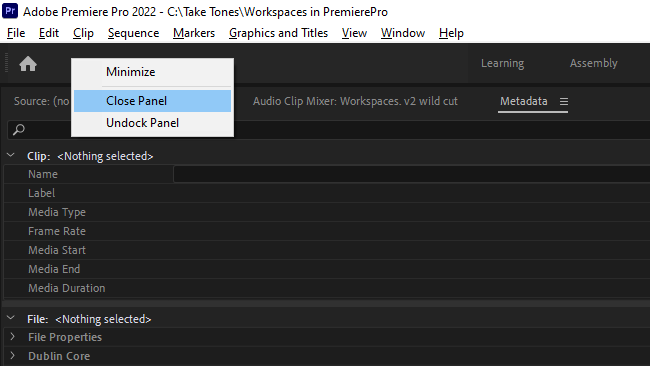
Now we’re going to delete this 'Workspaces' panel to free up so much valuable space on the top of your screen. (You can always find it here: Window → Workspaces.) Do the Right-click → Close panel.
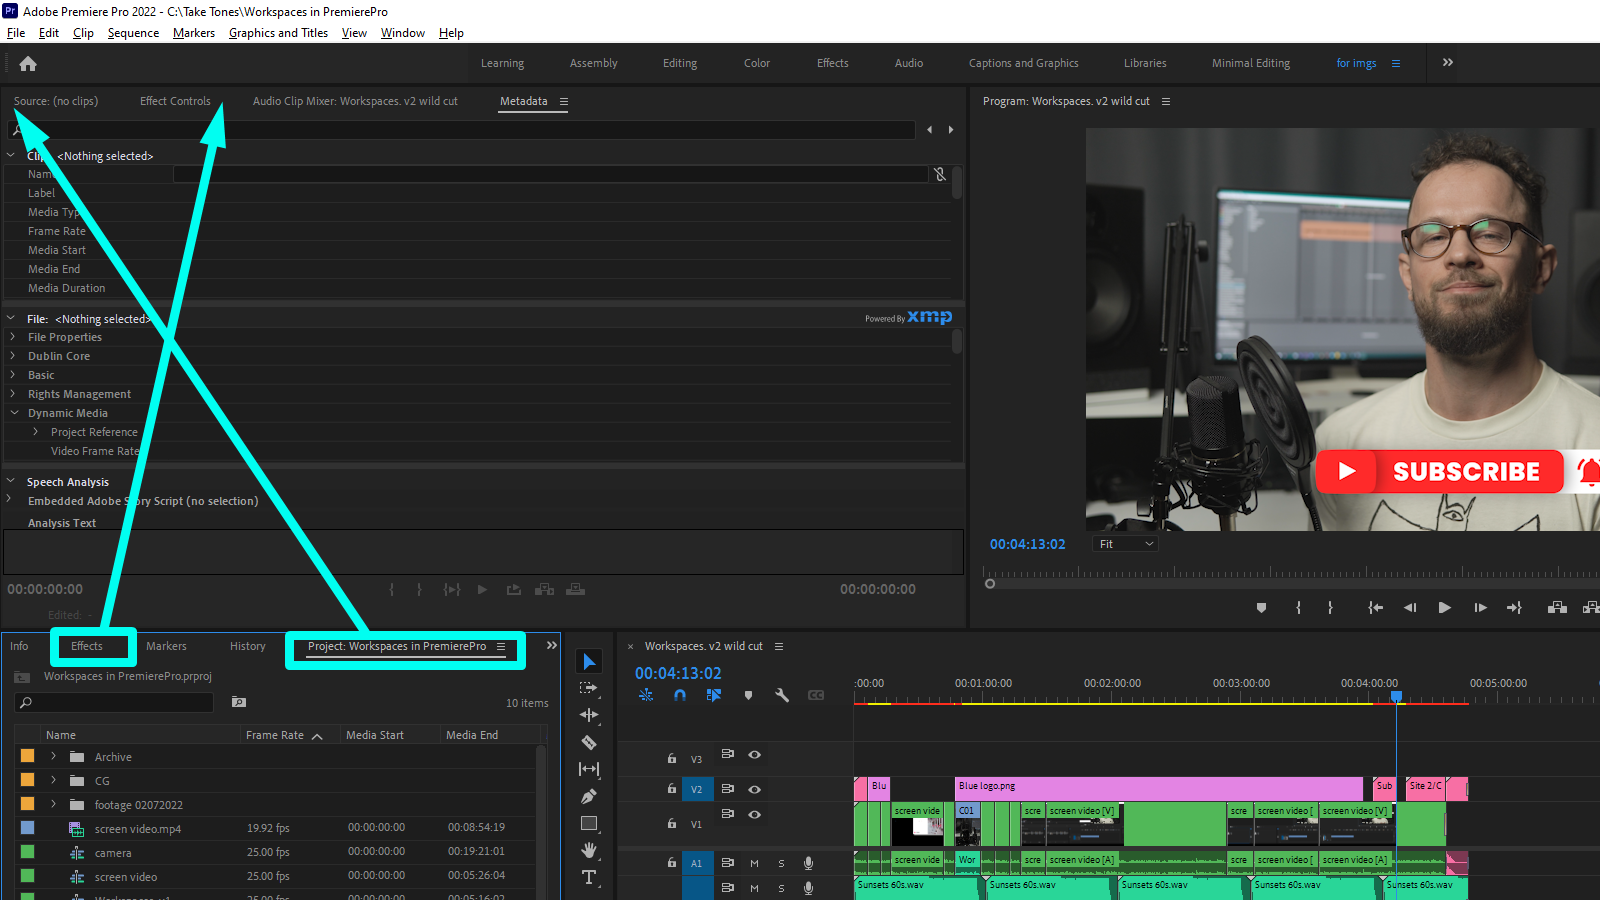
Timeline is the most important panel in Premiere Pro. So we should give it as much space as we can. To do so, let’s clear some space from the left of our timeline.
Drag the Project panel and the Effects panel up. Drag the Project panel to the left because it’s an important one. You will arrange all your media here. Put the Effects panel near the Effects control panel.
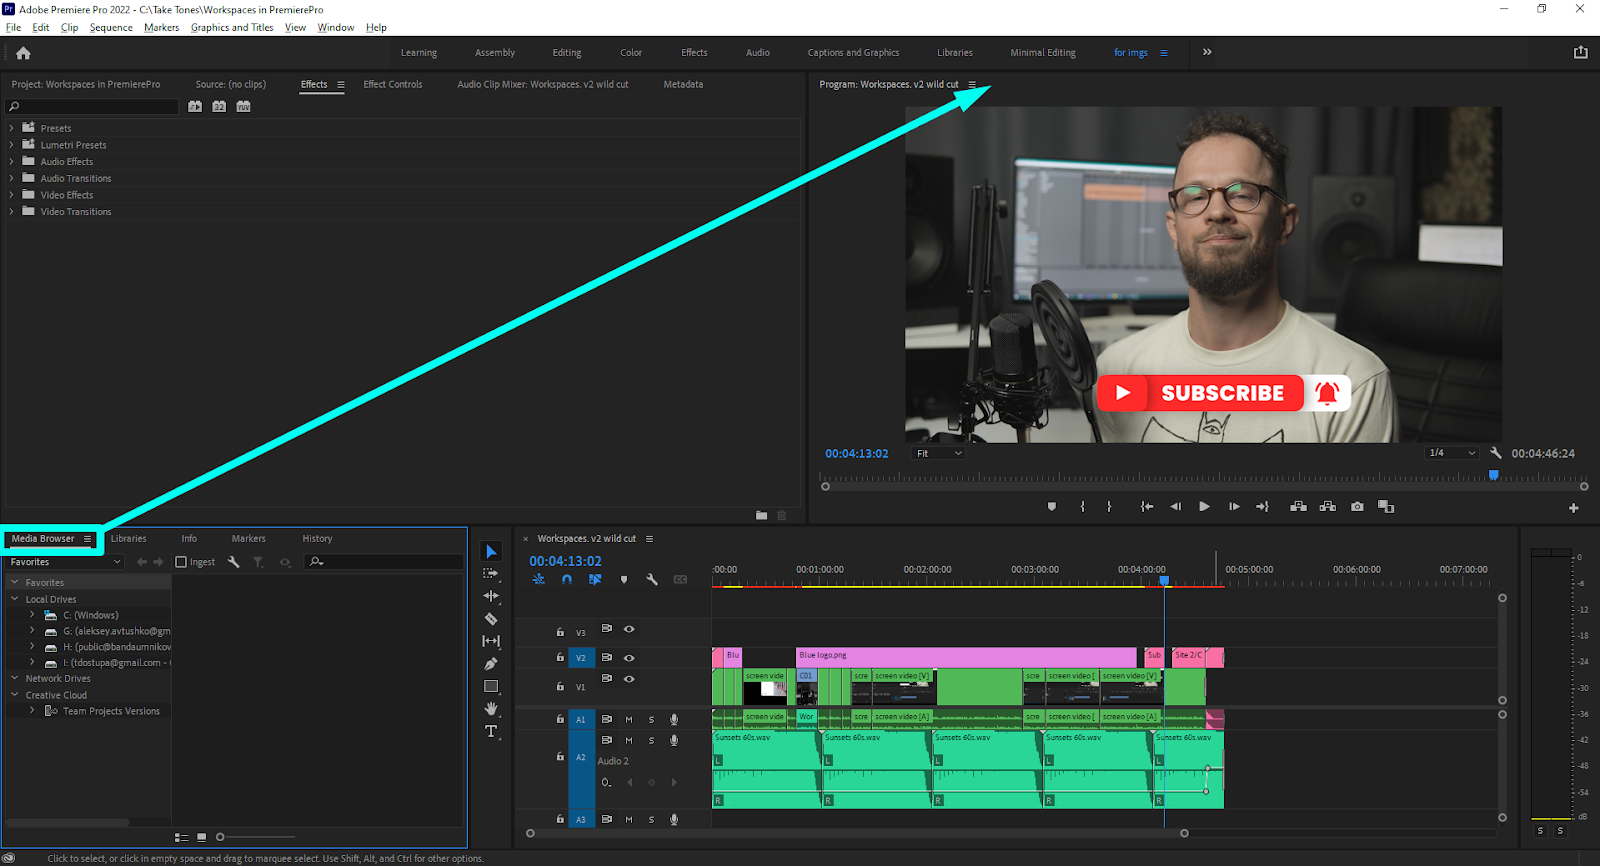
The Media browser is also very important, and it goes in the top right. Why here? Because you don’t need to see those two panels — Program monitor and Media browser — simultaneously.
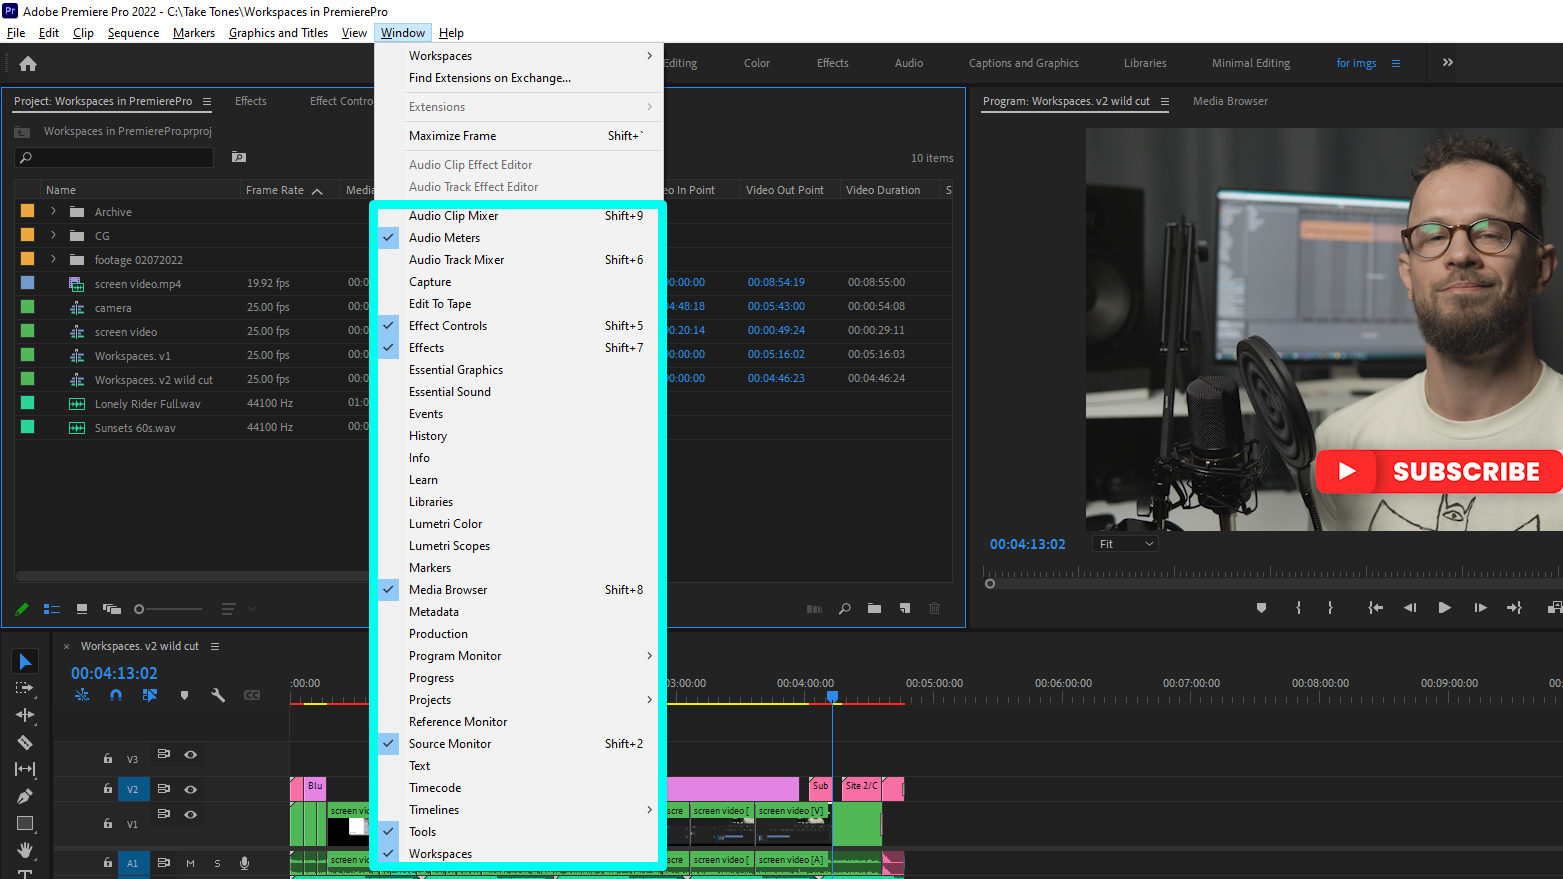
Libraries, Info, History, Markers are useful, but not for now. Also close Audio Mixer and Metadata. So we’ll close them and open when necessary. In case you need something from these panels in the future, you’ll just go to the Window menu and immediately see all the panels that are opened and closed. Just choose those you want to open.
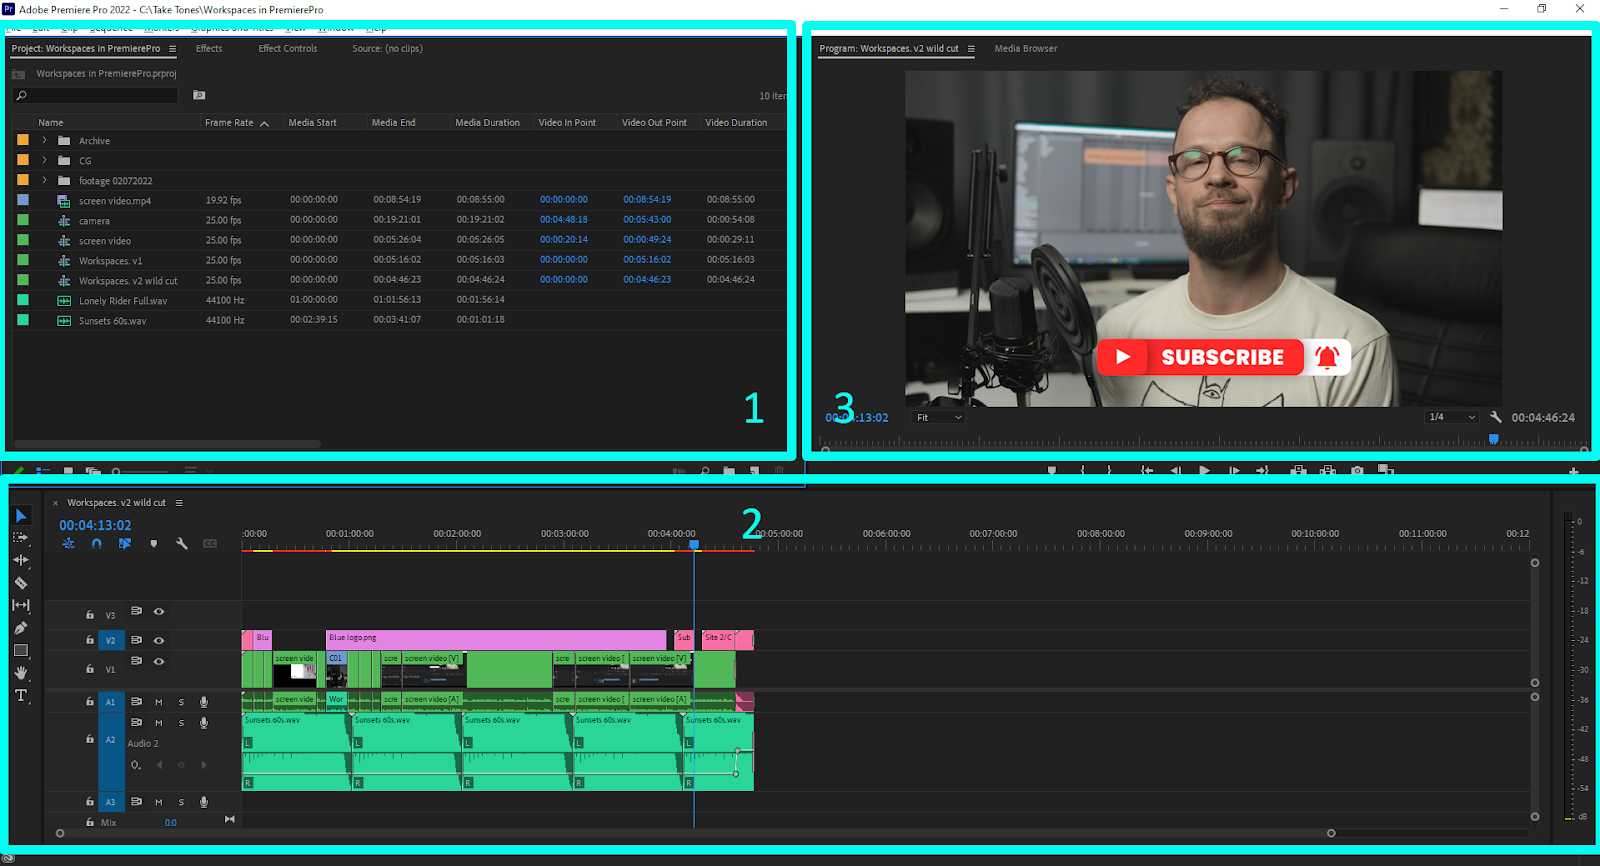
So now we’ve got a minimal, simple, clear workspace with three main blocks. Put your files in the Project panel, put your clips and edit them on a Timeline, and see the result on a Program monitor.